

Time for Part 2 of adventures in sourdough bread! Part 1 is all about sourdough maintenance.

Did that picture get you excited to make bread??? Read on!
Once you have a handle on your starter and it is consistently bubbly after feedings, youre ready to try making some bread. I have made a lot of bread at this point and Ive tried two methods the one day method and the two day method. Ive had the most success with the two day method, so Ill tell you how I do that. This recipe is from The Perfect Loaf and it makes consistently the best bread great flavor, great air pockets, beautiful oven spring. Here is an overview of the whole process:
Overview
- Thursday PM first feed out of the fridge
- Friday AM feed starter
- Friday PM feed starter
- Saturday AM feed starter and start leaven
- Incubate leaven 5-6 hours
- Start dough autolyse 30 minutes
- Complete dough, pull and turns 2 hours
- Finish bulk fermentation 2 hours
- Begin shaping 30 minutes
- Finish shaping, move to the fridge
- Incubate in the fridge overnight
- Sunday AM pre-heat oven
- Pre-heat Dutch oven 30 minutes
- Remove loaves from fridge
- Bake with lid on 20 minutes
- Bake with lid off 30 minutes
- Cool 1 hour
- EAT!
Dont worry if you dont know what everything means just yet, but I wanted to give you an overview of what youll be doing. I dont want to scare you off with how much time it takes, but it does take a long time. Let me tell you it is WORTH IT! This bread is flavorful, has beautiful air pockets and a crunchy crust with an awesome oven spring (which well get to later!).
Making the dough
Lets get to making that dough. Here is an overview of the equipment youll need for the whole process of making the dough to baking the loaves:
- Large glass bowl
- 3.5L plastic container (optional)
- Dough scraper (optional)
- Bench scraper
- Banneton (I use a round 10 inch and an oval 10 inch) or small bowls lined with a kitchen towel
- Lameor razor blade or very sharp knife
- Dutch oven round or oval
On Thursday night, pull your starter out, warm it up and little and feed it. You want to feed the starter about 2-3 times before using it to bake. Heres my feeding on Thursday night:
- 30g starter
- 100g water
- 50g bread flour
- 50g whole wheat flour
On Friday morning and evening, do:
- 15g starter
- 100g water
- 50g bread flour
- 50g whole wheat flour
On Saturday morning, you will feed your starter like on Friday, but you will also make an offshoot of your starter called a leaven. The leaven is what will actually go into the dough. In one jar, do you normal feeding but in another jar, starter you leaven:
- 40g starter
- 40g bread flour
- 40g whole wheat flour
- 80g water
Incubate your starter for 30 minutes to one hour and then put back in the fridge. Incubate the leaven for at least 5-6 hours before using it to start your dough.
To make your dough, you will need:
- 641g water plus 50g water at 80F (chlorine free)
- 184g leaven (sourdough starter)
- 748g bread flour
- 110g whole wheat flour
- 49g rye flour
- 18g kosher salt (or other coarse salt, not iodized)
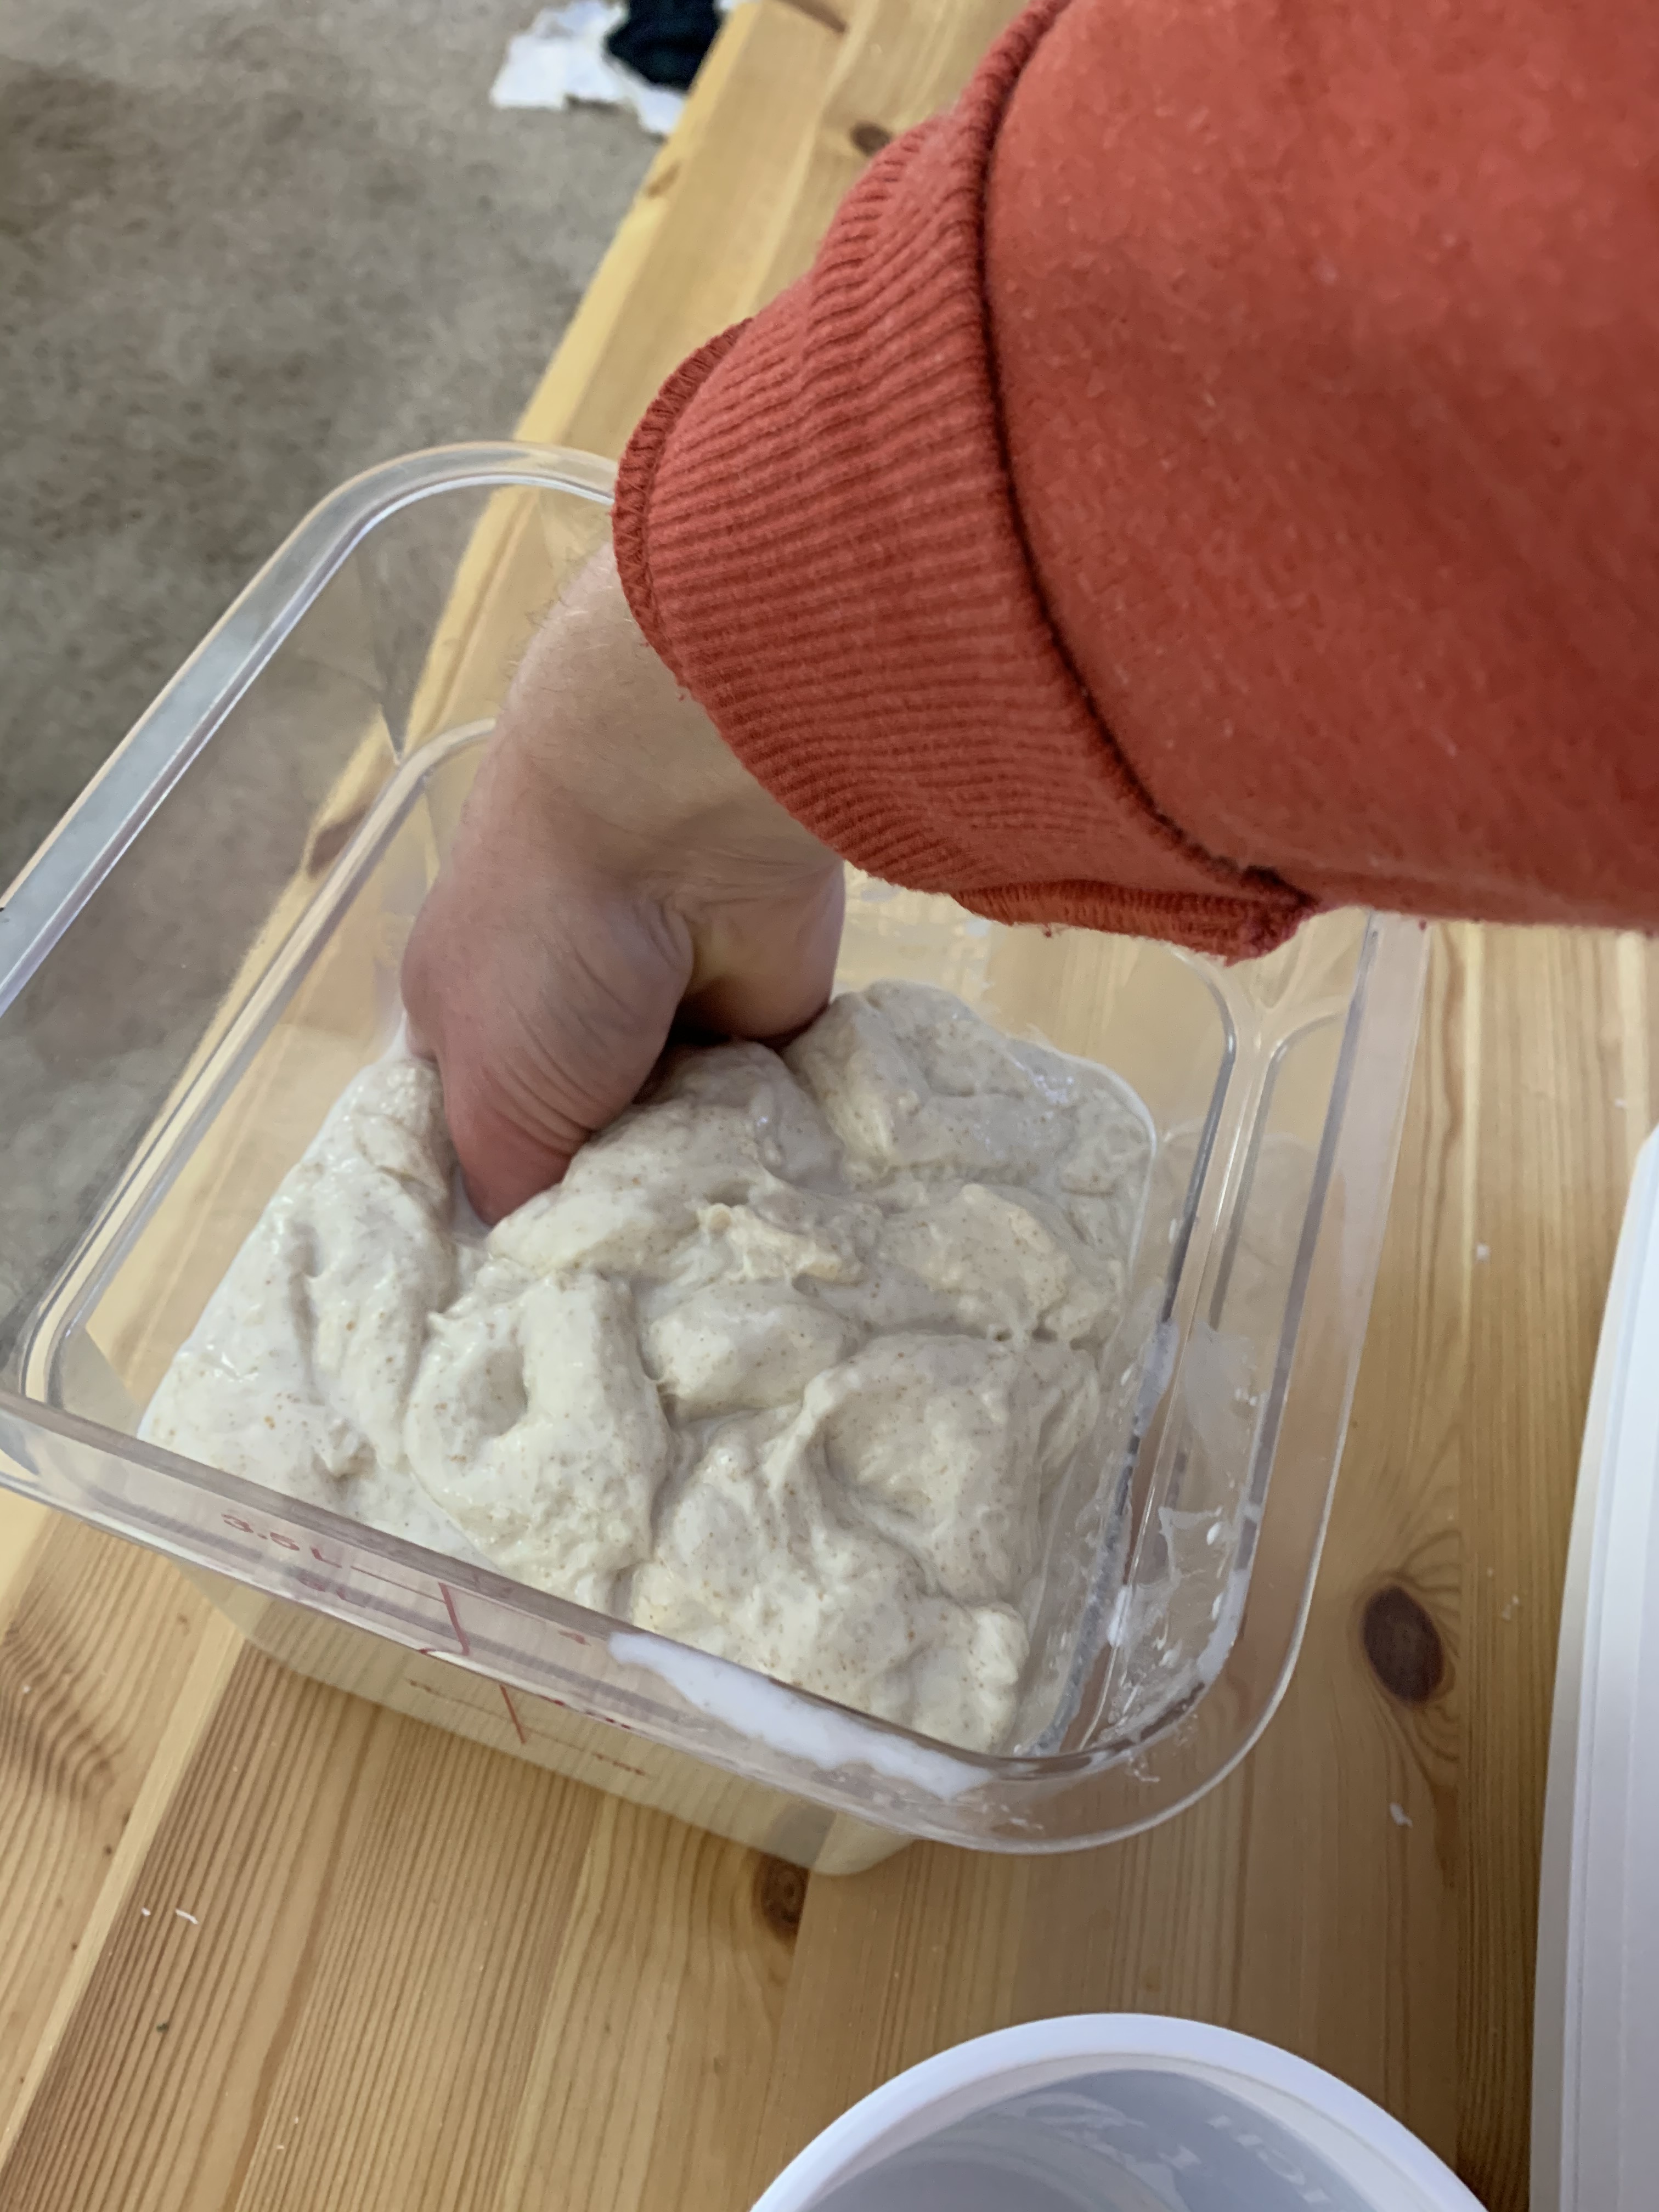
First, weigh out the starter into a large glass bowl and set aside. Weigh out 641g of water into a pot and heat over high heat until it reaches 80F. I do this by holding an instant read thermometer in the pot with one hand and constantly stirring with a spoon with the other hand. Water heats up very quickly and takes an eternity to cool down. For me, it takes less than a minute to reach 80F. If the water is too hot, you will kill your starter. If its too cold, your dough will take longer to ferment. As mentioned in part one, the water should be chlorine free to avoid killing the yeast and bacteria. Pour the water into the starter and use a spatula or your hand to mix it up. Your starter should be buoyant, but not completely floating at the top. This is how you know your starter is ready to use. If it sinks, it is not mature enough. You can always do a test with a little bit of starter and water before making the dough, but Ive found that if your starter looks big and bubbly, its good to go.

Bubbly leaven. If your leaven looks like this, it should be good to use.
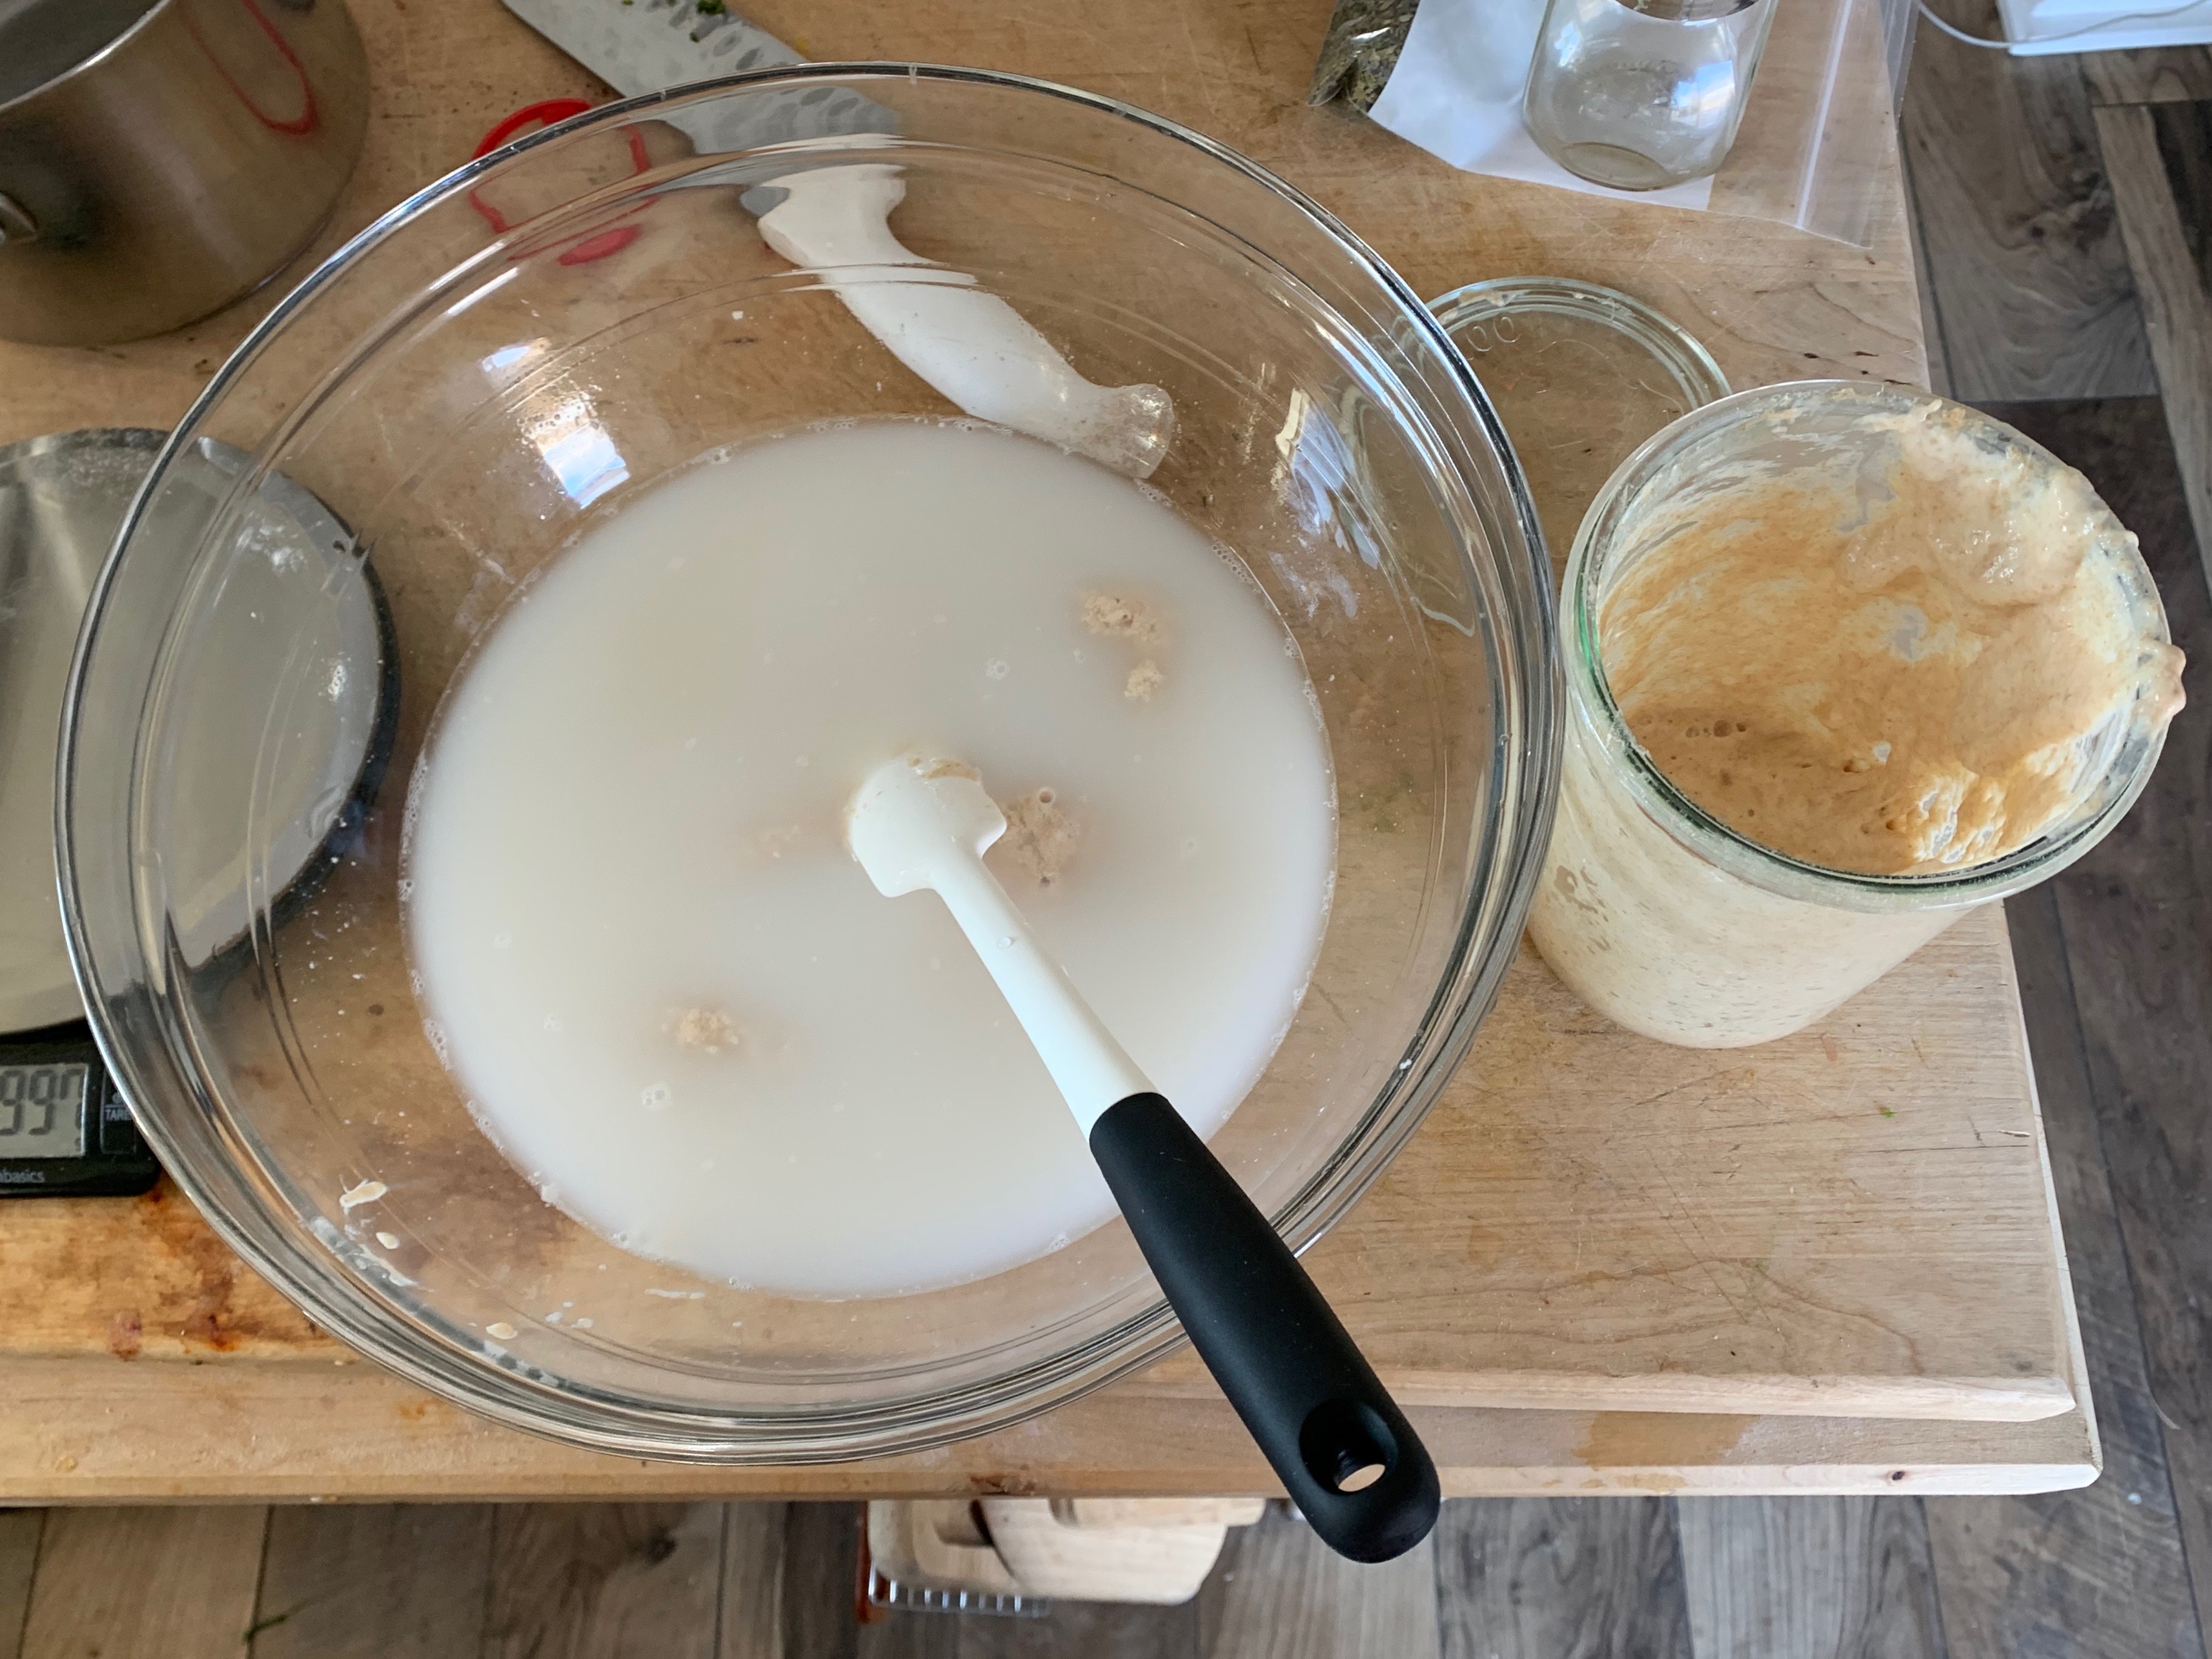
Leaven mixed with warm water. See how the leaven is slightly floating in the water?
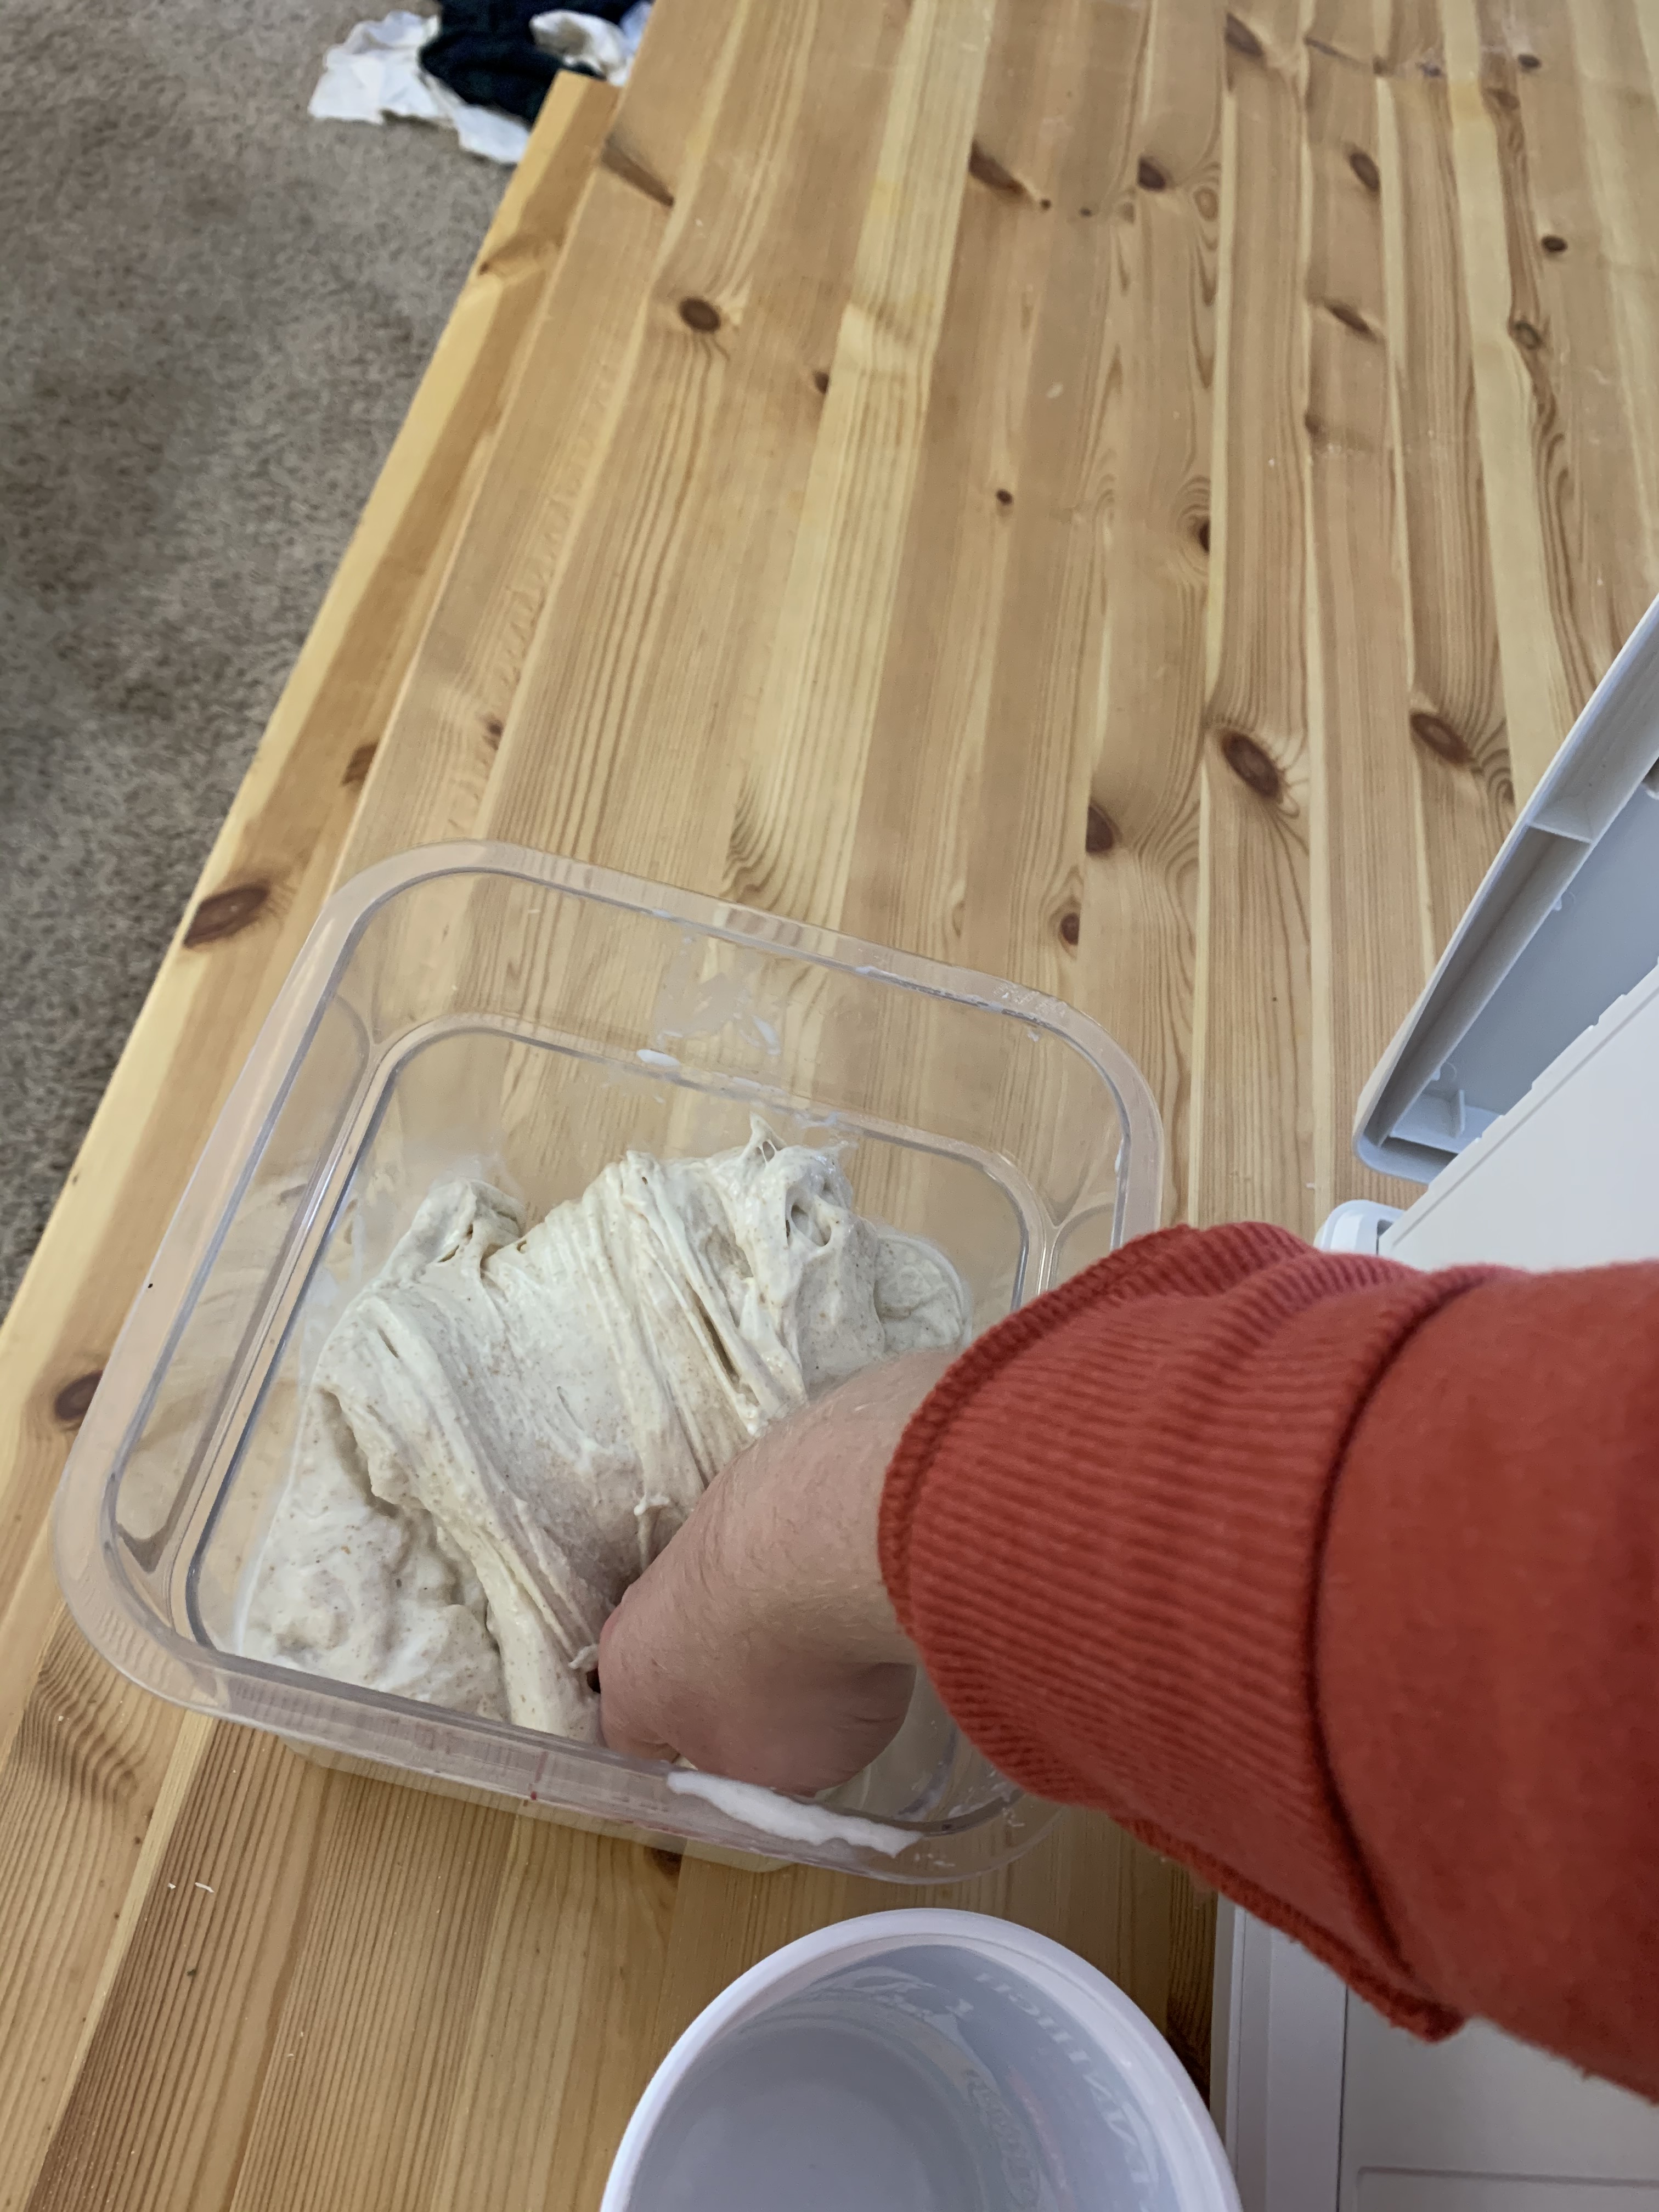
To your water-starter mixture, add in the bread, whole wheat and rye flours. Using one hand, mix up the dough. A lot of it will stick to your hand. Keep mixing until the dough is fully mixed and there are no dry bits of flour. My technique for mixing is a combination of stirring and squeezing the dough. Once it is all mixed, use the dough scraper to remove the dough from your hand and then scrape down the sides of the bowl. Let your dough rest in a warm spot or in an incubator for 30 minutes. This is called the auto-lyse step, which plays a very important role in gluten development so dont skip it!

Flours added, before mixing.
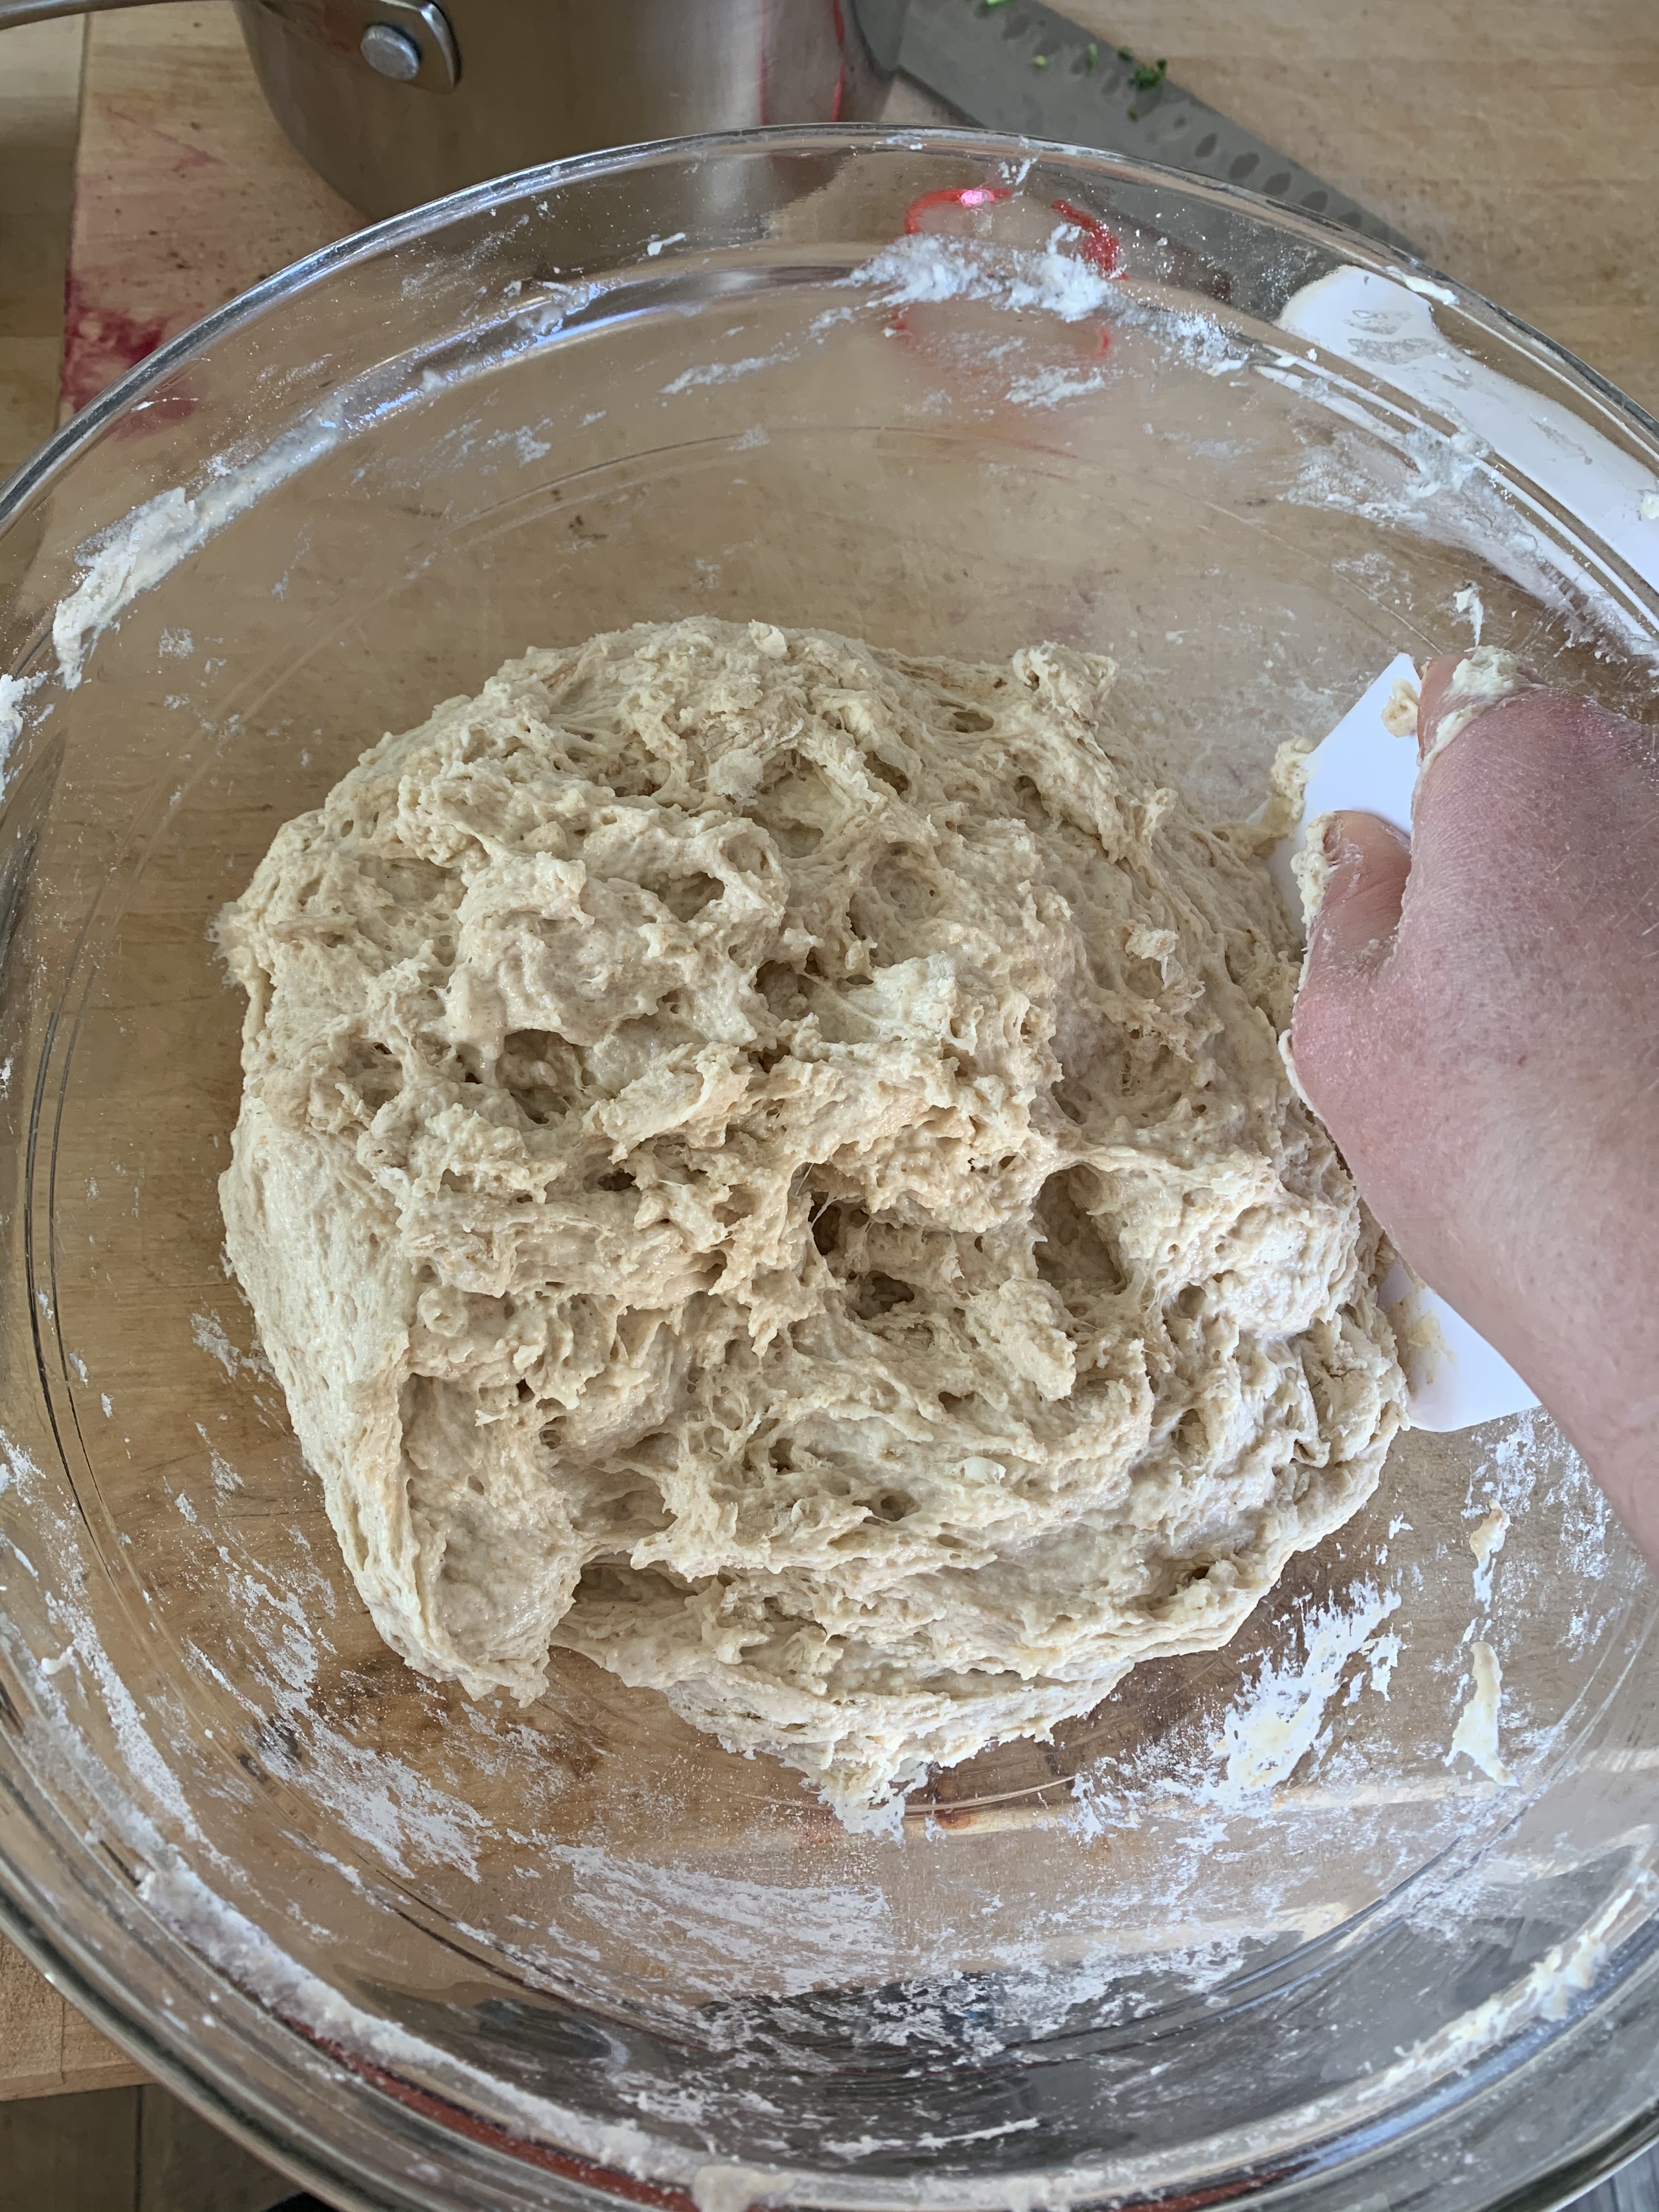
After mixing, the dough should look moist, sticky and rough.
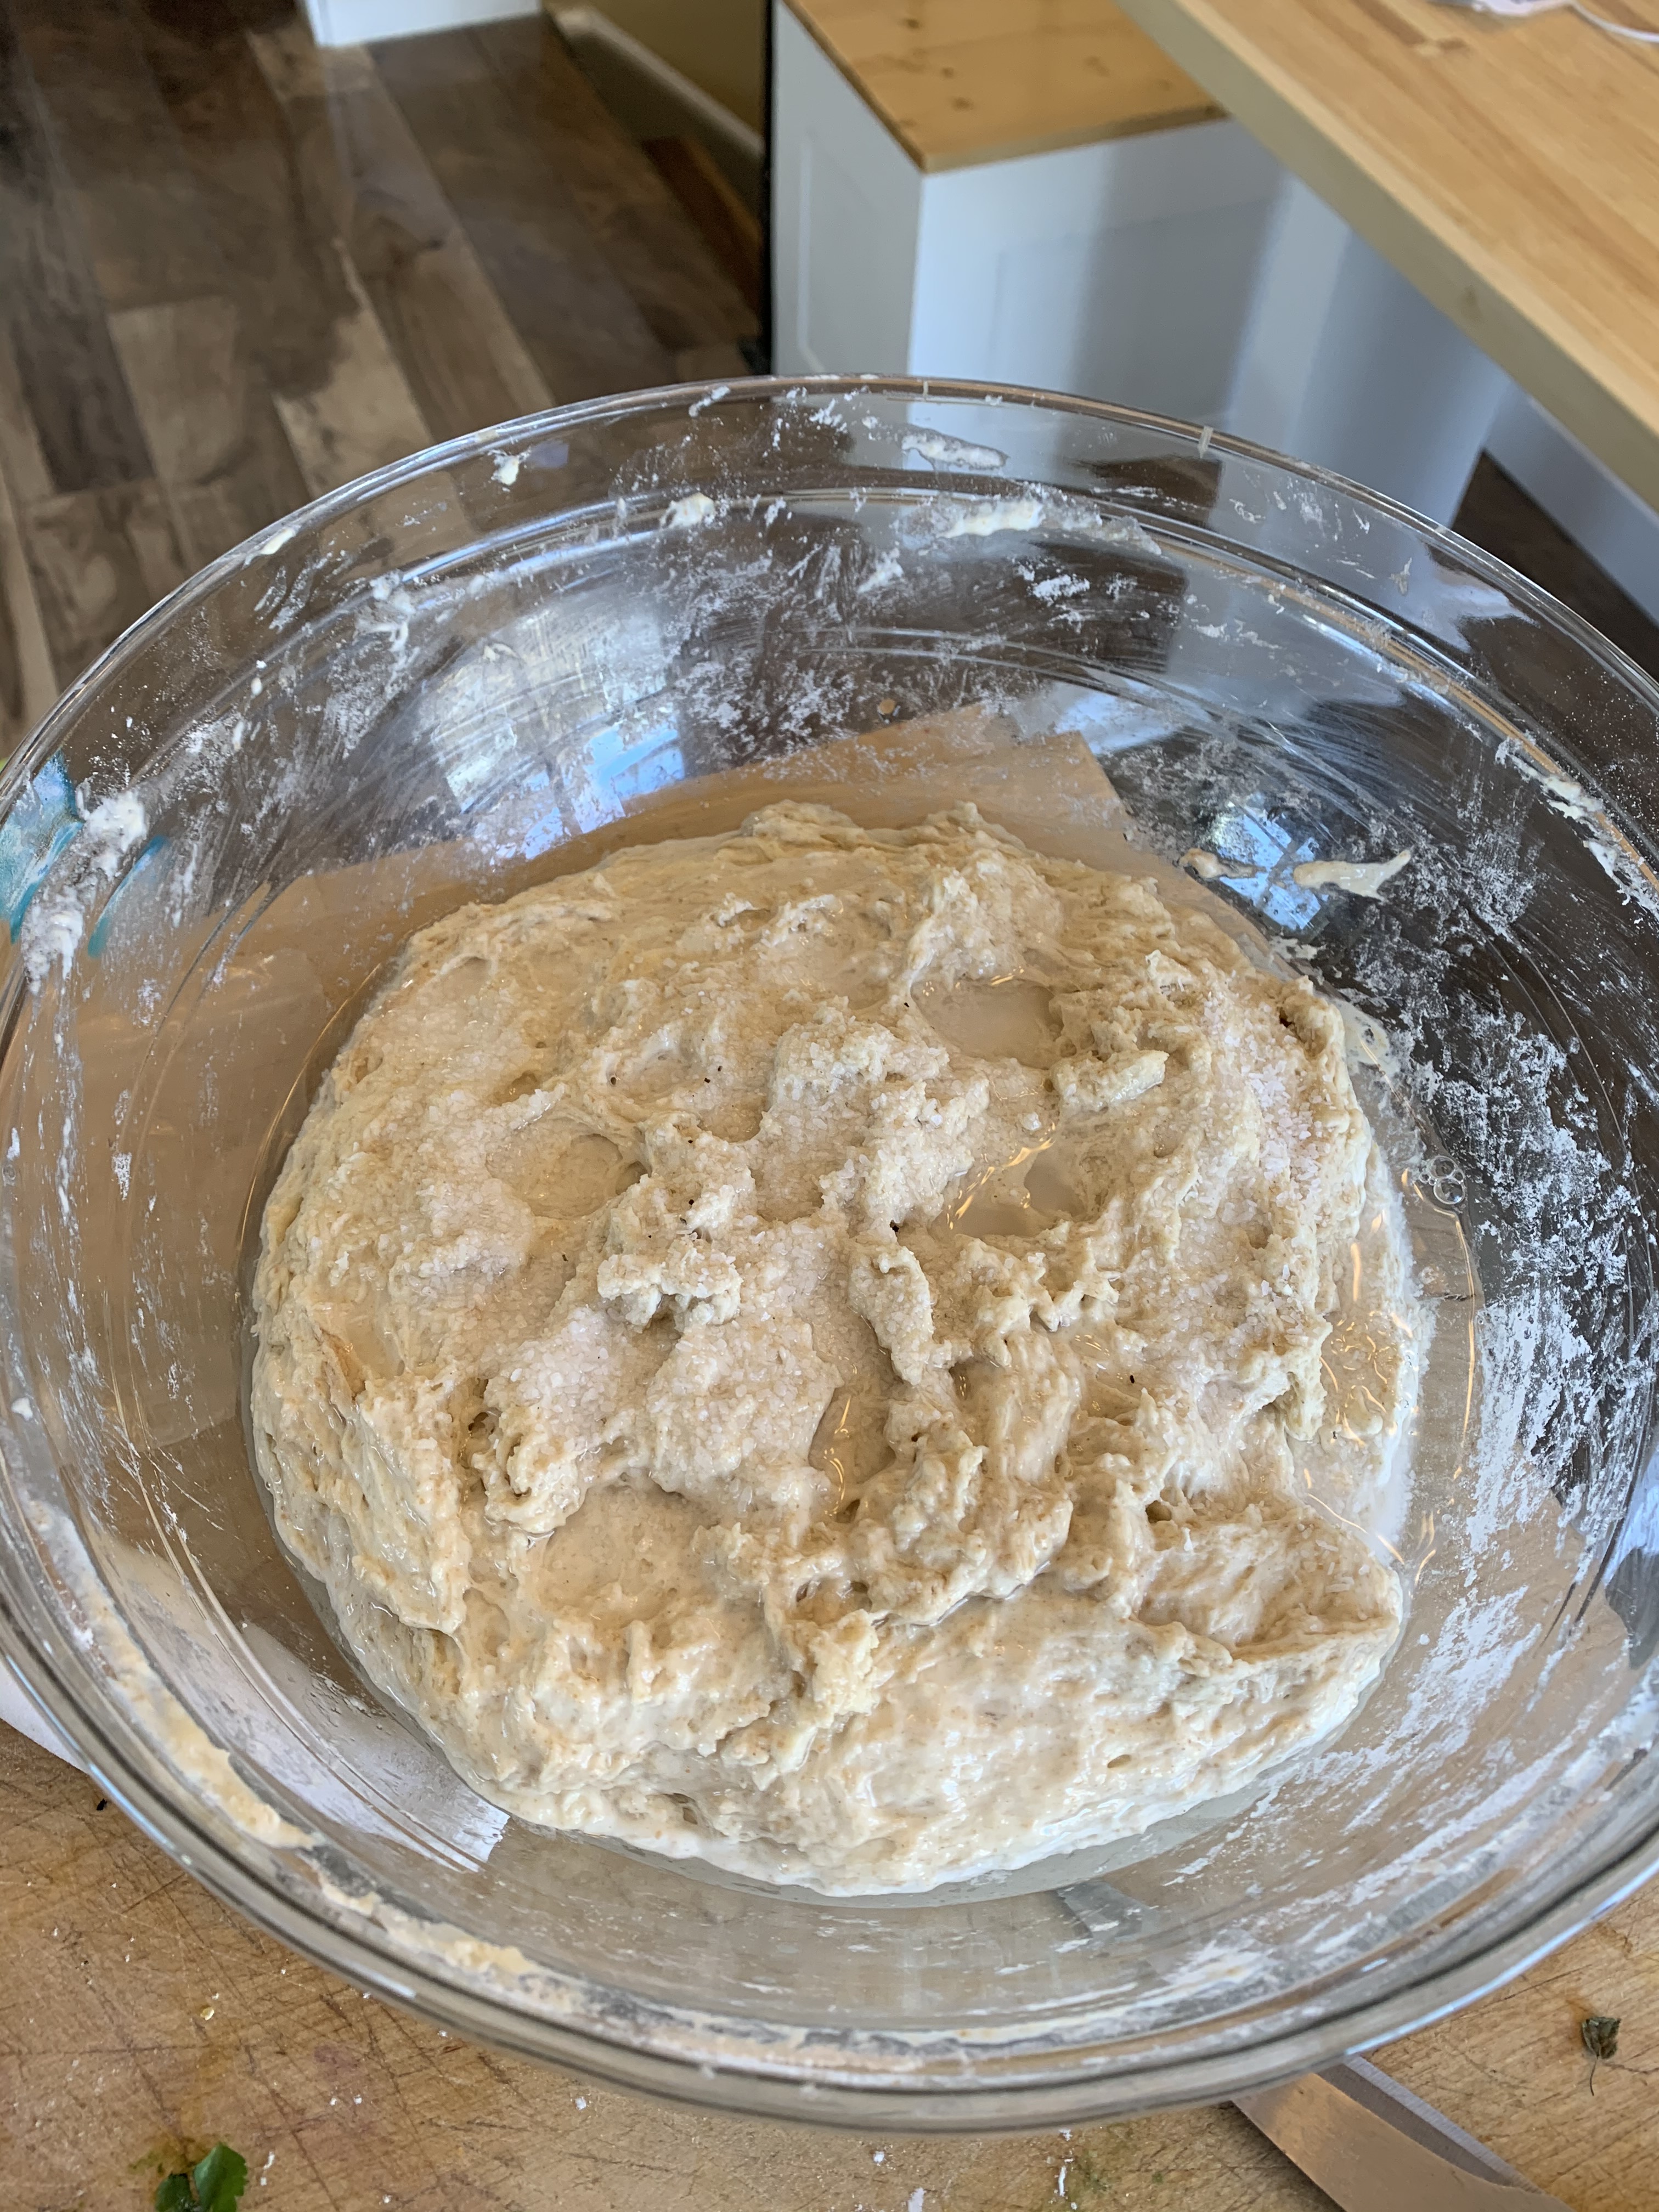
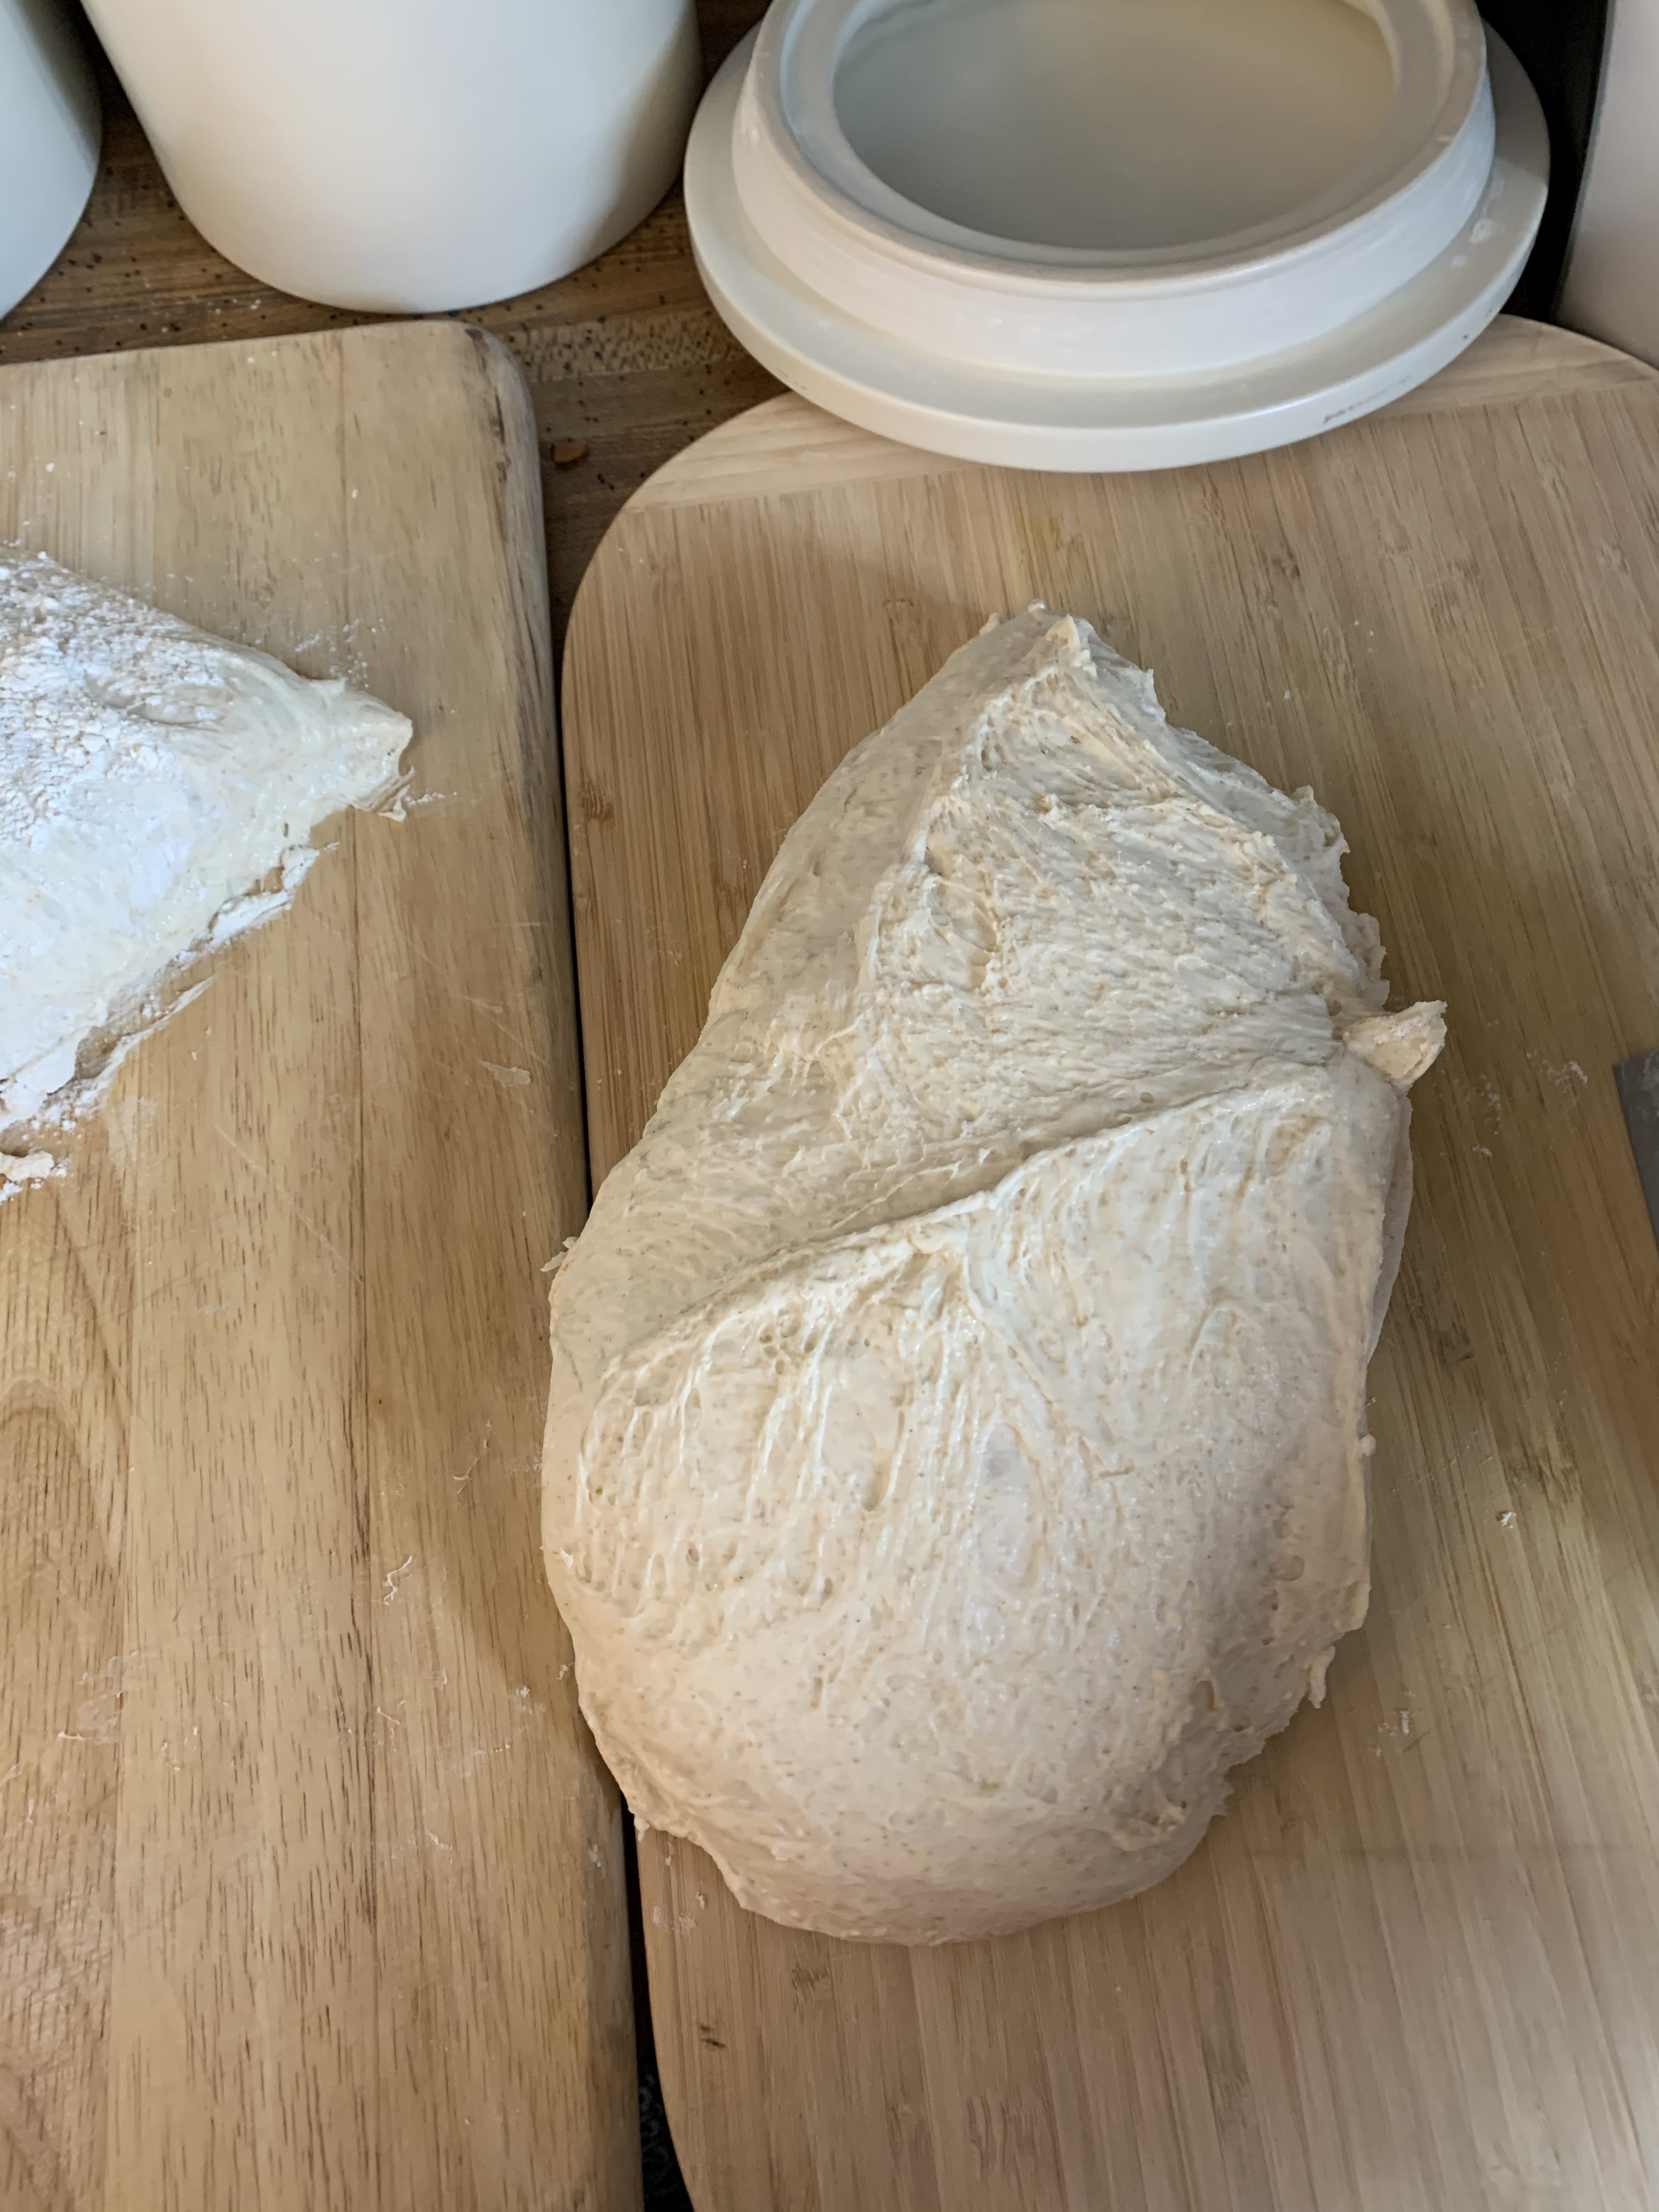
After the 30 minute rest period, add the remaining 50g of water and the 18g of salt. I pour the water on top and then sprinkle the salt evenly across the surface of the dough. Using your hand, start squeezing the dough all around. You will feel the coarse salt start to dissolve after squeezing for a bit. The dough will become much smoother and may look segmented. It will feel very wet and less sticky. Transfer to a 3.5L square plastic container or keep it in the glass bowl. I like to use the square container because it makes the next steps easier.
After resting with the salt and water sprinkled on top

Squeeze the salt into the dough

After squeezing. The dough will be smooth.
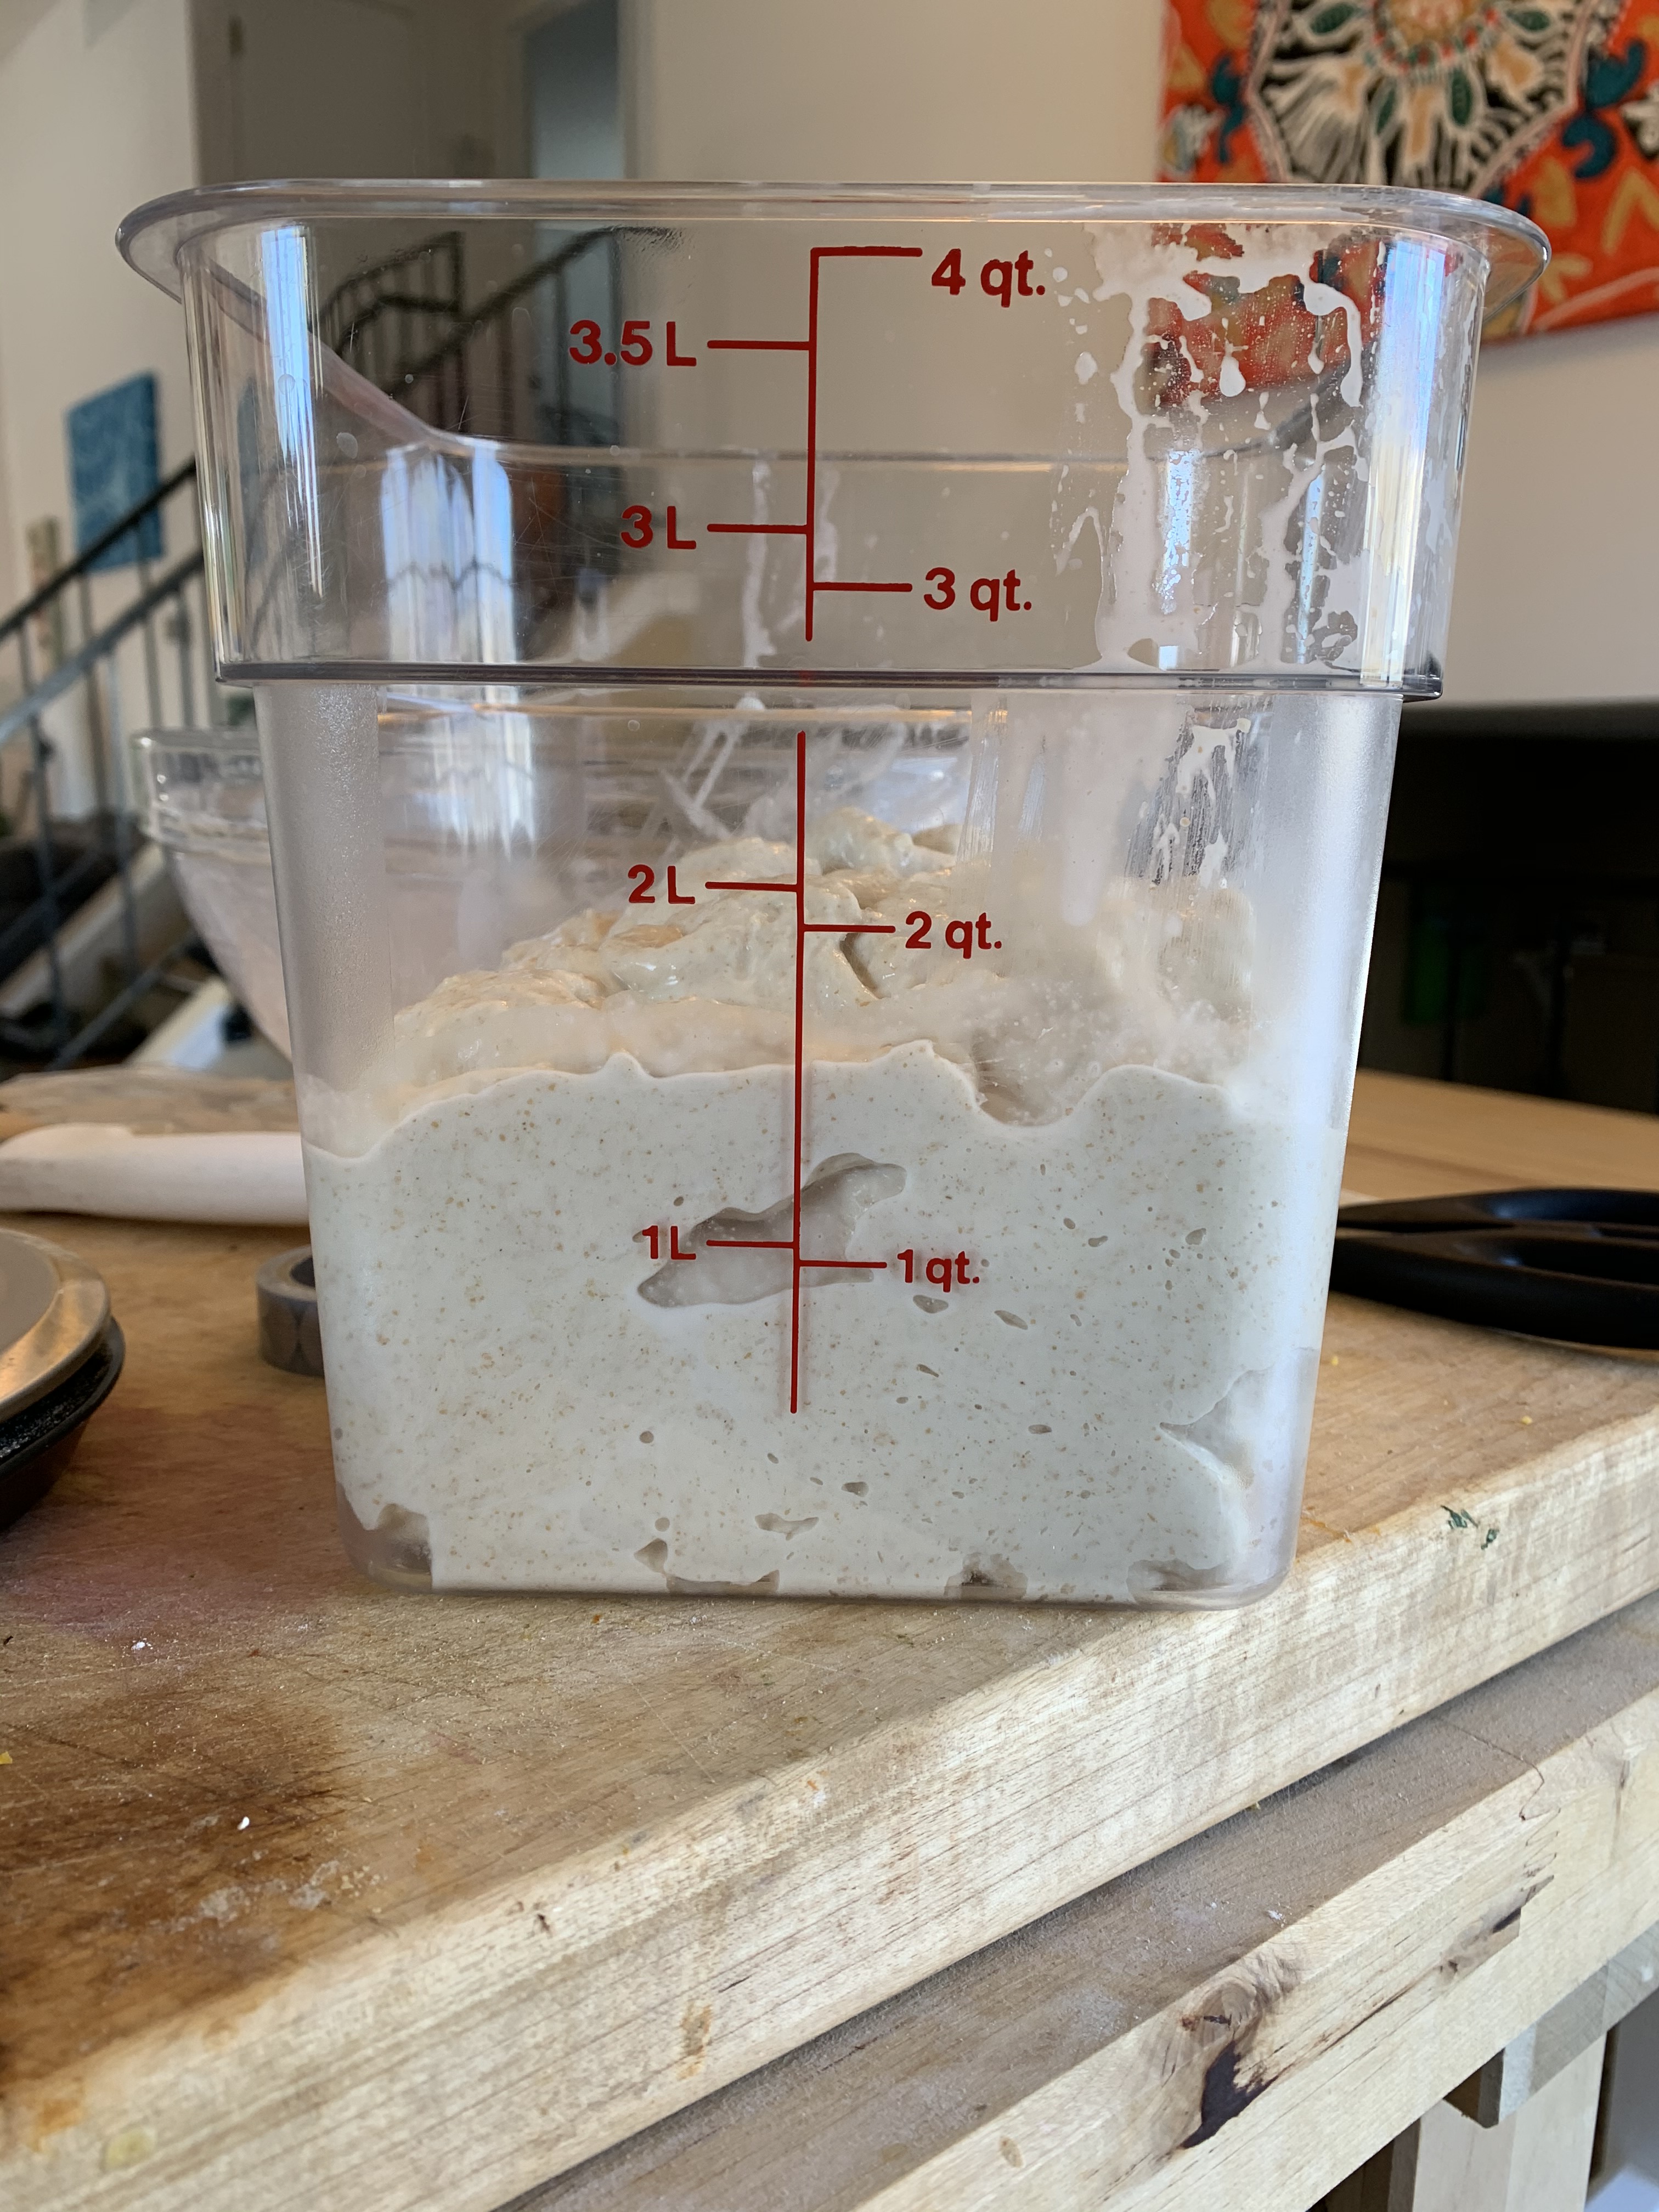
Transferred into the square container
Bulk Fermentation
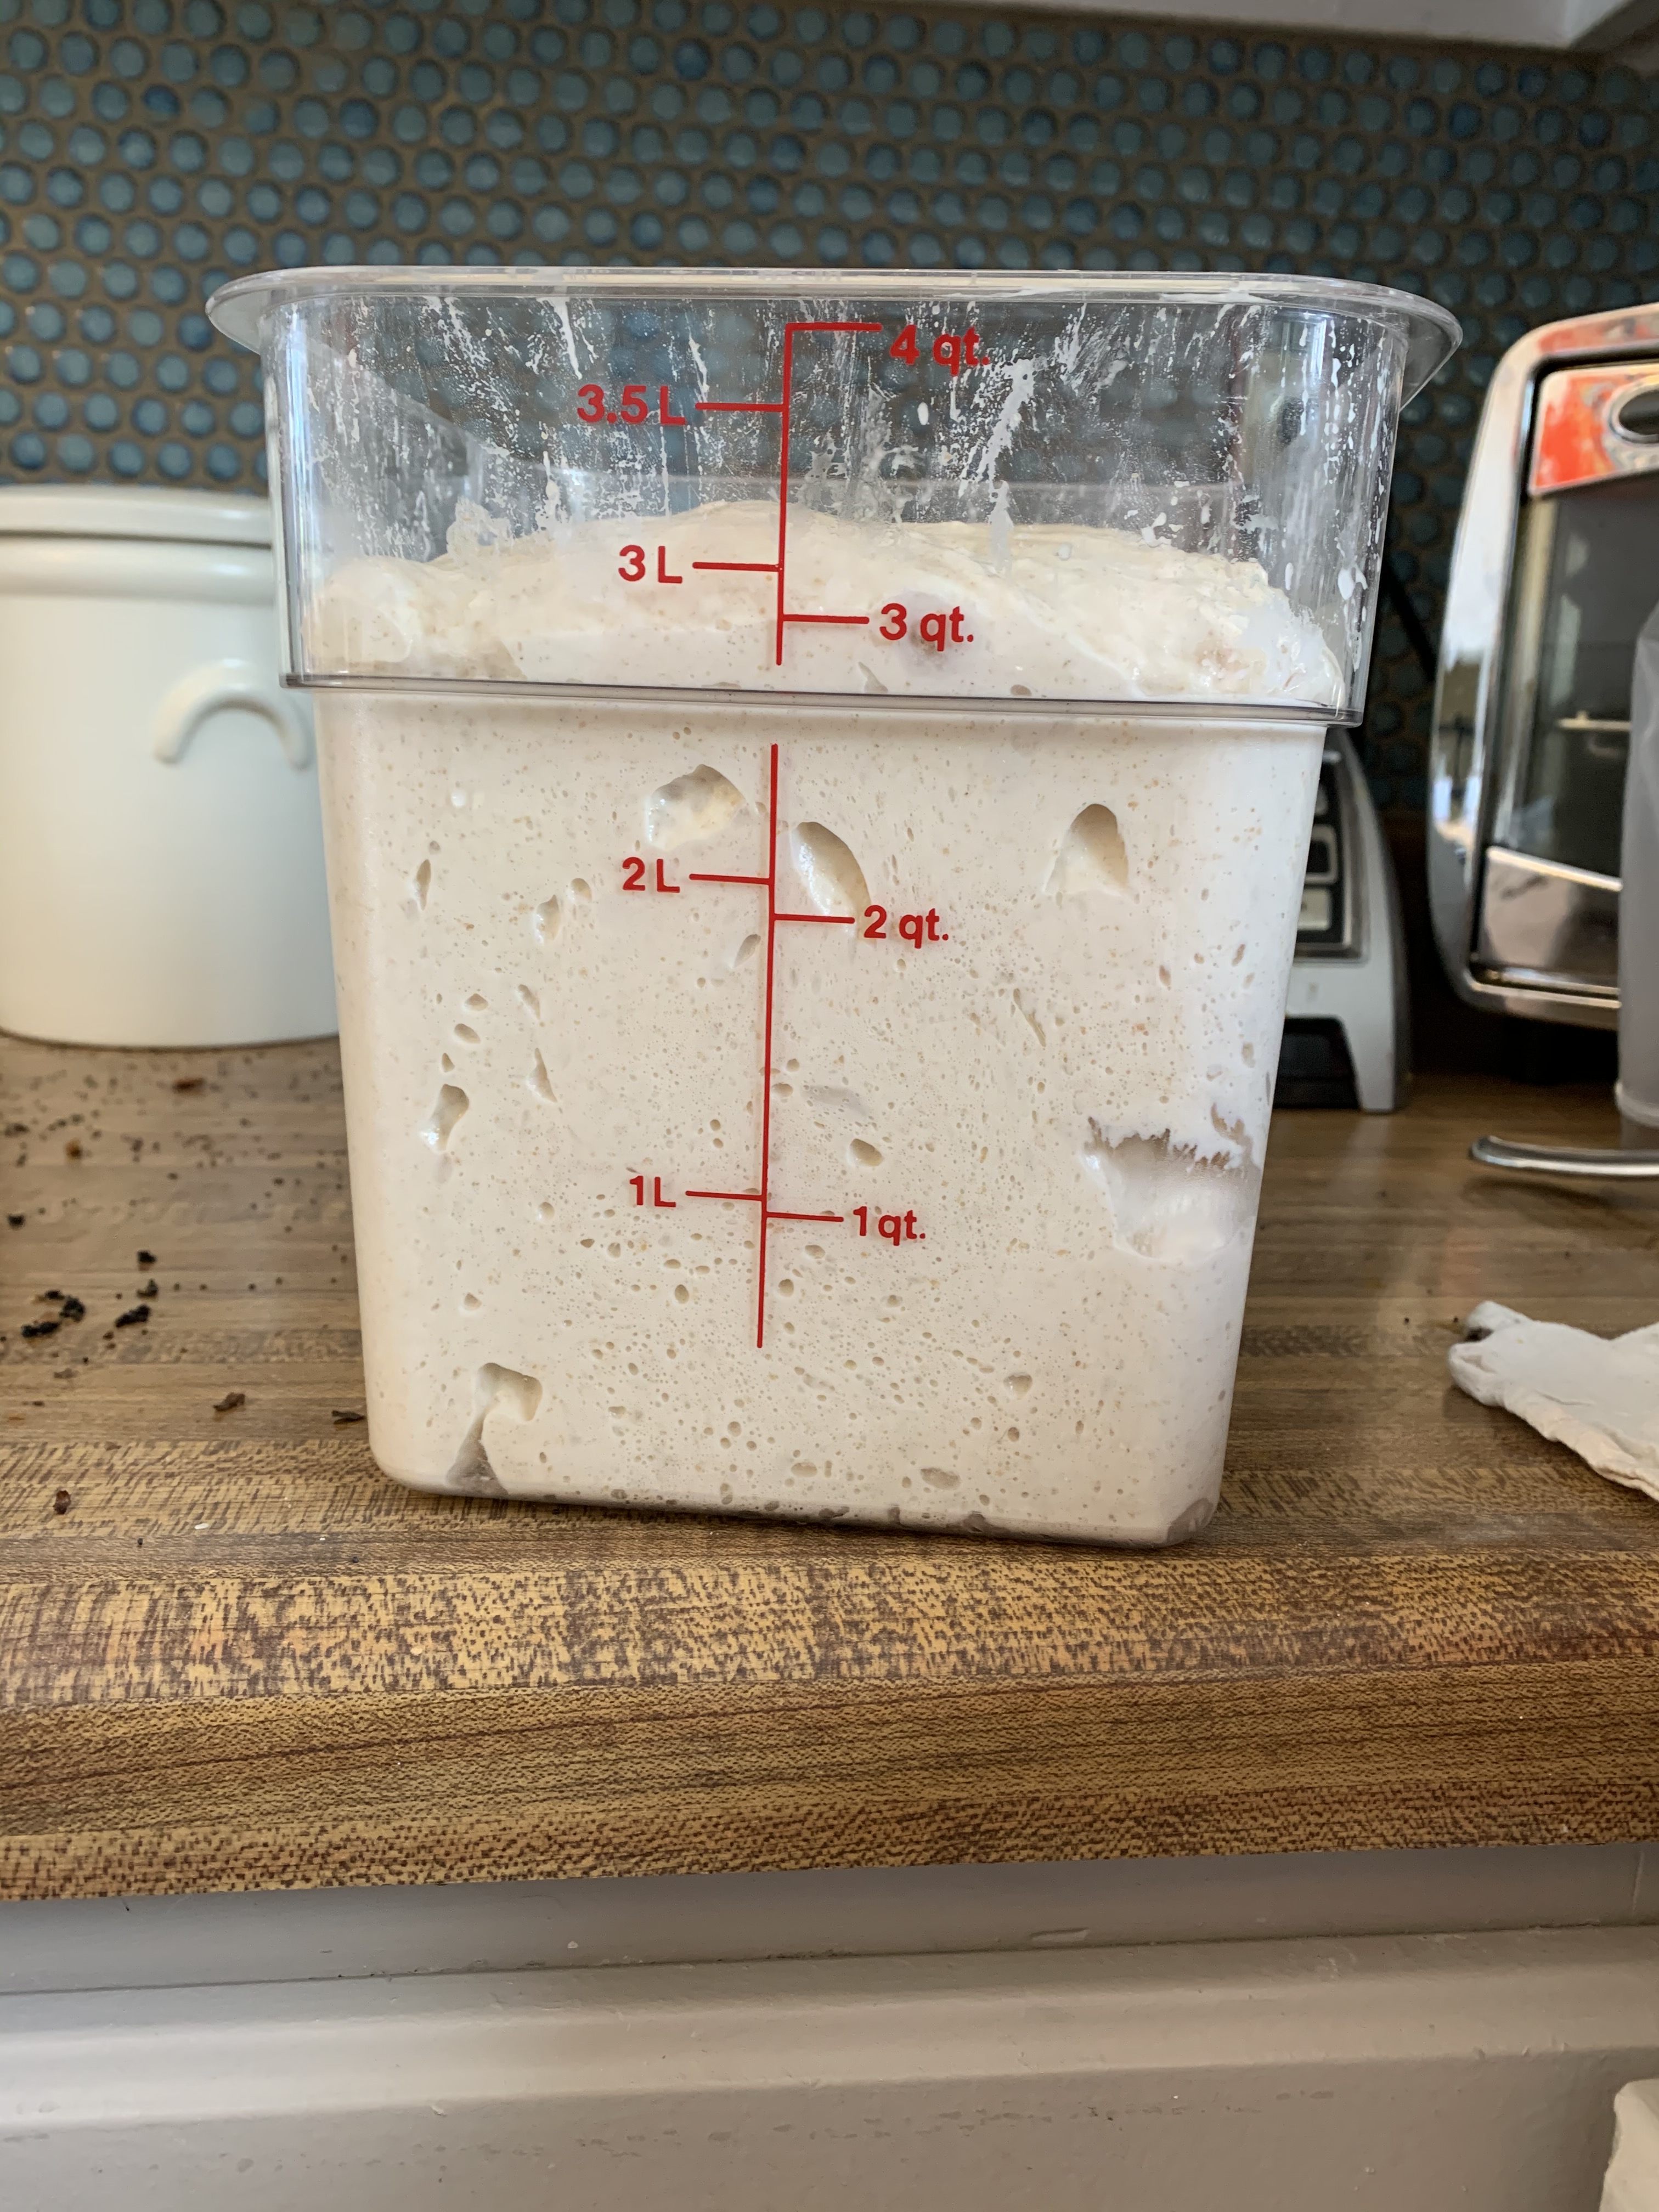
After the auto-lyse step and the dough is complete, the next part is bulk fermentation. Bulk fermentation is where all the magic happens. Dough structure is developed by working the dough, developing strands of gluten. Air bubbles are formed by carbon dioxide, which is a result of of carbohydrates being broken down by the yeast and bacteria. In total, bulk fermentation lasts 4 hours. The first 2 hours consist of pull and turns. Instead of kneading the dough to develop gluten, you develop gluten by working the dough in short increments every 30 minutes for 2 hours.
When the auto-lyse is done, incubate the dough for 30 minutes and then perform the first pull and turn. If using the square container, dip your hand into the container in one corner, grab a handful of dough, draw it up and over to the corner directly opposite and push it down. Turn the container by one quarter turn and repeat. Repeat until all corners have been done. I like to grab the dough from the underside. On the first pull and turn, the dough may break when stretching and that is okay. Let the dough rest for another 30 minutes and repeat the pull and turns. In total, you will do four pull and turns over 2 hours. On the 2nd pull and turn, the dough will be smoother and stretch more easily. On the last two pull and turns, be more gentle so you dont squish too many of the air pockets.
If using a round bowl, do four pull and turns evenly spaced around the bowl.
Dip your hand into the container.

Pull the dough up and over.
Press the dough down into the opposite corner.
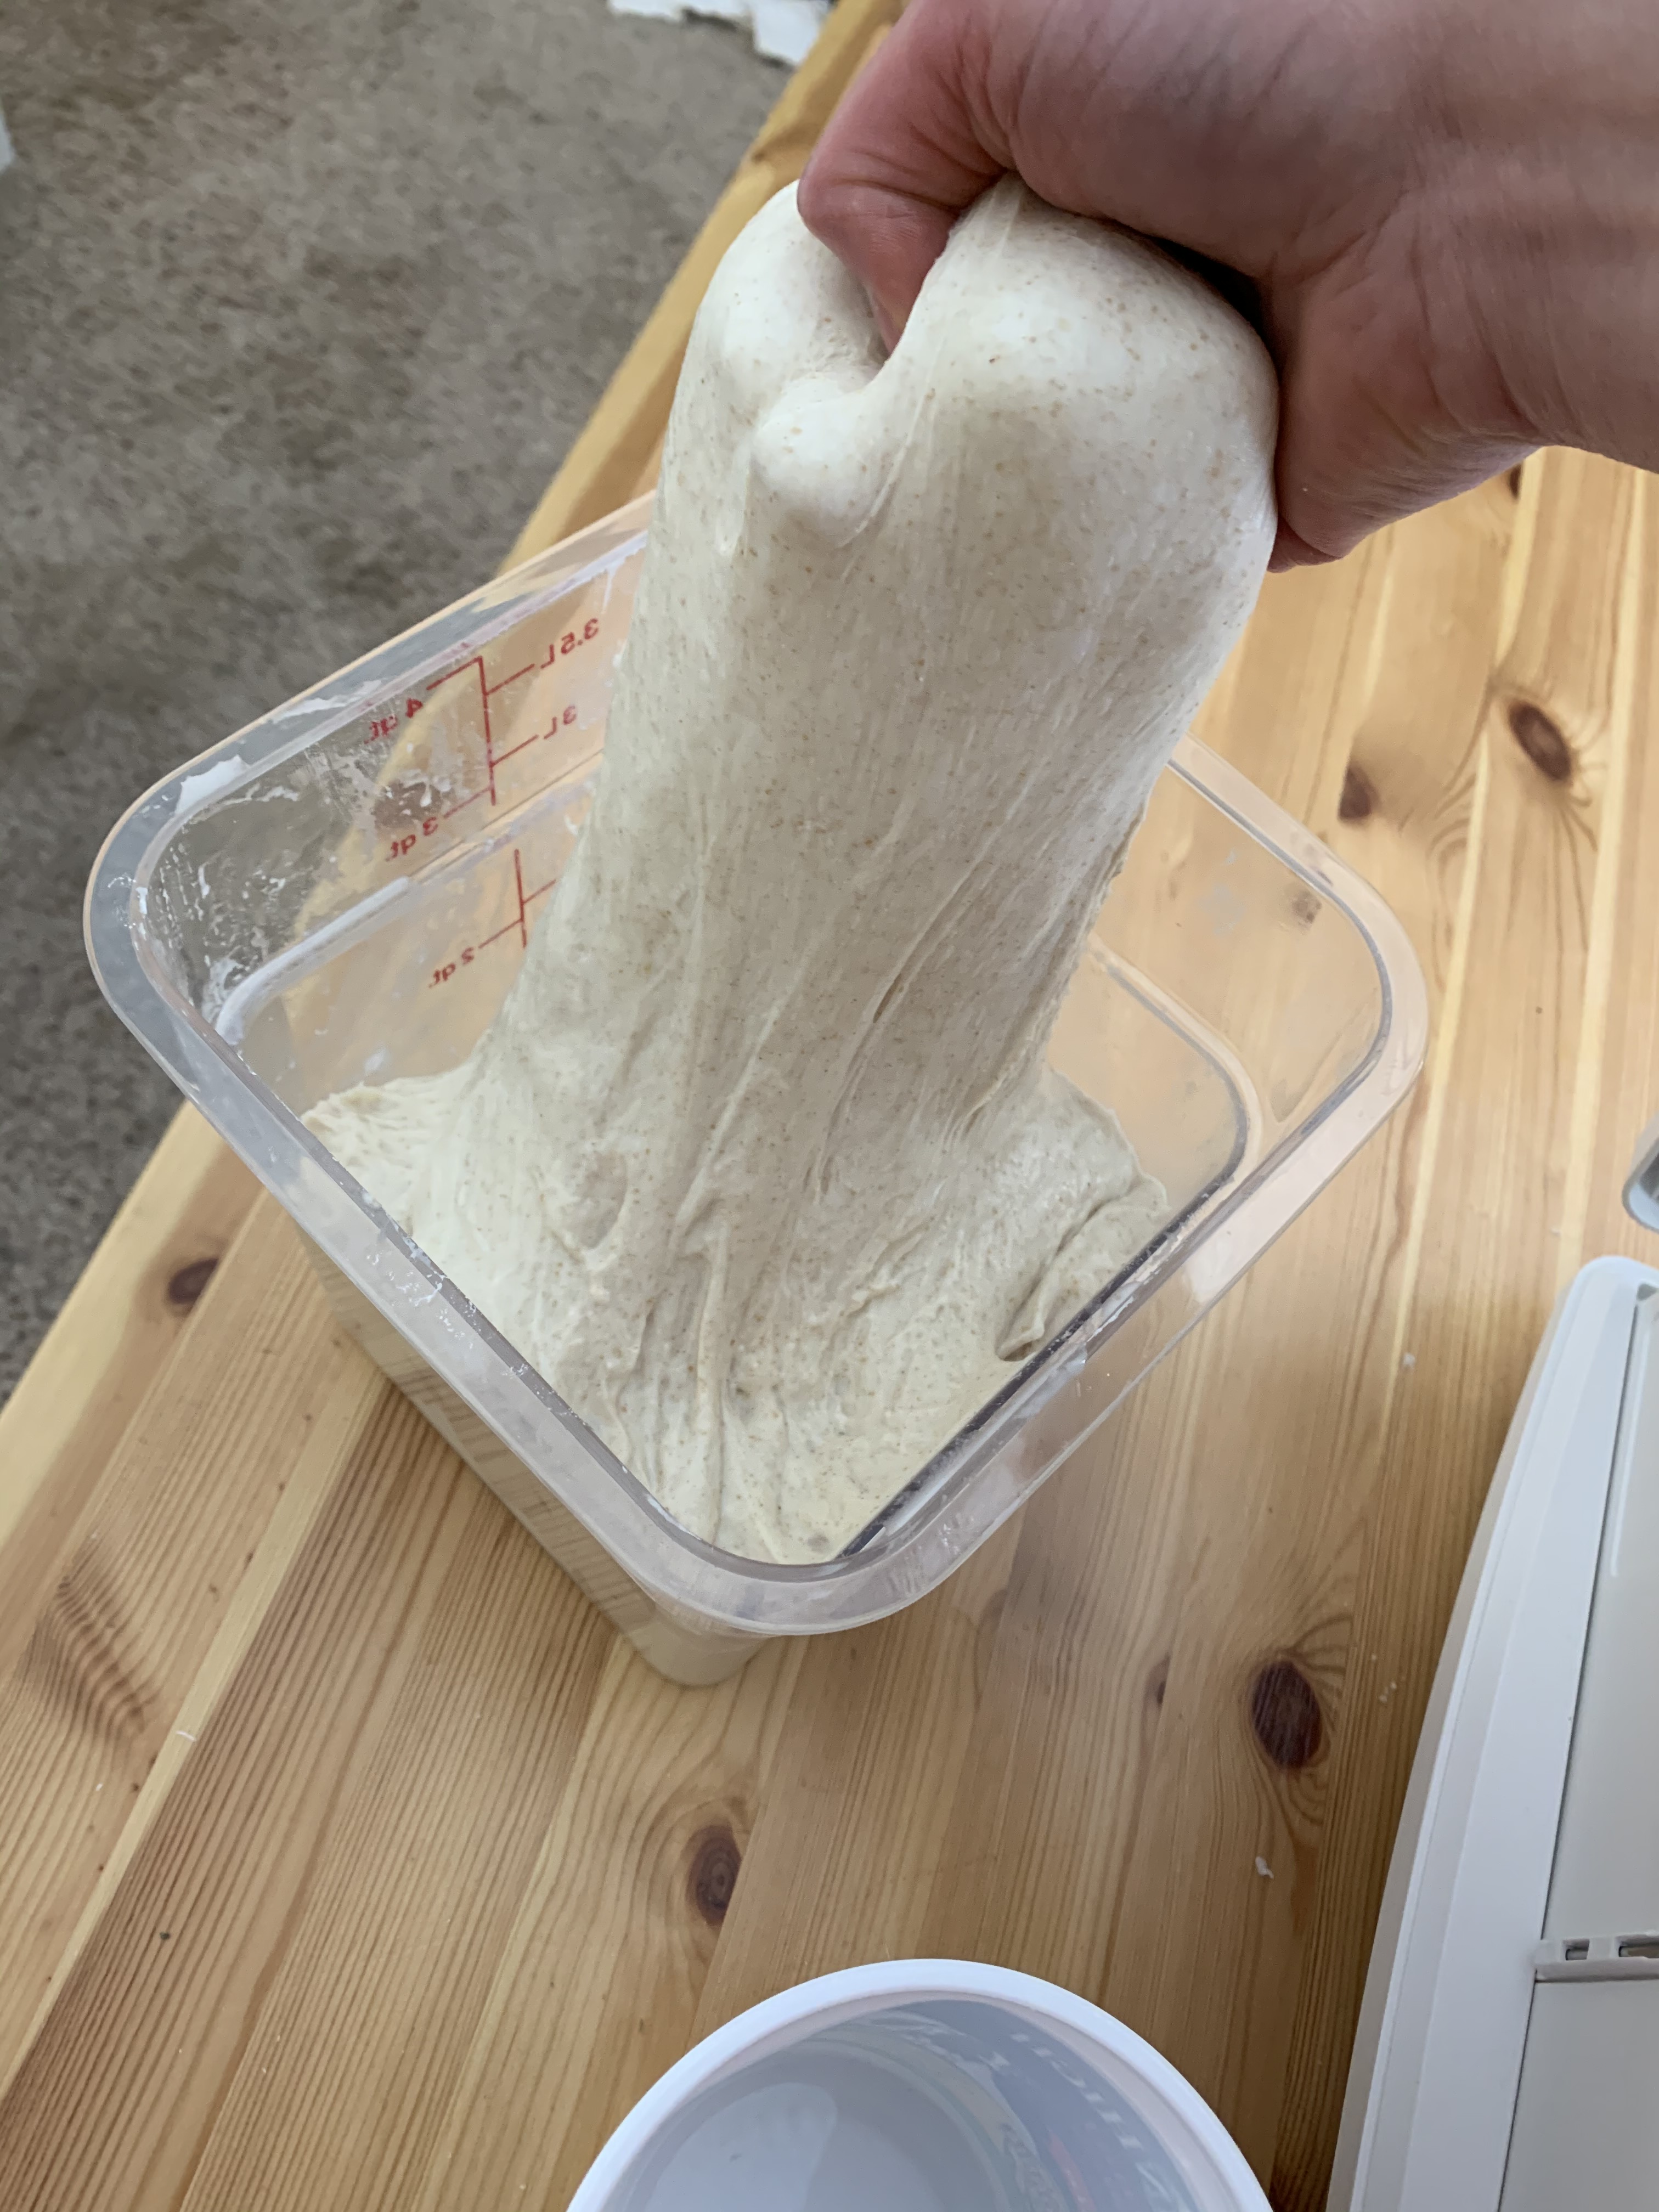
After a few pul land turns the dough will be smoother and stretchier.
After the pull and turns, incubate the dough for another 2 hours to complete bulk fermentation.
Dough Shaping
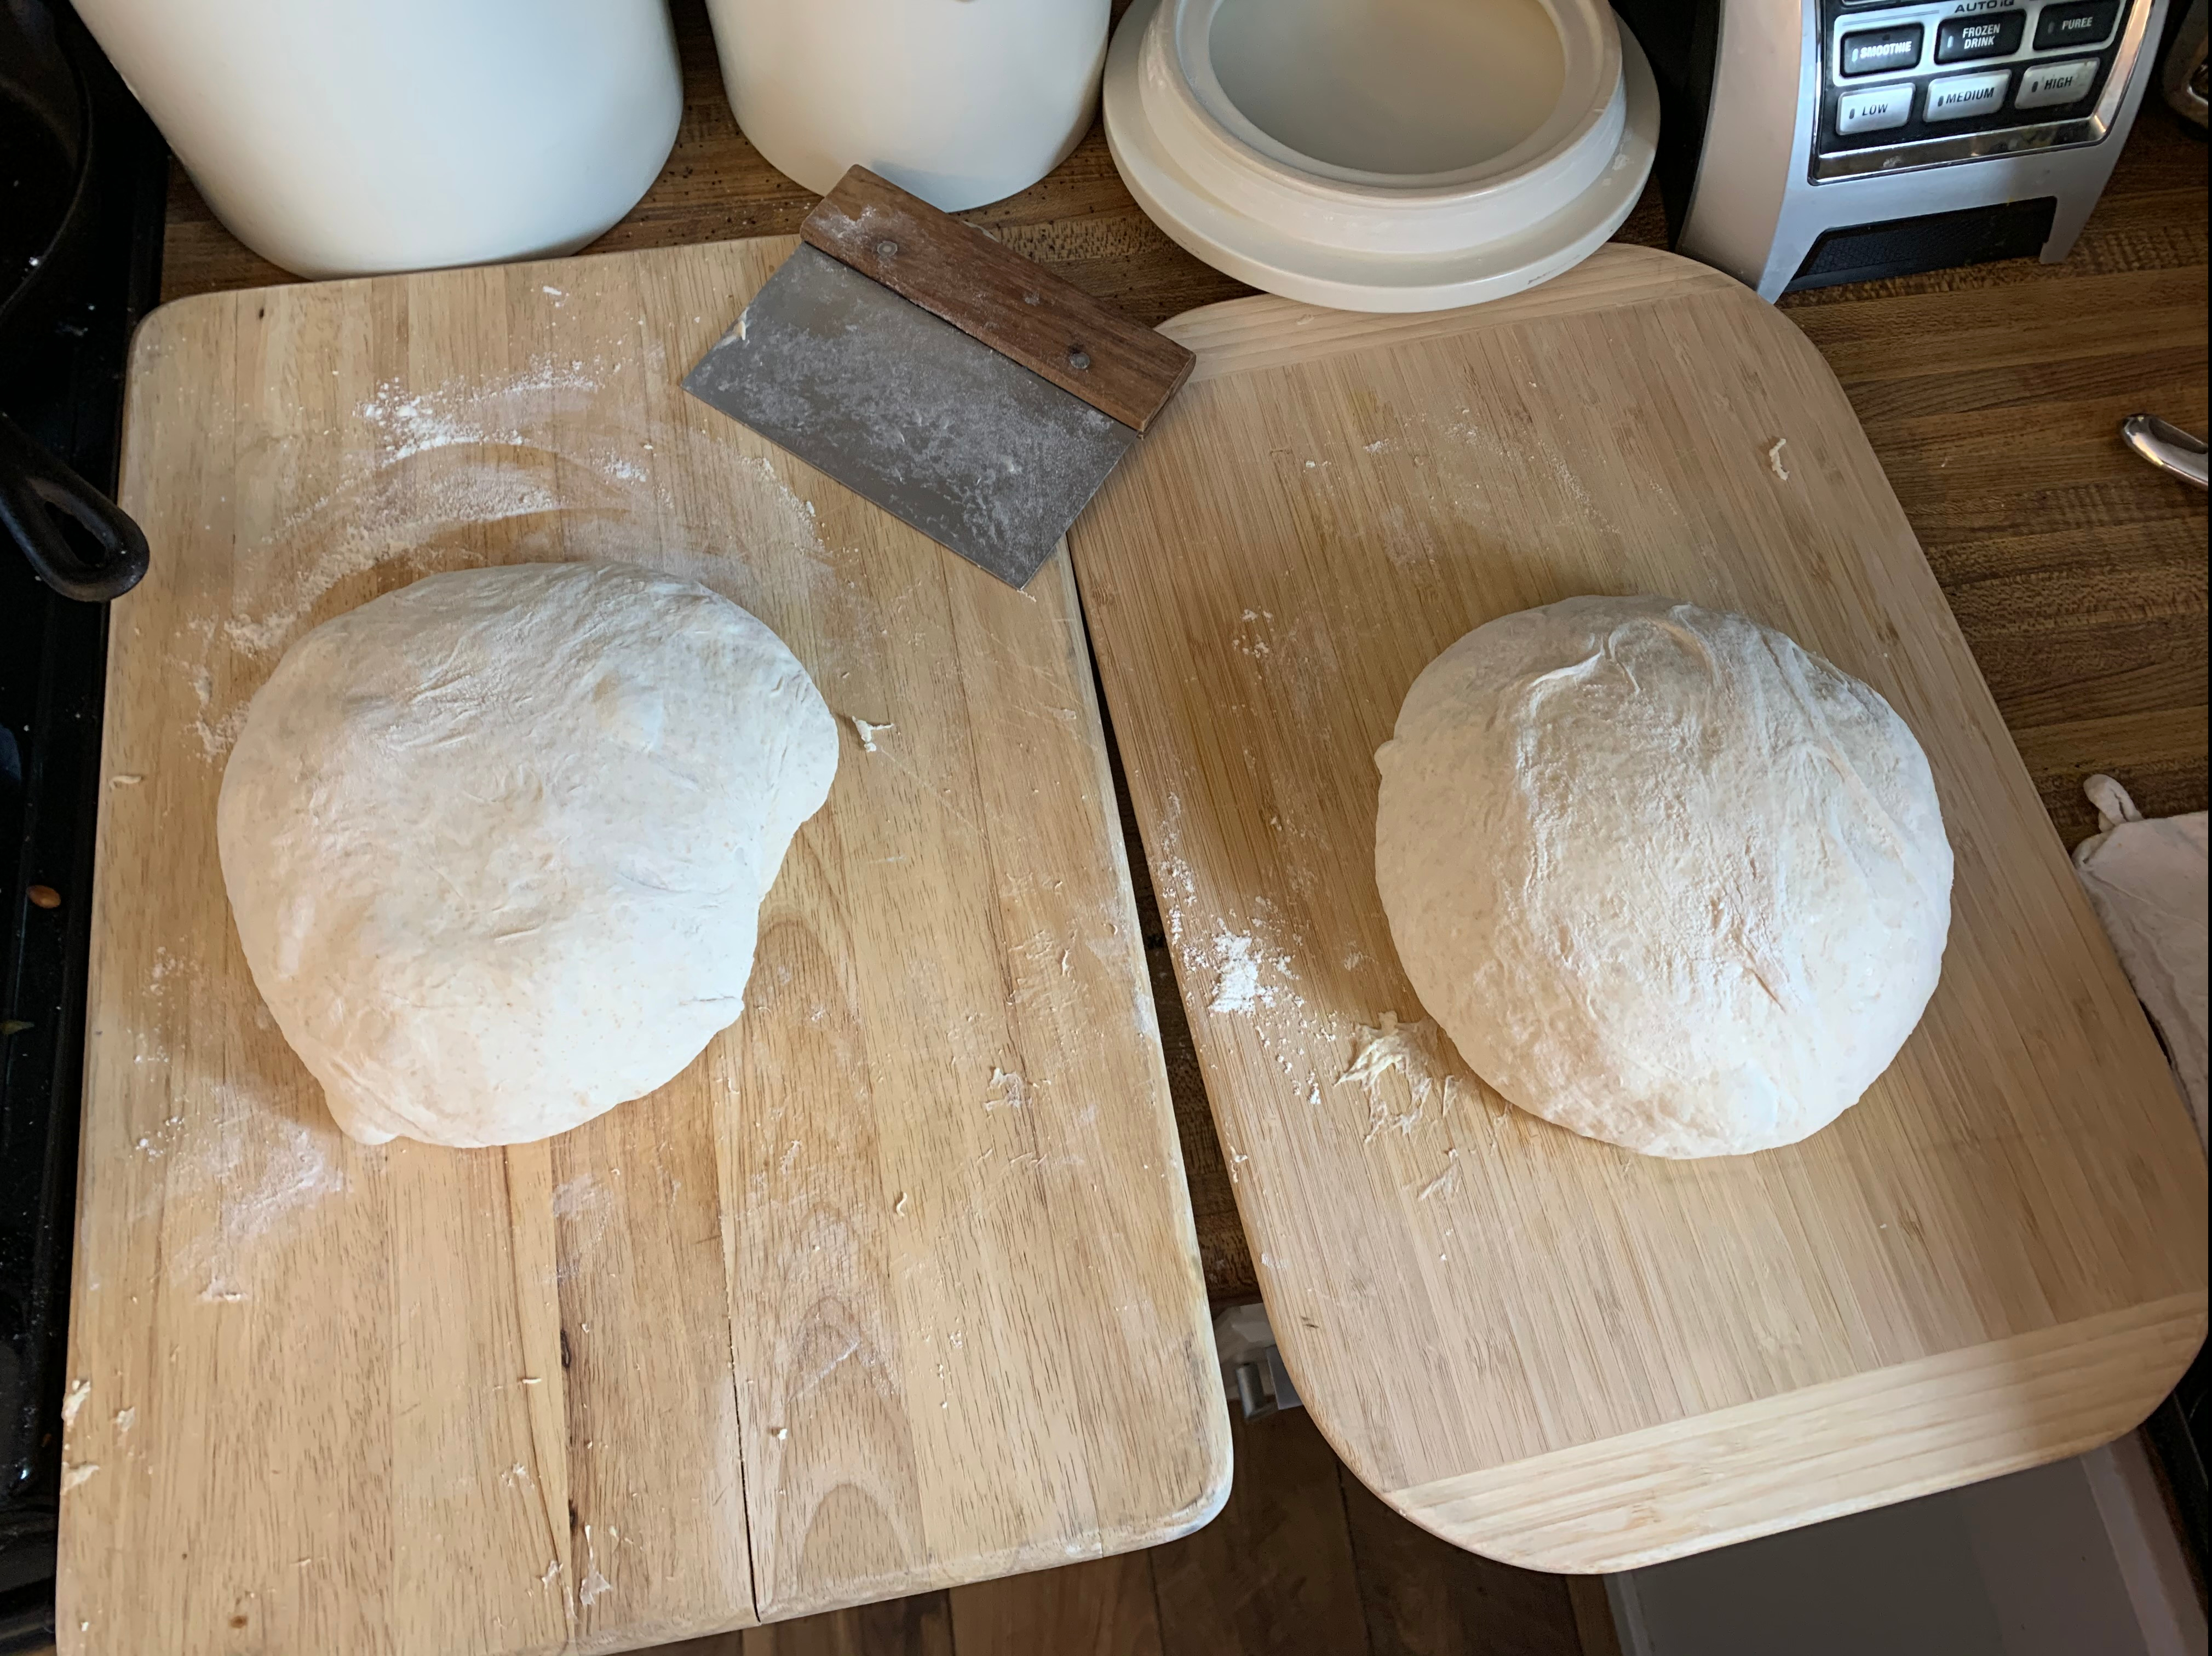
Its time to shape the dough! Bulk fermentation is done and your dough should have increased in size by 30-50%. Turn the container over and use a dough scraper to empty the container onto an unfloured cutting board. Sprinkle the top of the dough with some flour, but not too much. You want to use as little flour as possible.
After bulk fermentation is complete

Dump out the dough onto an unfloured surface. Sprinkle the top with flour.
Using a bench scraper, divide the dough in two equal pieces by eye.

Divide the dough in half.
Use the dough scraper to flip each half of the dough onto the floured side by inserting the scraper under one half and turning. The dough will stick to the cutting board while youre completing the flip, which is fine and what you want. The goal is to use a little extra flour as possible.
Flip the dough so the floured side faces down.
Once the dough has been flipped onto the floured side, fold the dough in half so that the top and bottom of the dough have the flour side facing outward and the unfloured surfaces are facing inward.

Fold the dough over itself so the floured surfaces are on the outside.
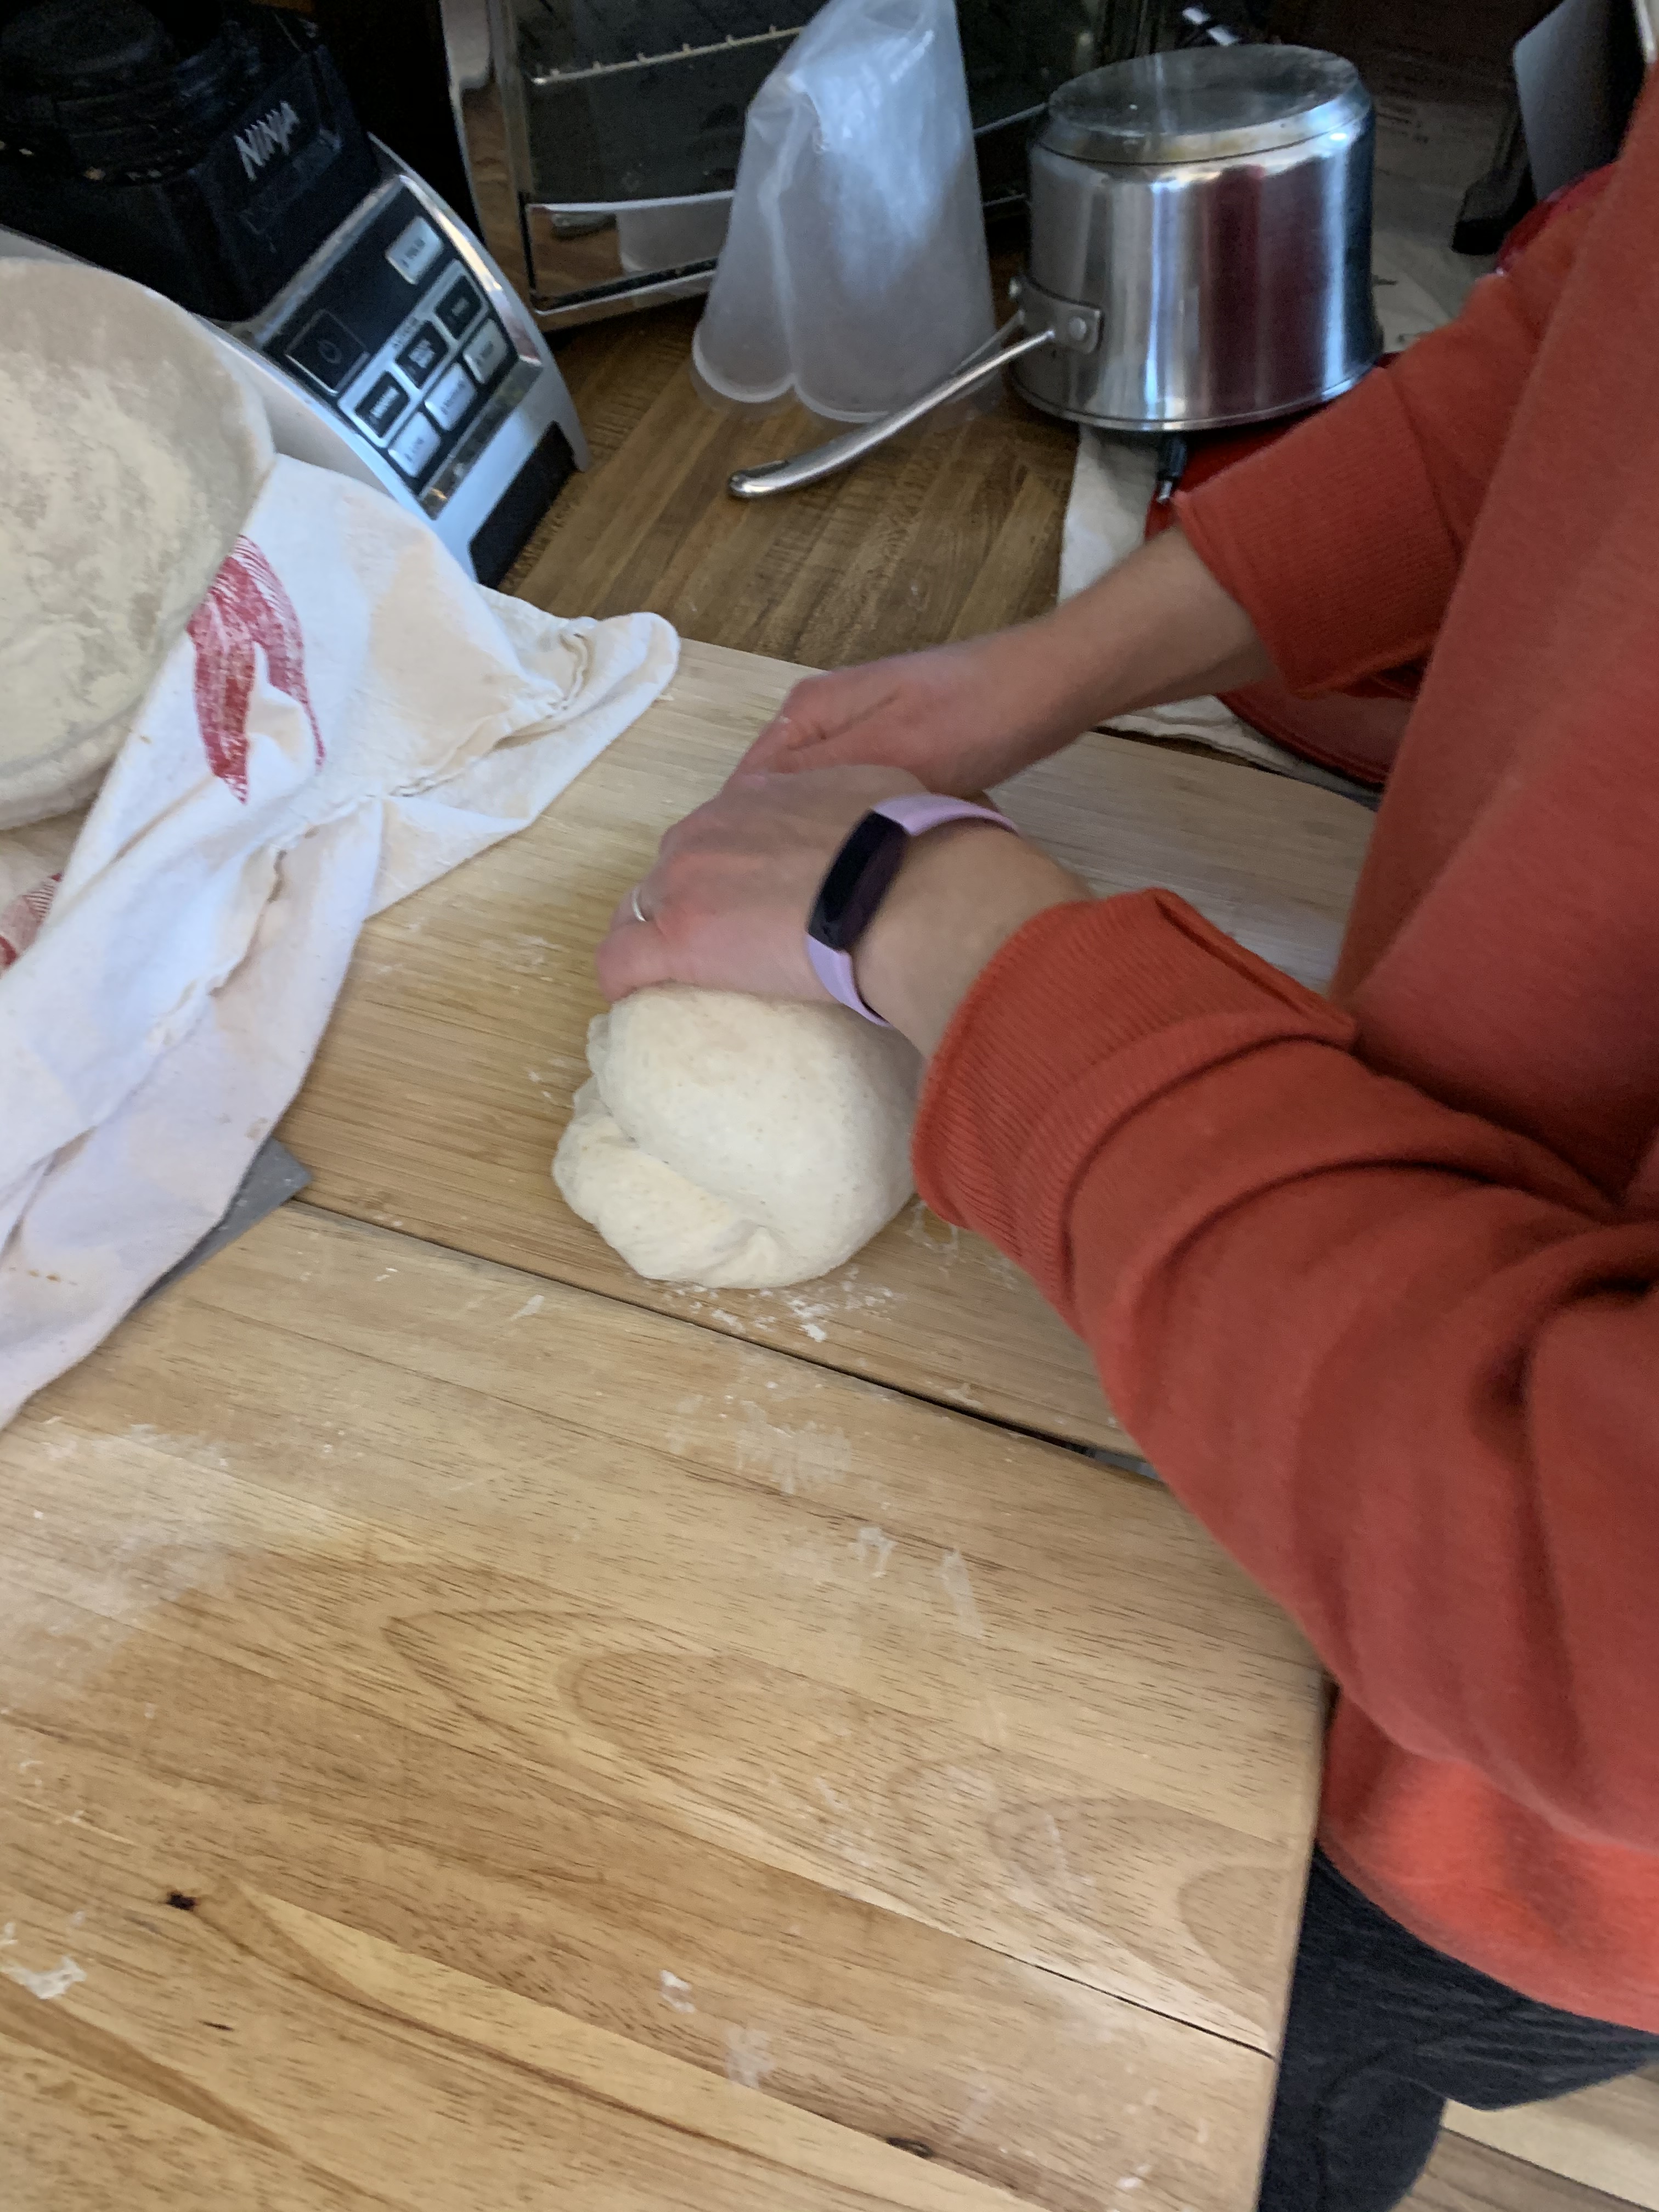
Now, use the bench scraper and your hand to spin the dough around until it forms a smooth ball. Some of the dough may stick to the cutting board, which is normal and desired, actually. It will take about 5-6 spins to get the dough smooth. Cover the dough with a towel and let it rest for 30 minutes. The dough will slightly spread out after this rest, but it shouldnt be completely flat. It should still be slightly domed.
Spin the dough using your hand and the bench scraper until they form smooth balls.
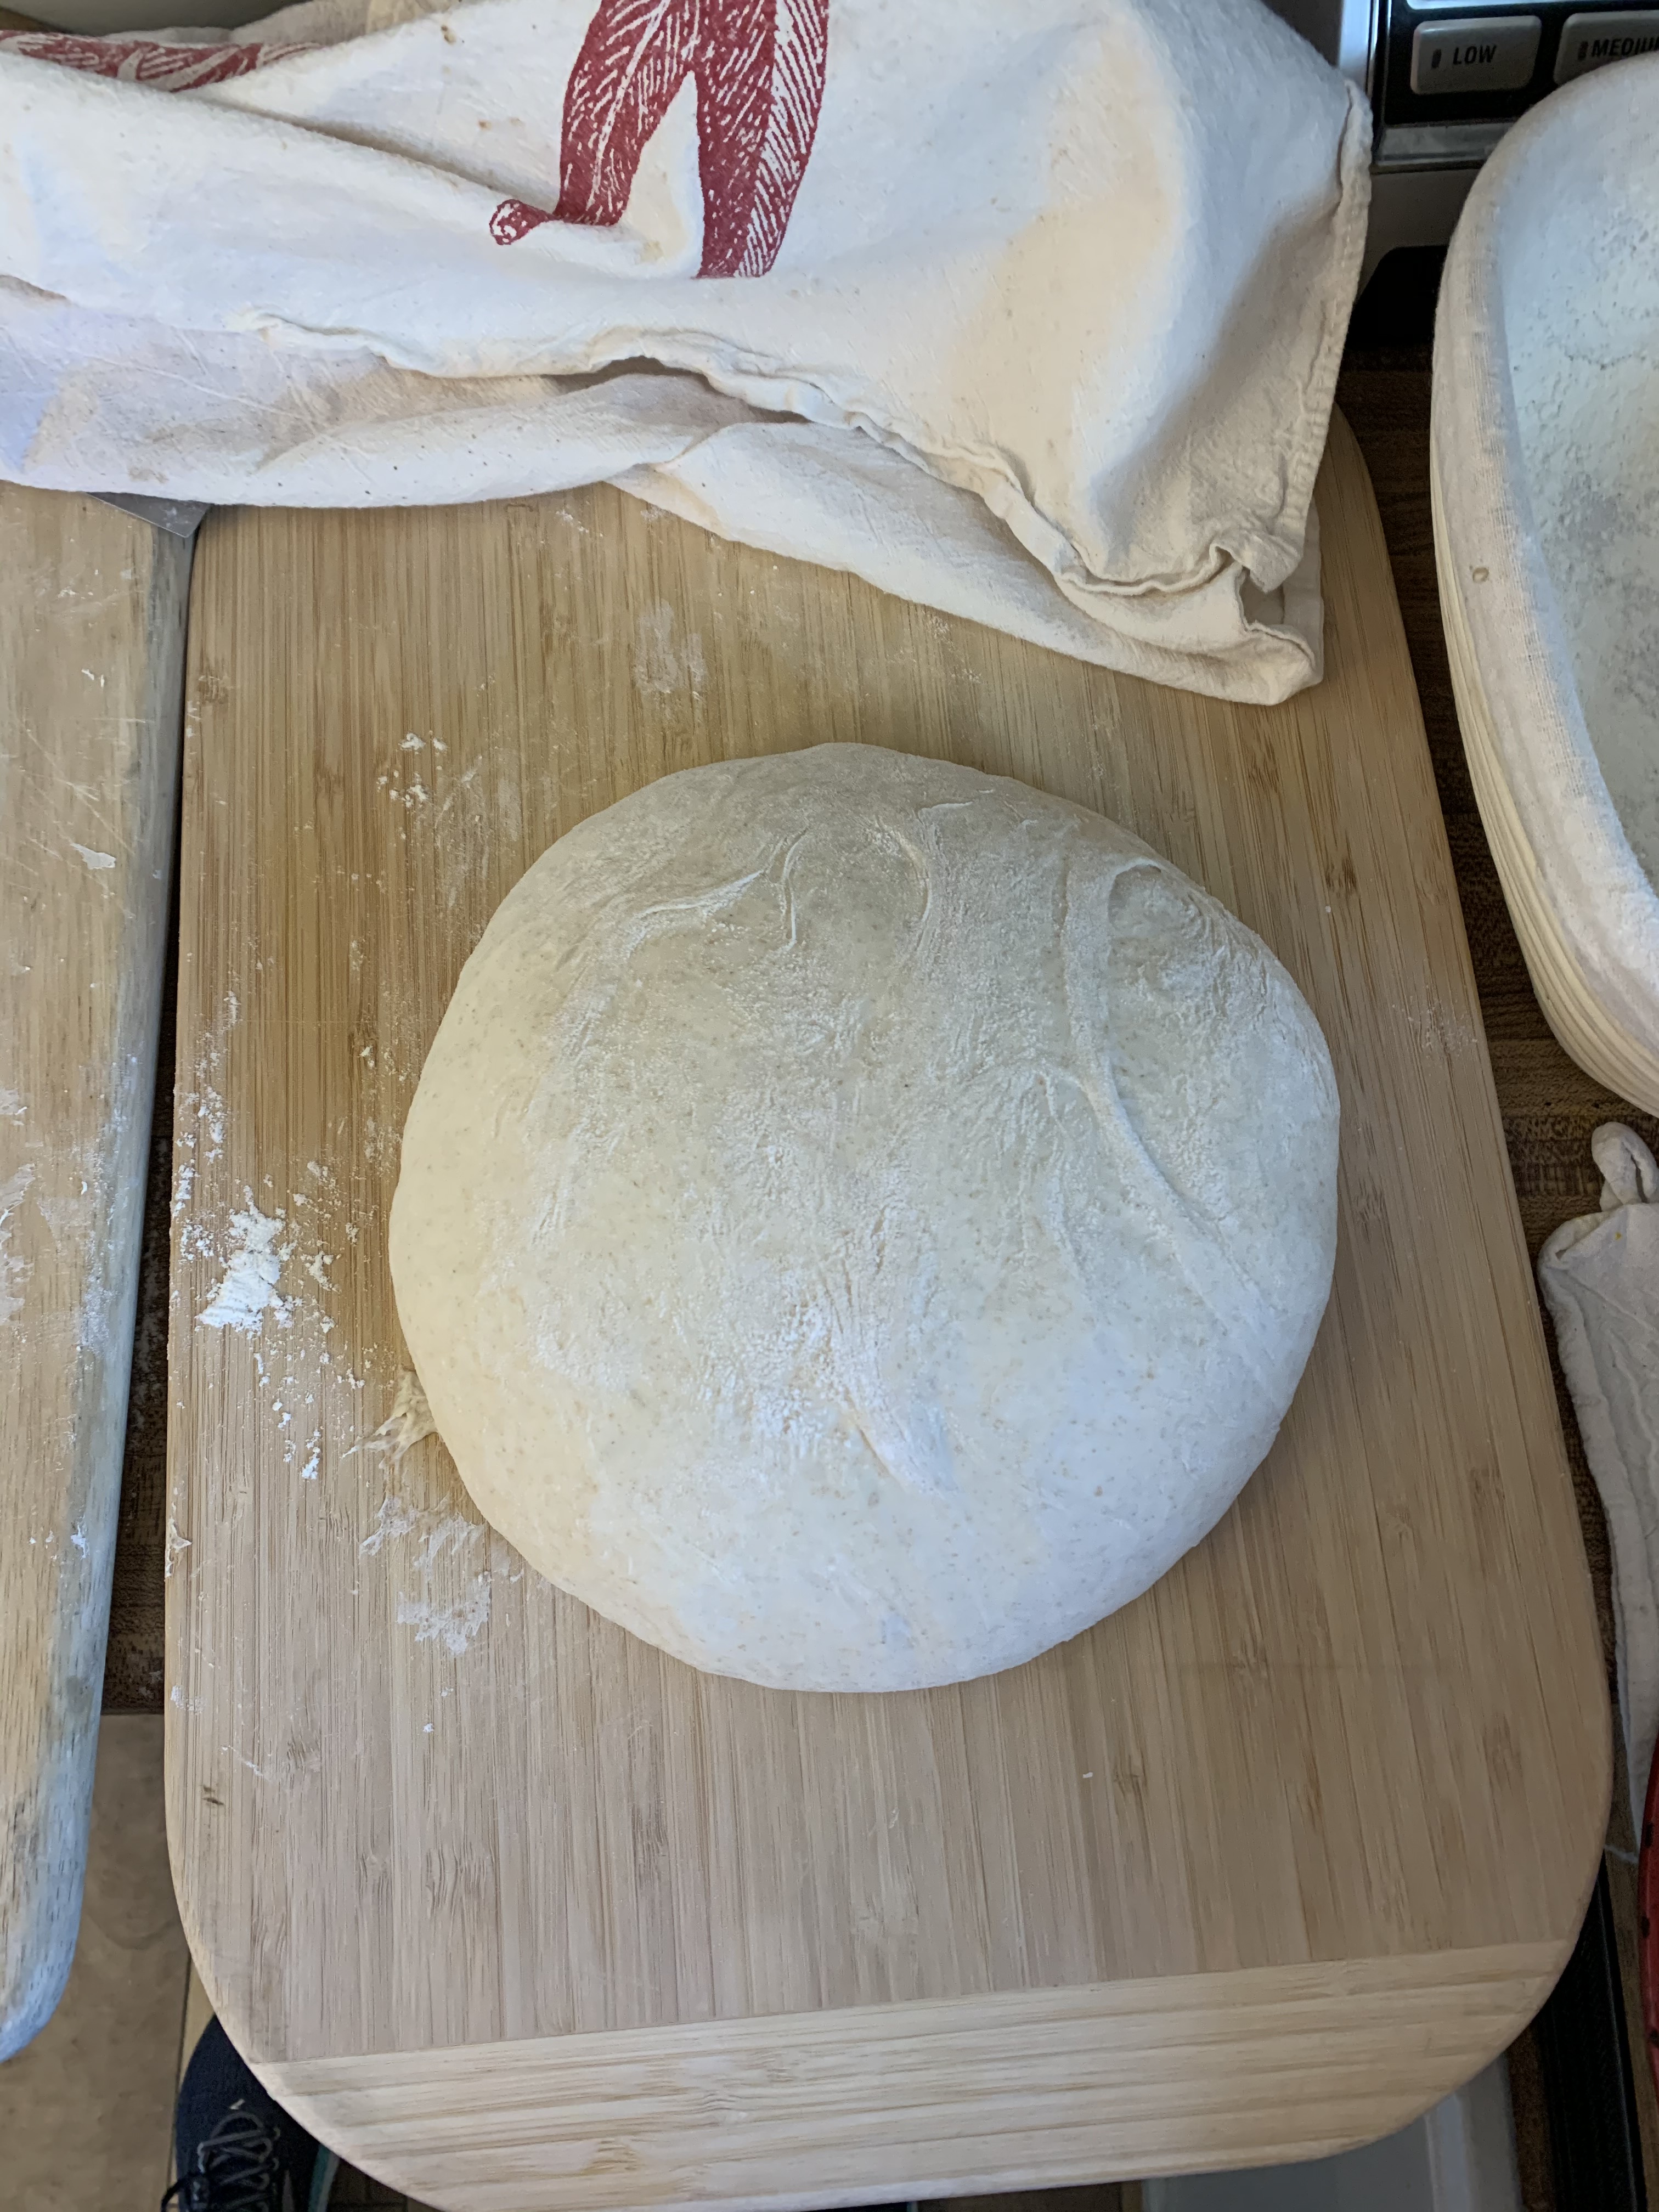
Let the dough rest for 30 minutes and it will spread out
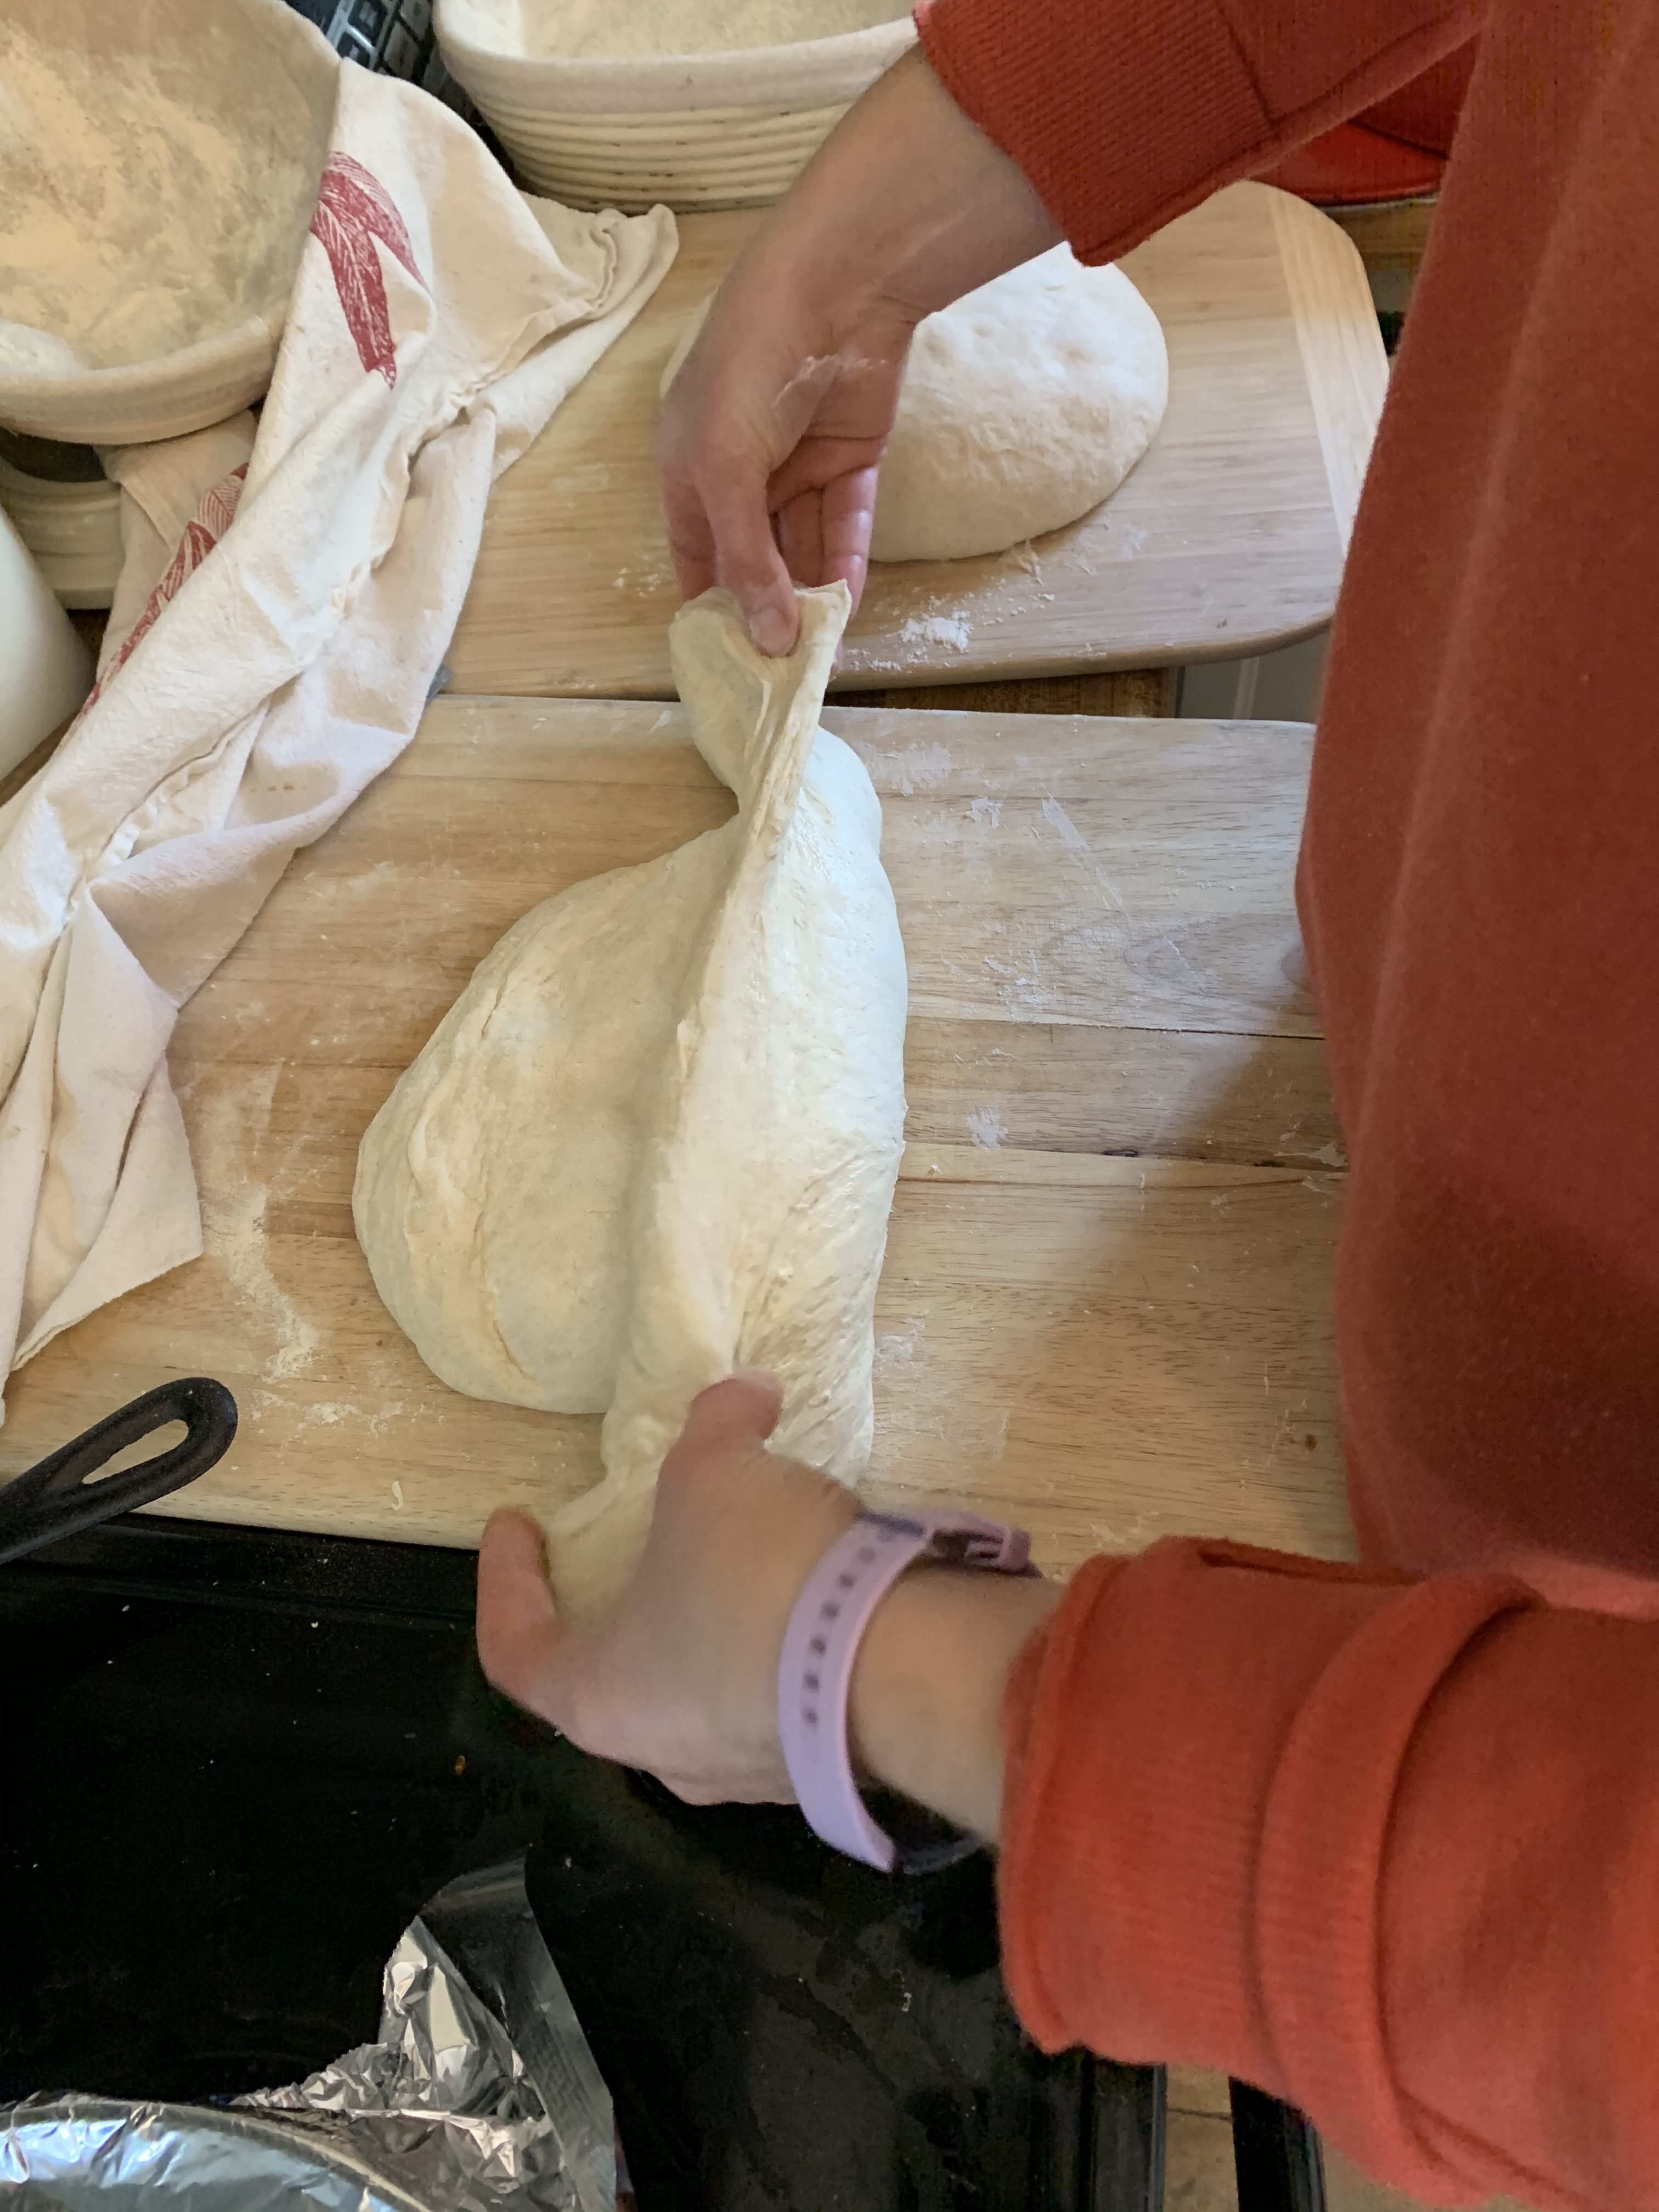
Finally time to shape the loaves! Grab the bottom of the dough and start to pull it towards you.
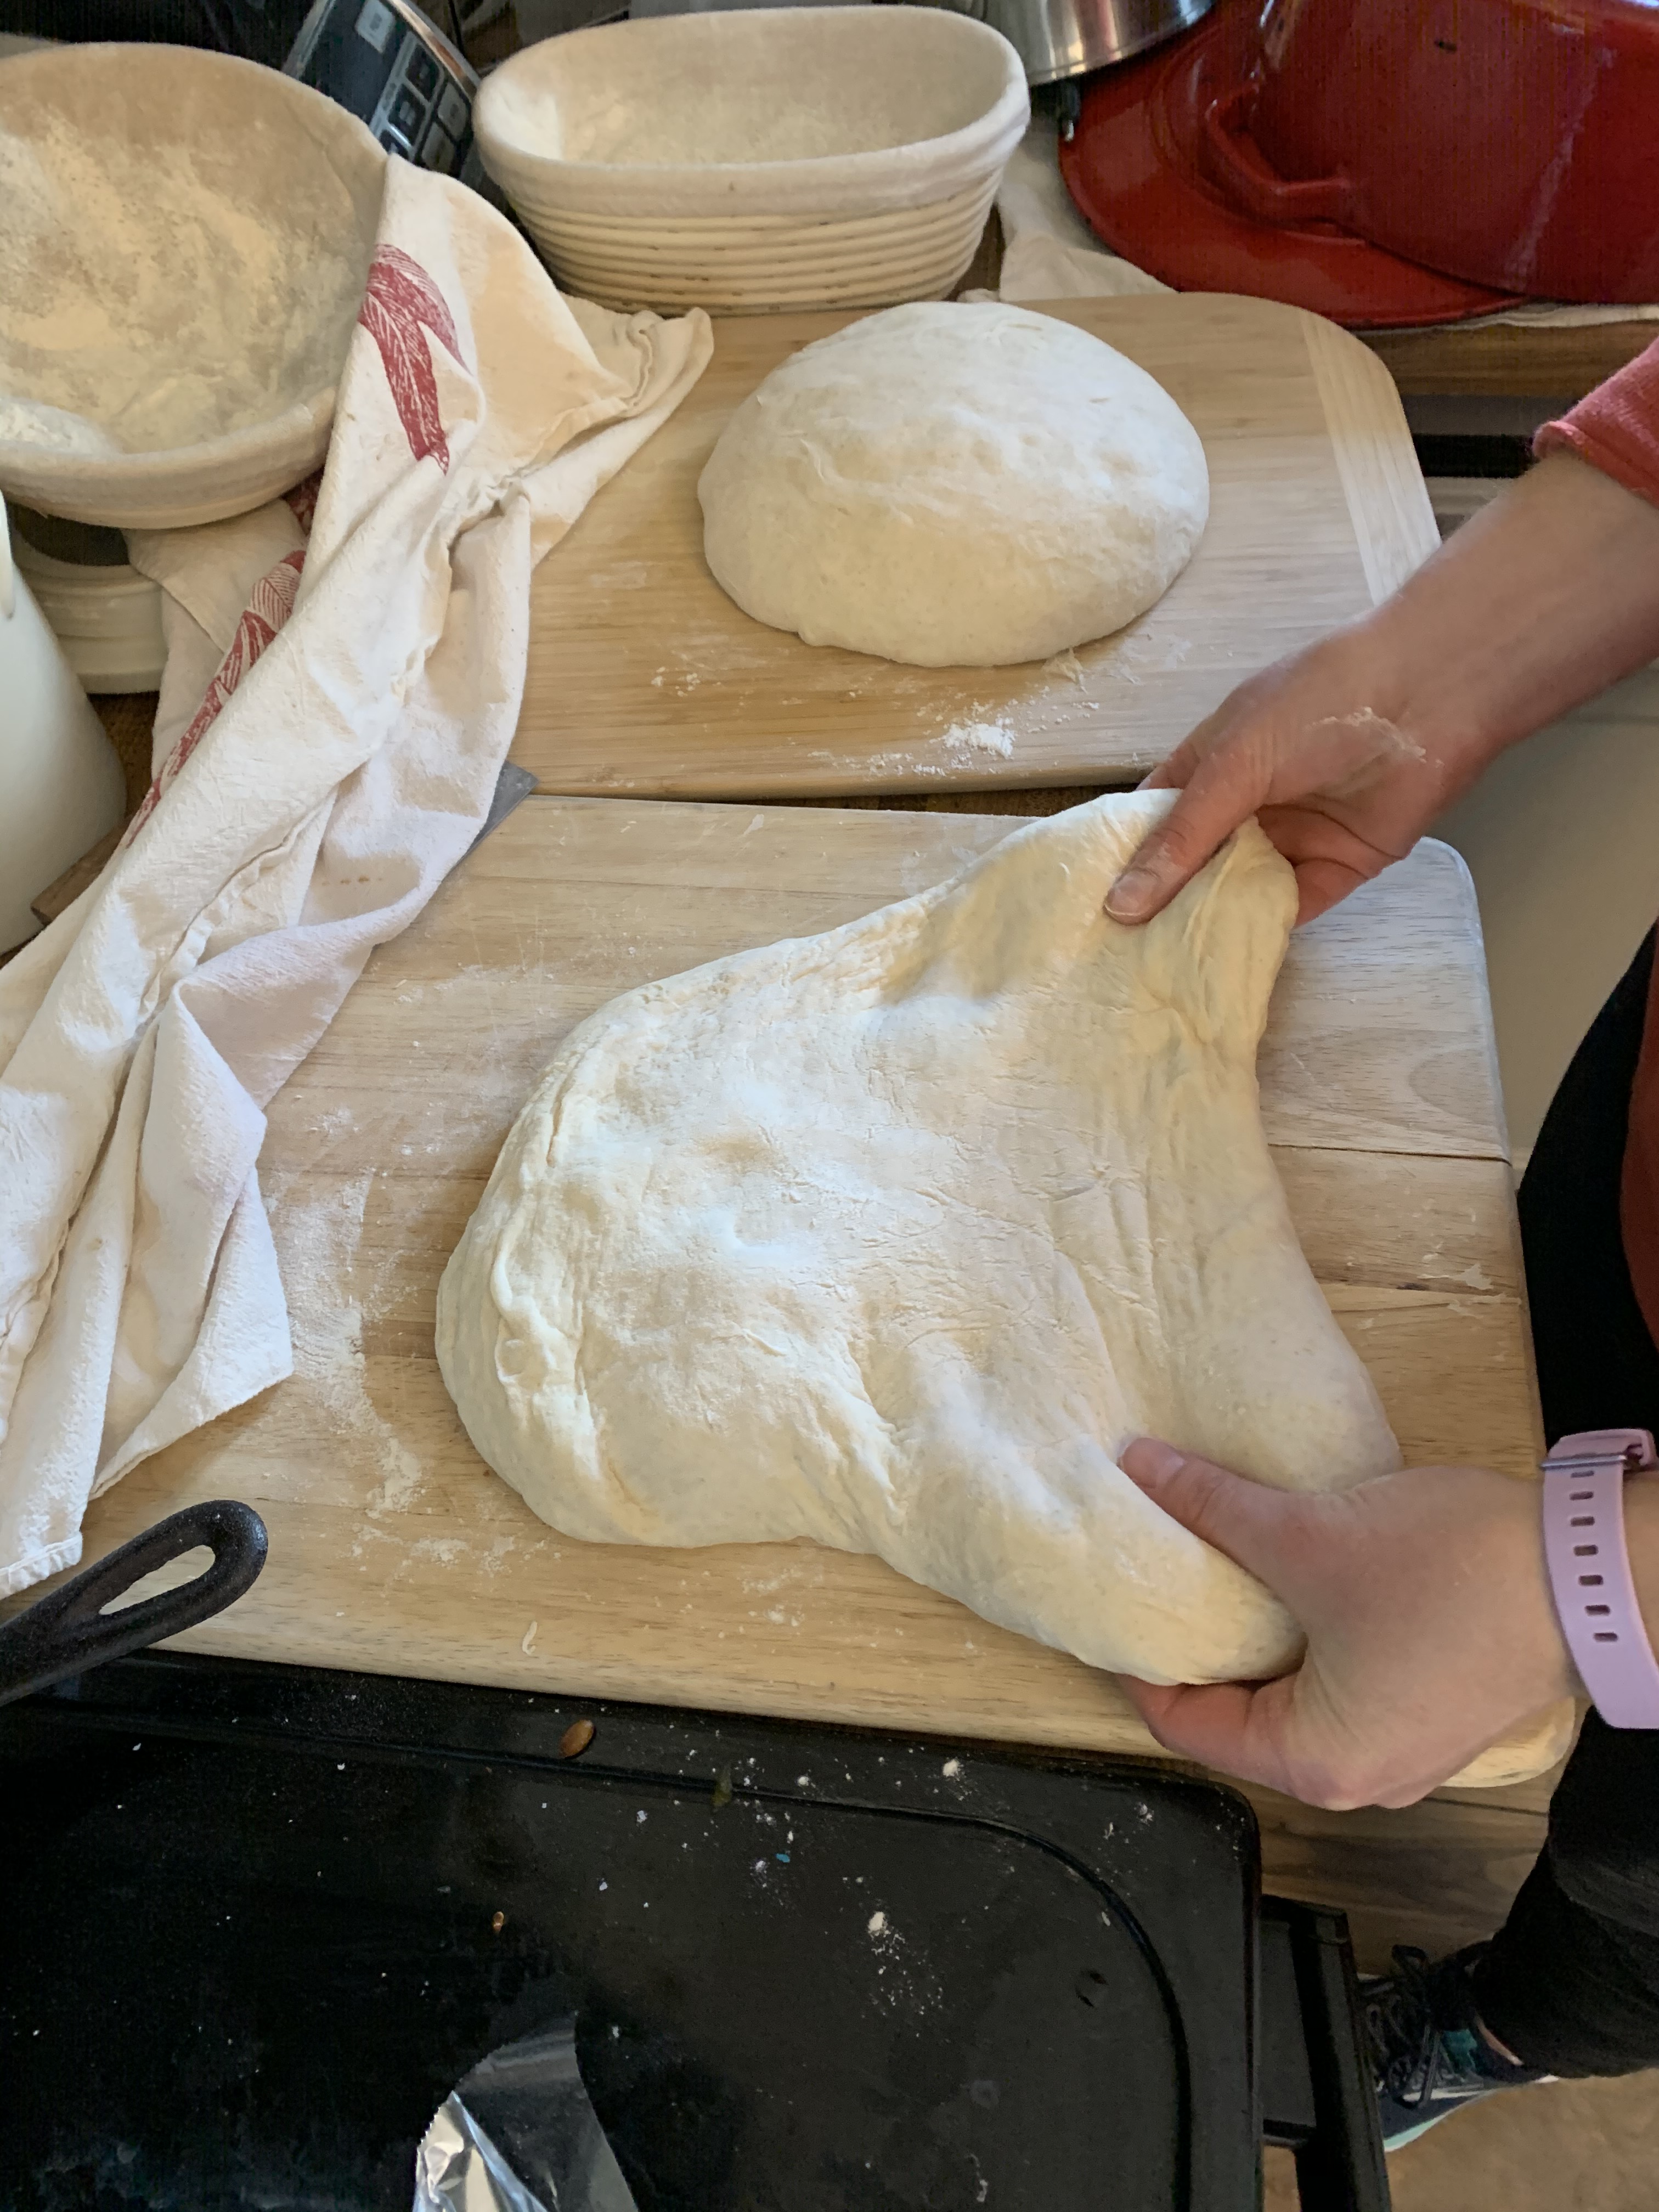
While pinching the dough, keep dragging it back towards you and up.

Then fold the dough over to the middle.

Pinch the right side of the dough and pull it to the right.

Pull it up and over to the middle and press it down into the center.

Pinch the left side of the dough, pull it out to the left, up and over, past the middle, and press it down. The dough will look like an envelope now.

Grab the top of the dough and stretch it away from you, then pull it up, and fold it over. It will look like a tube almost.
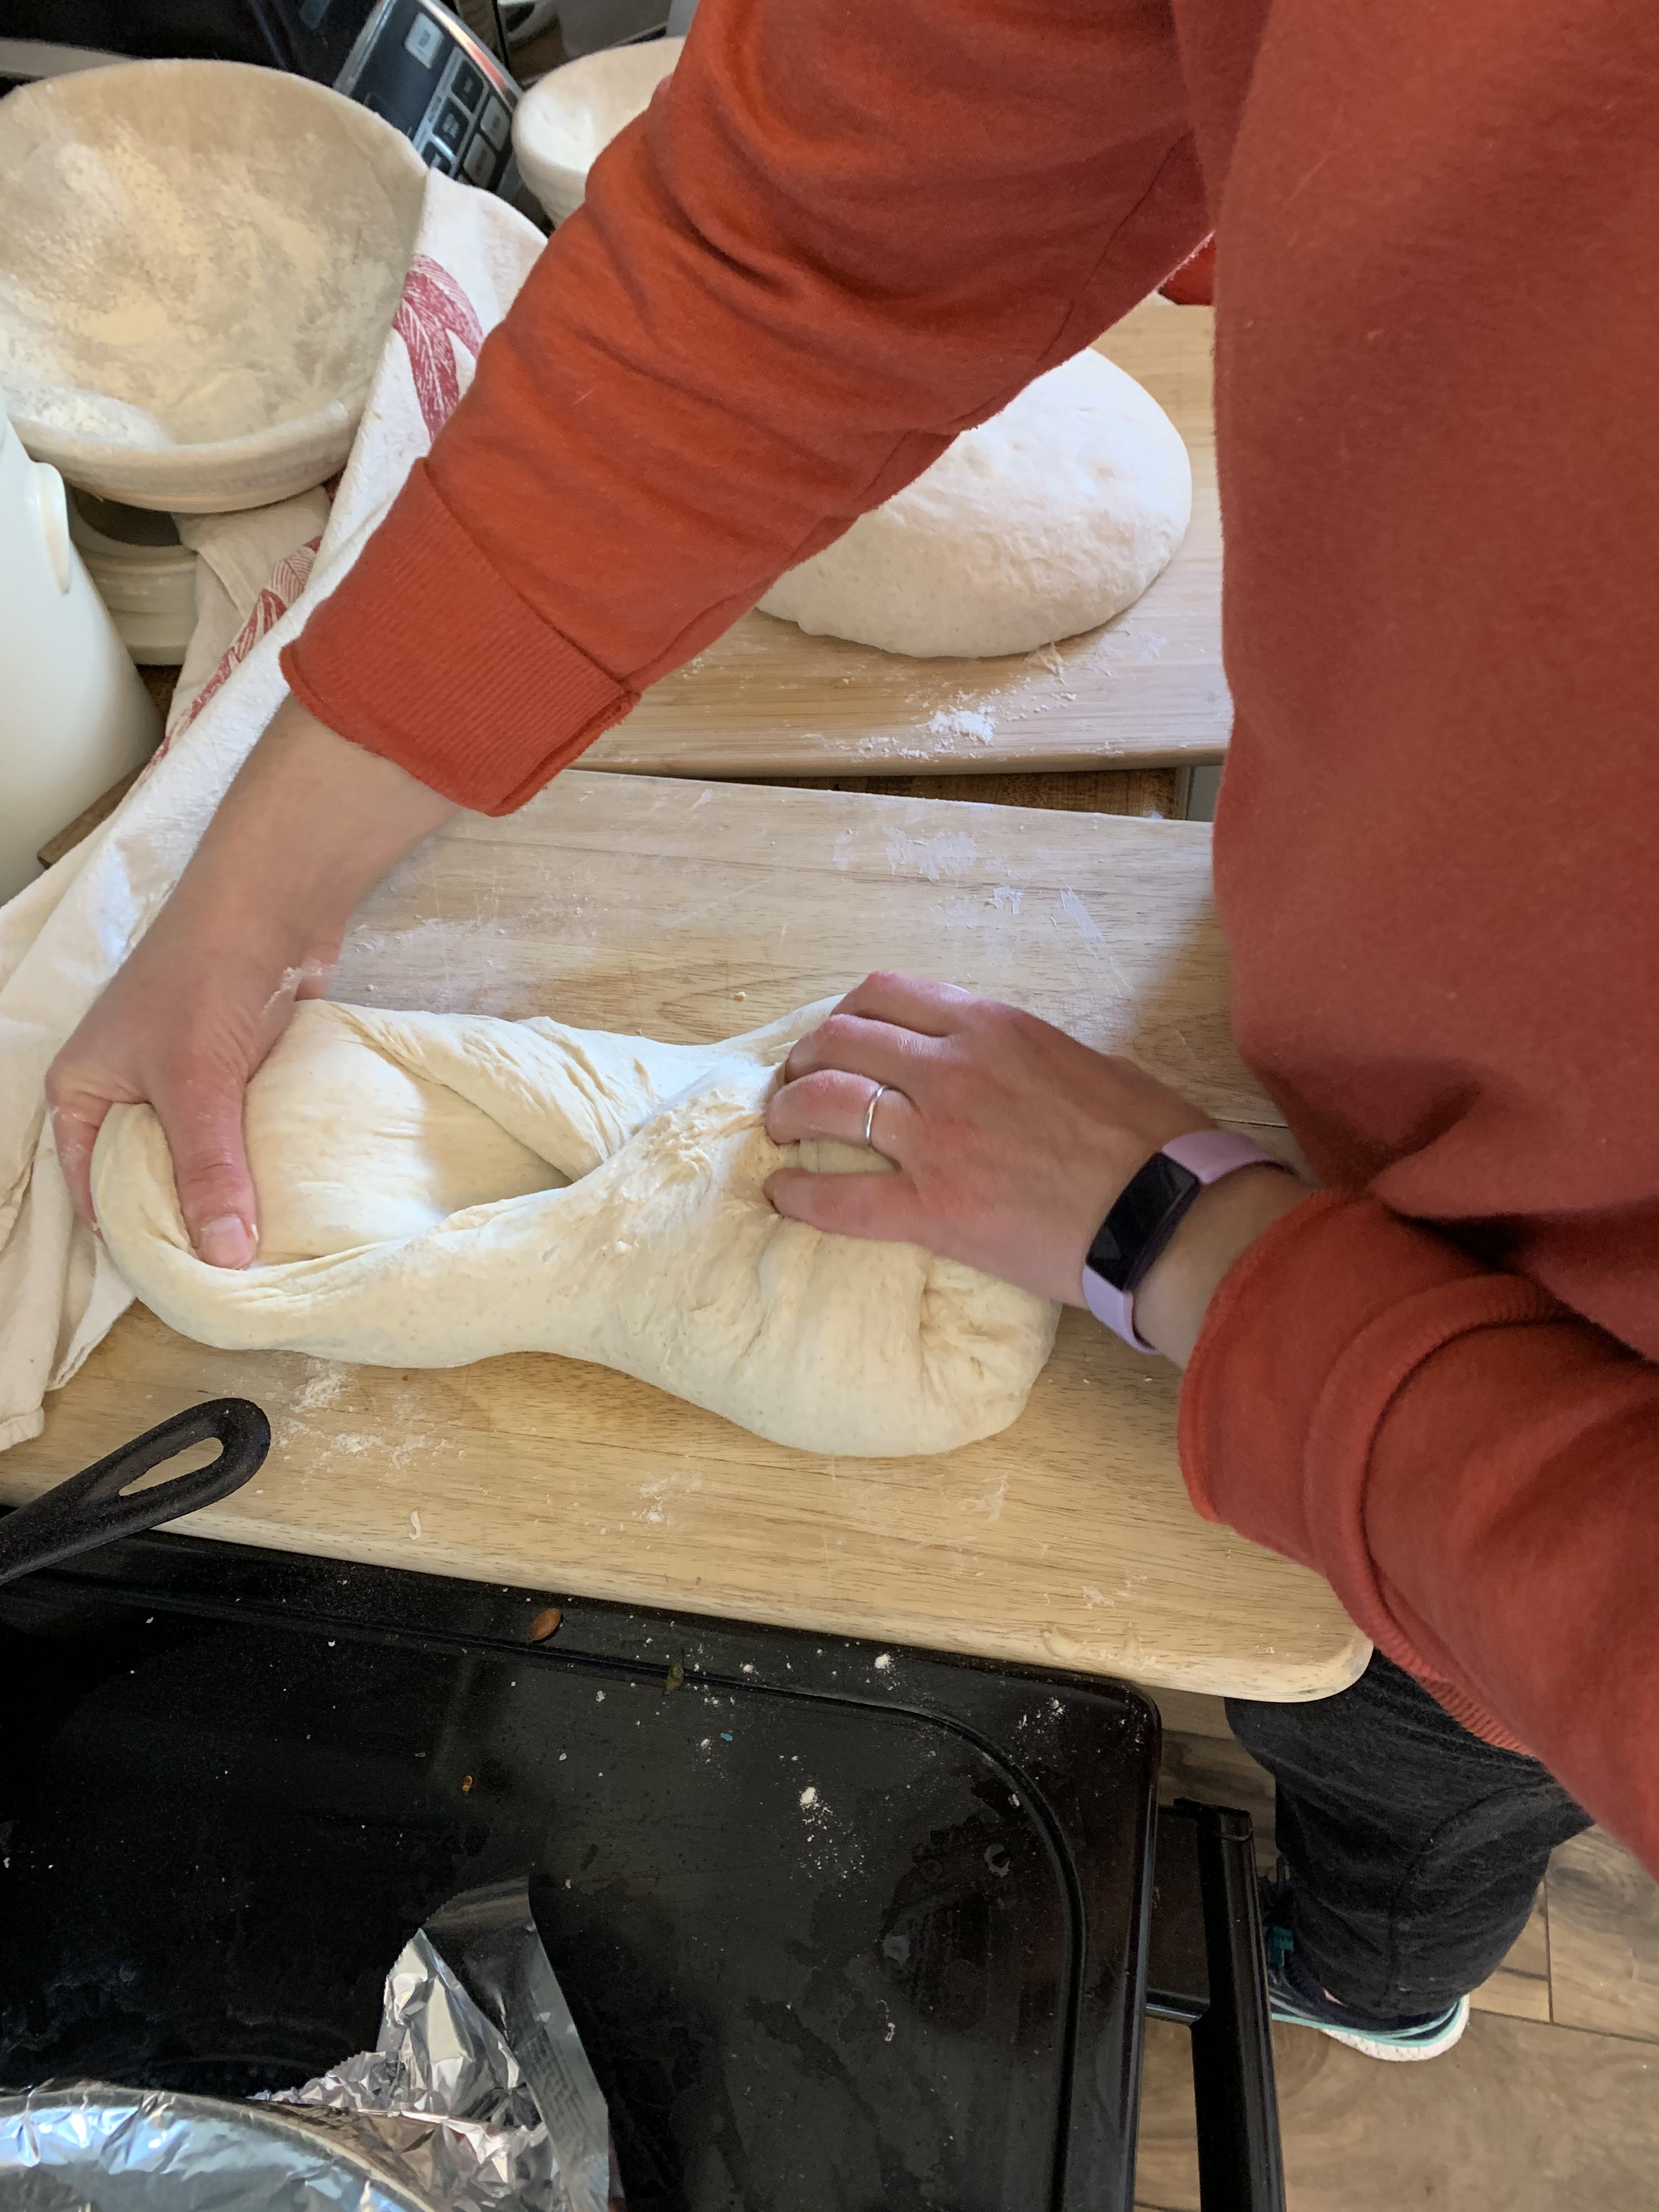
Pinch the dough down and then grab it, roll it over away from you and then roll it back towards you.

When you roll it back towards you, it will start to feel tight. Repeat this rolling towards yourself a few times.

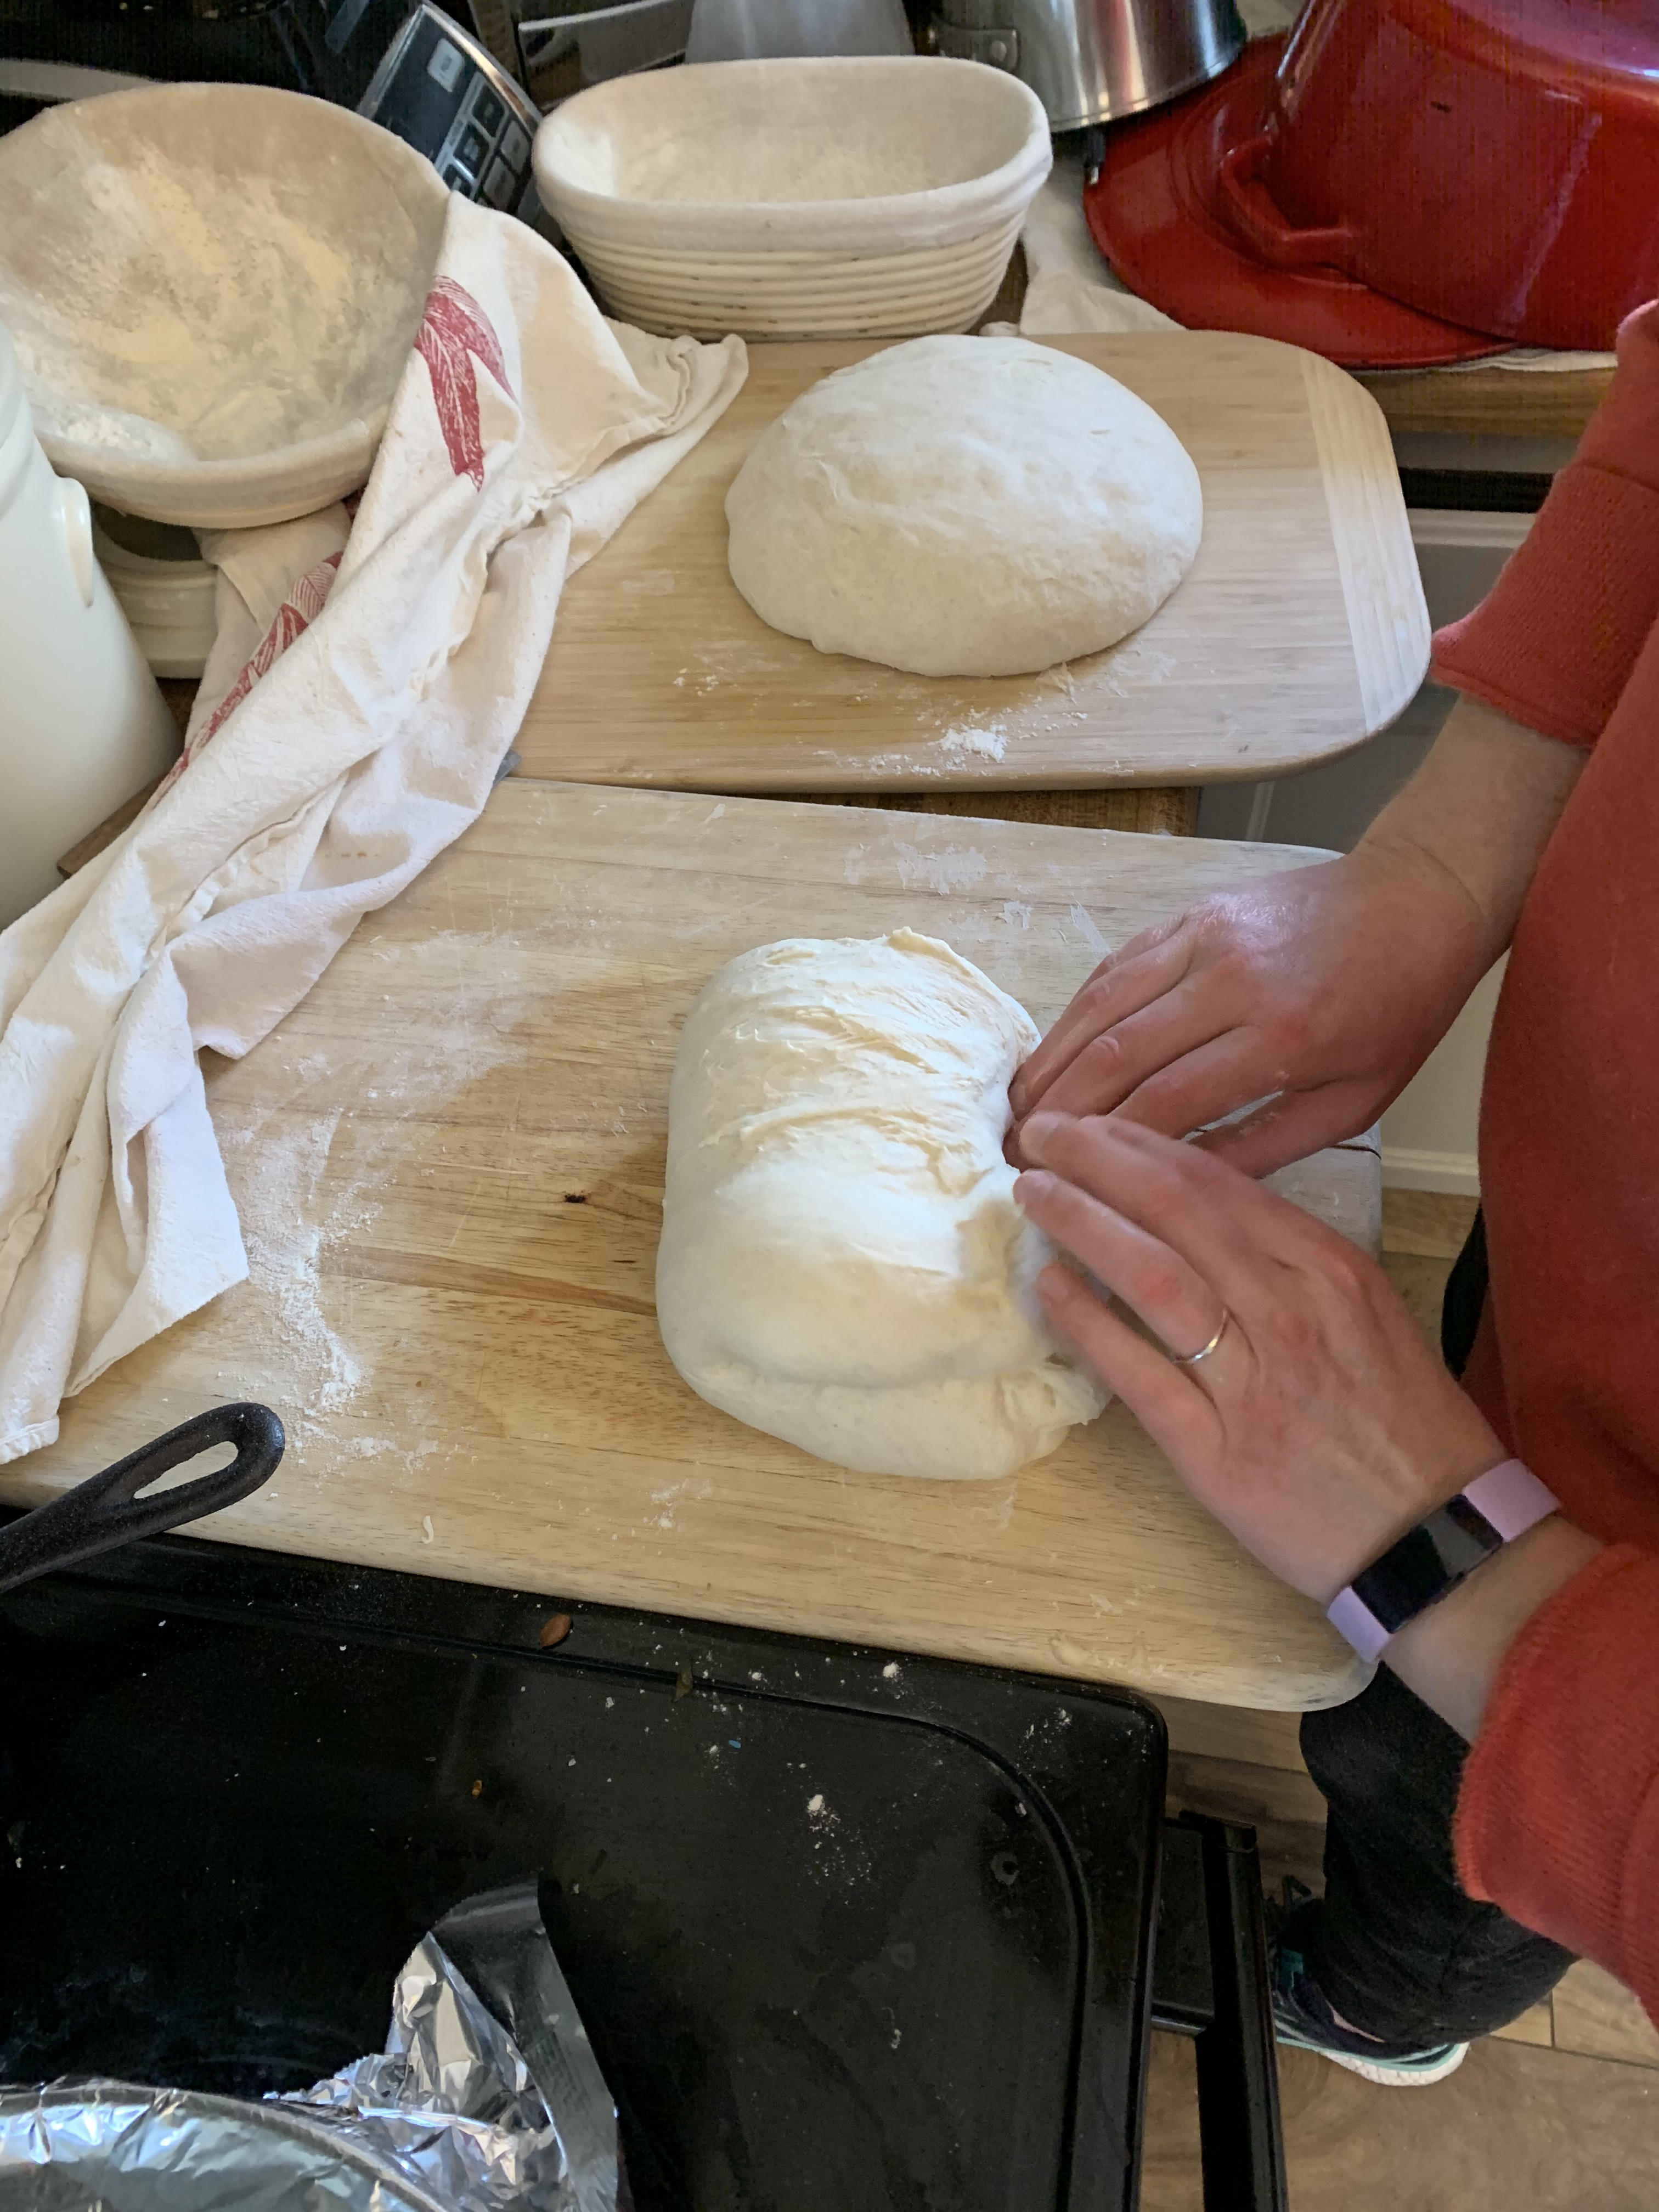
 Now pick up the dough and turn it in your hands until the seam side faces up. Transfer to an oval basket dusted with flour.
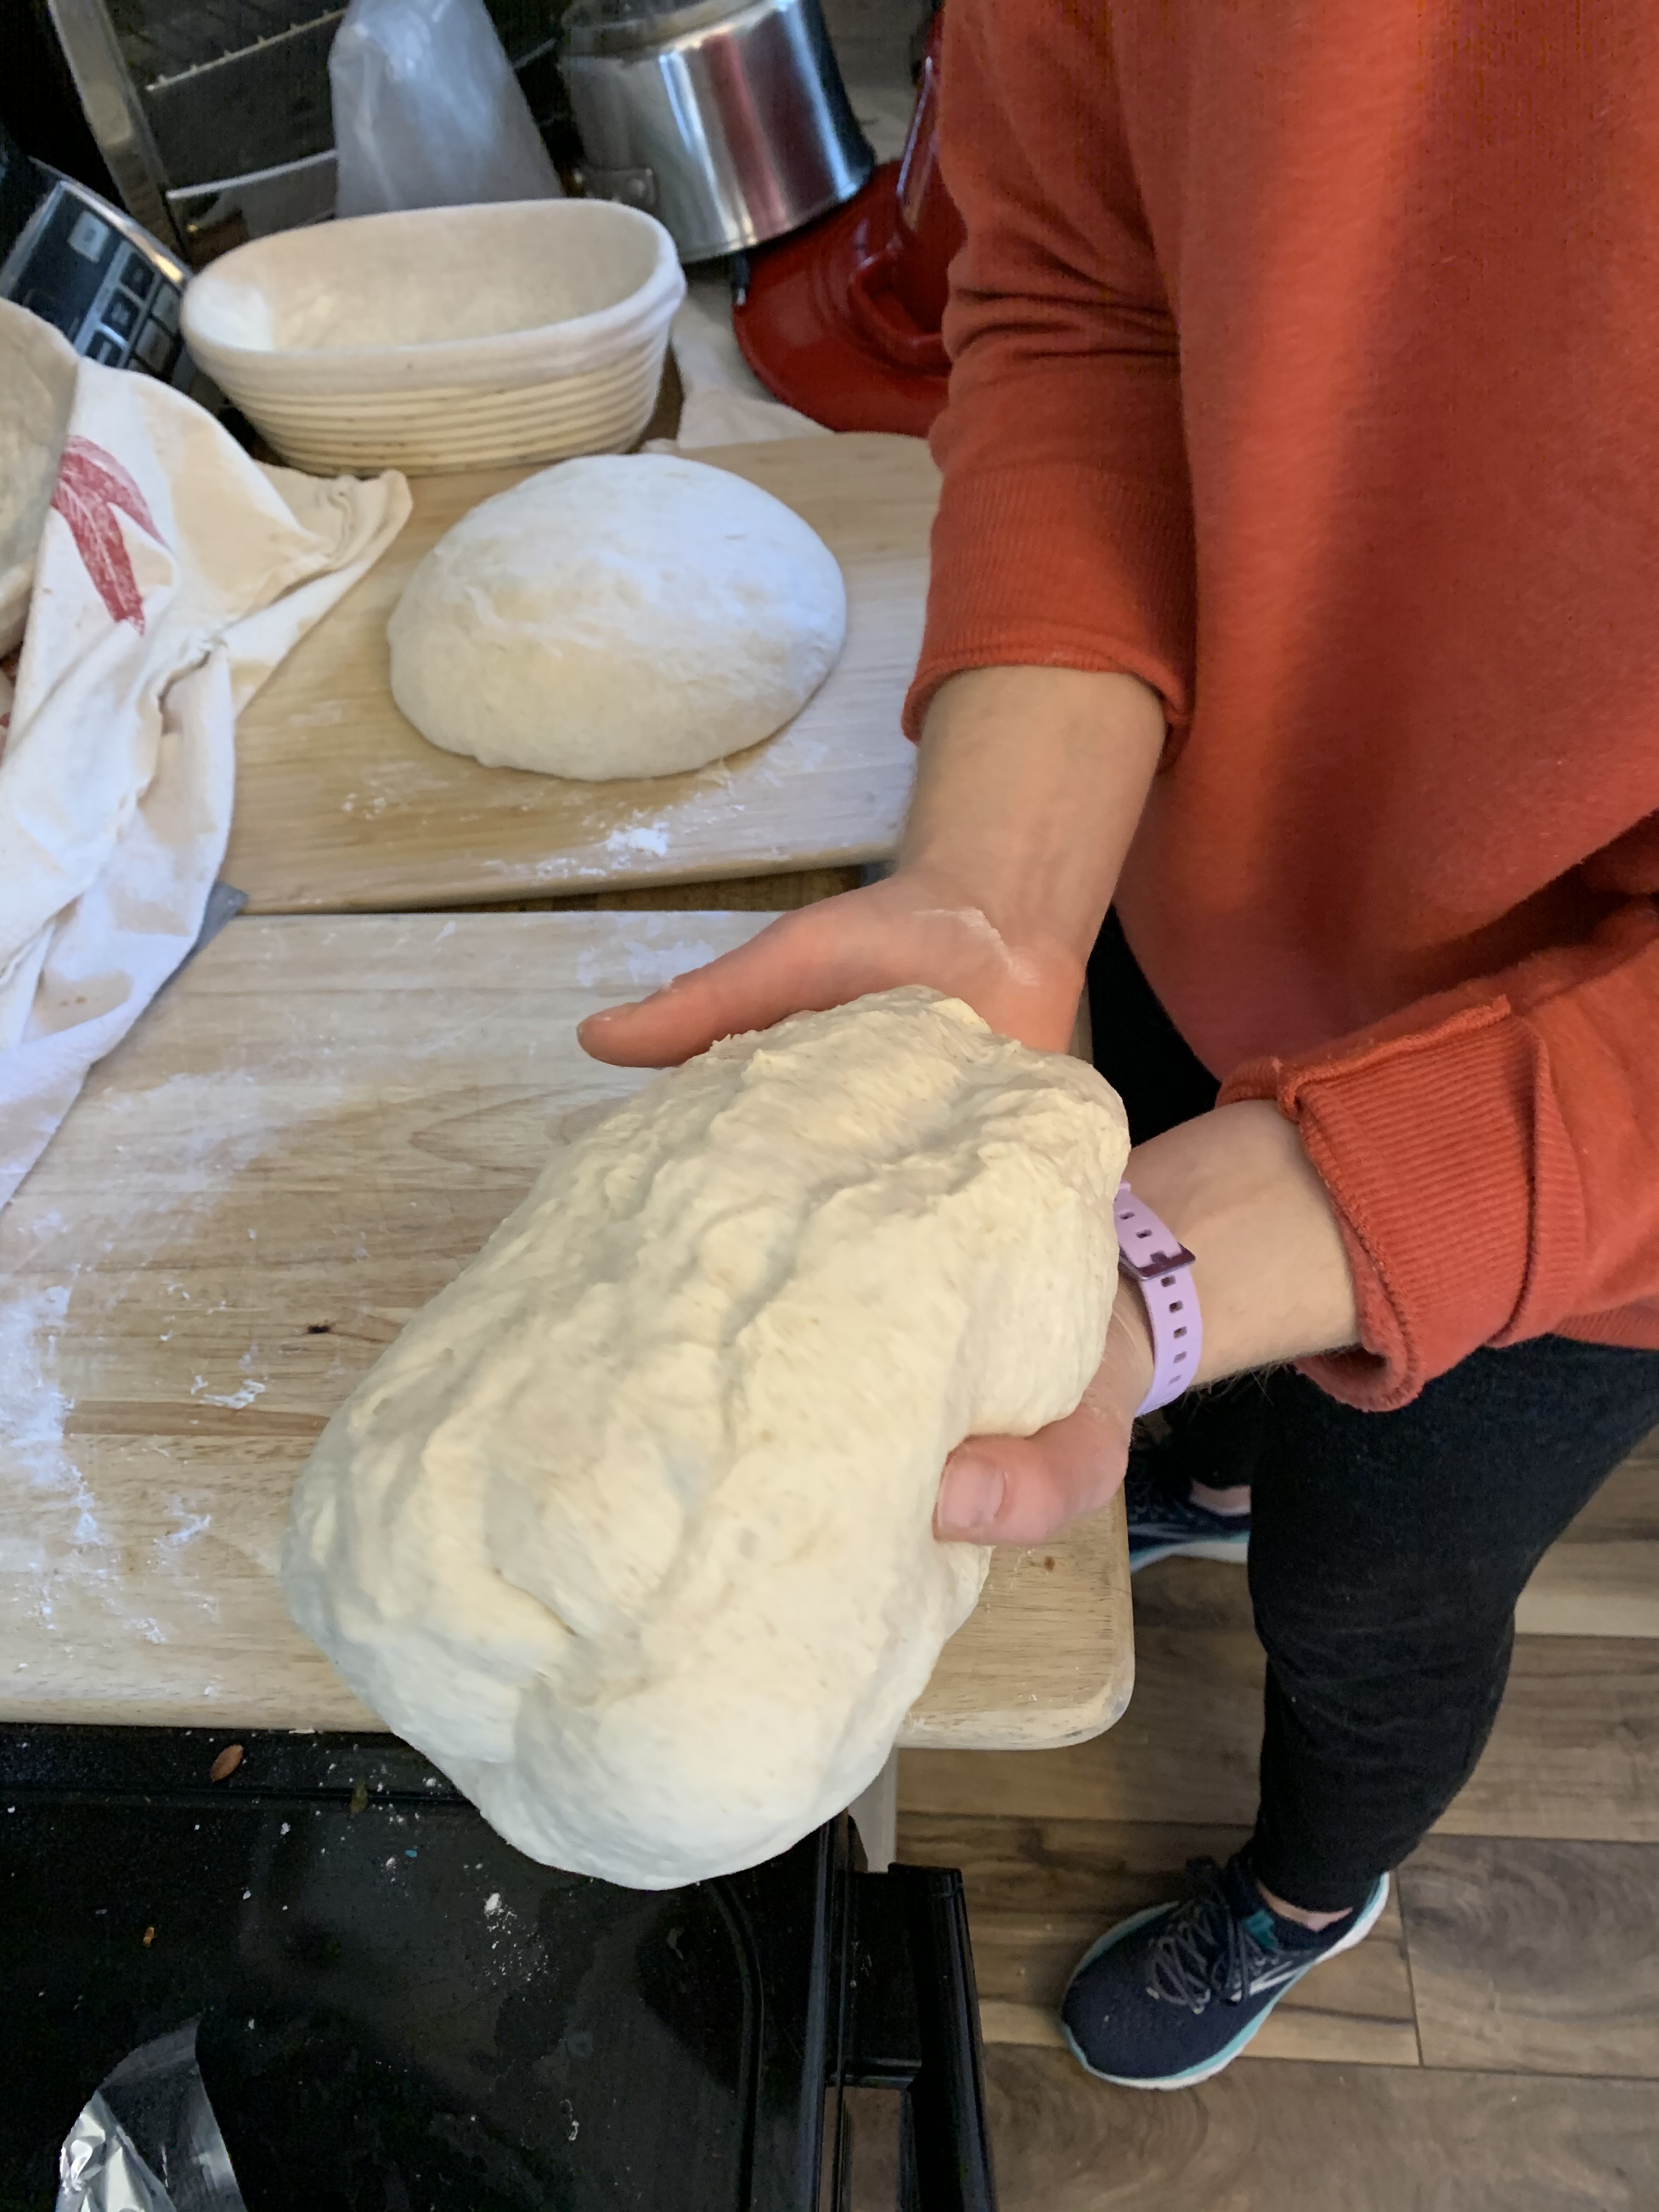
To shape the round loaf, all of the steps are the same until you get to the rolling the dough part. You will roll the dough once like before, and then slightly turn the dough and roll again, turn and roll again until the dough forms a round shape.


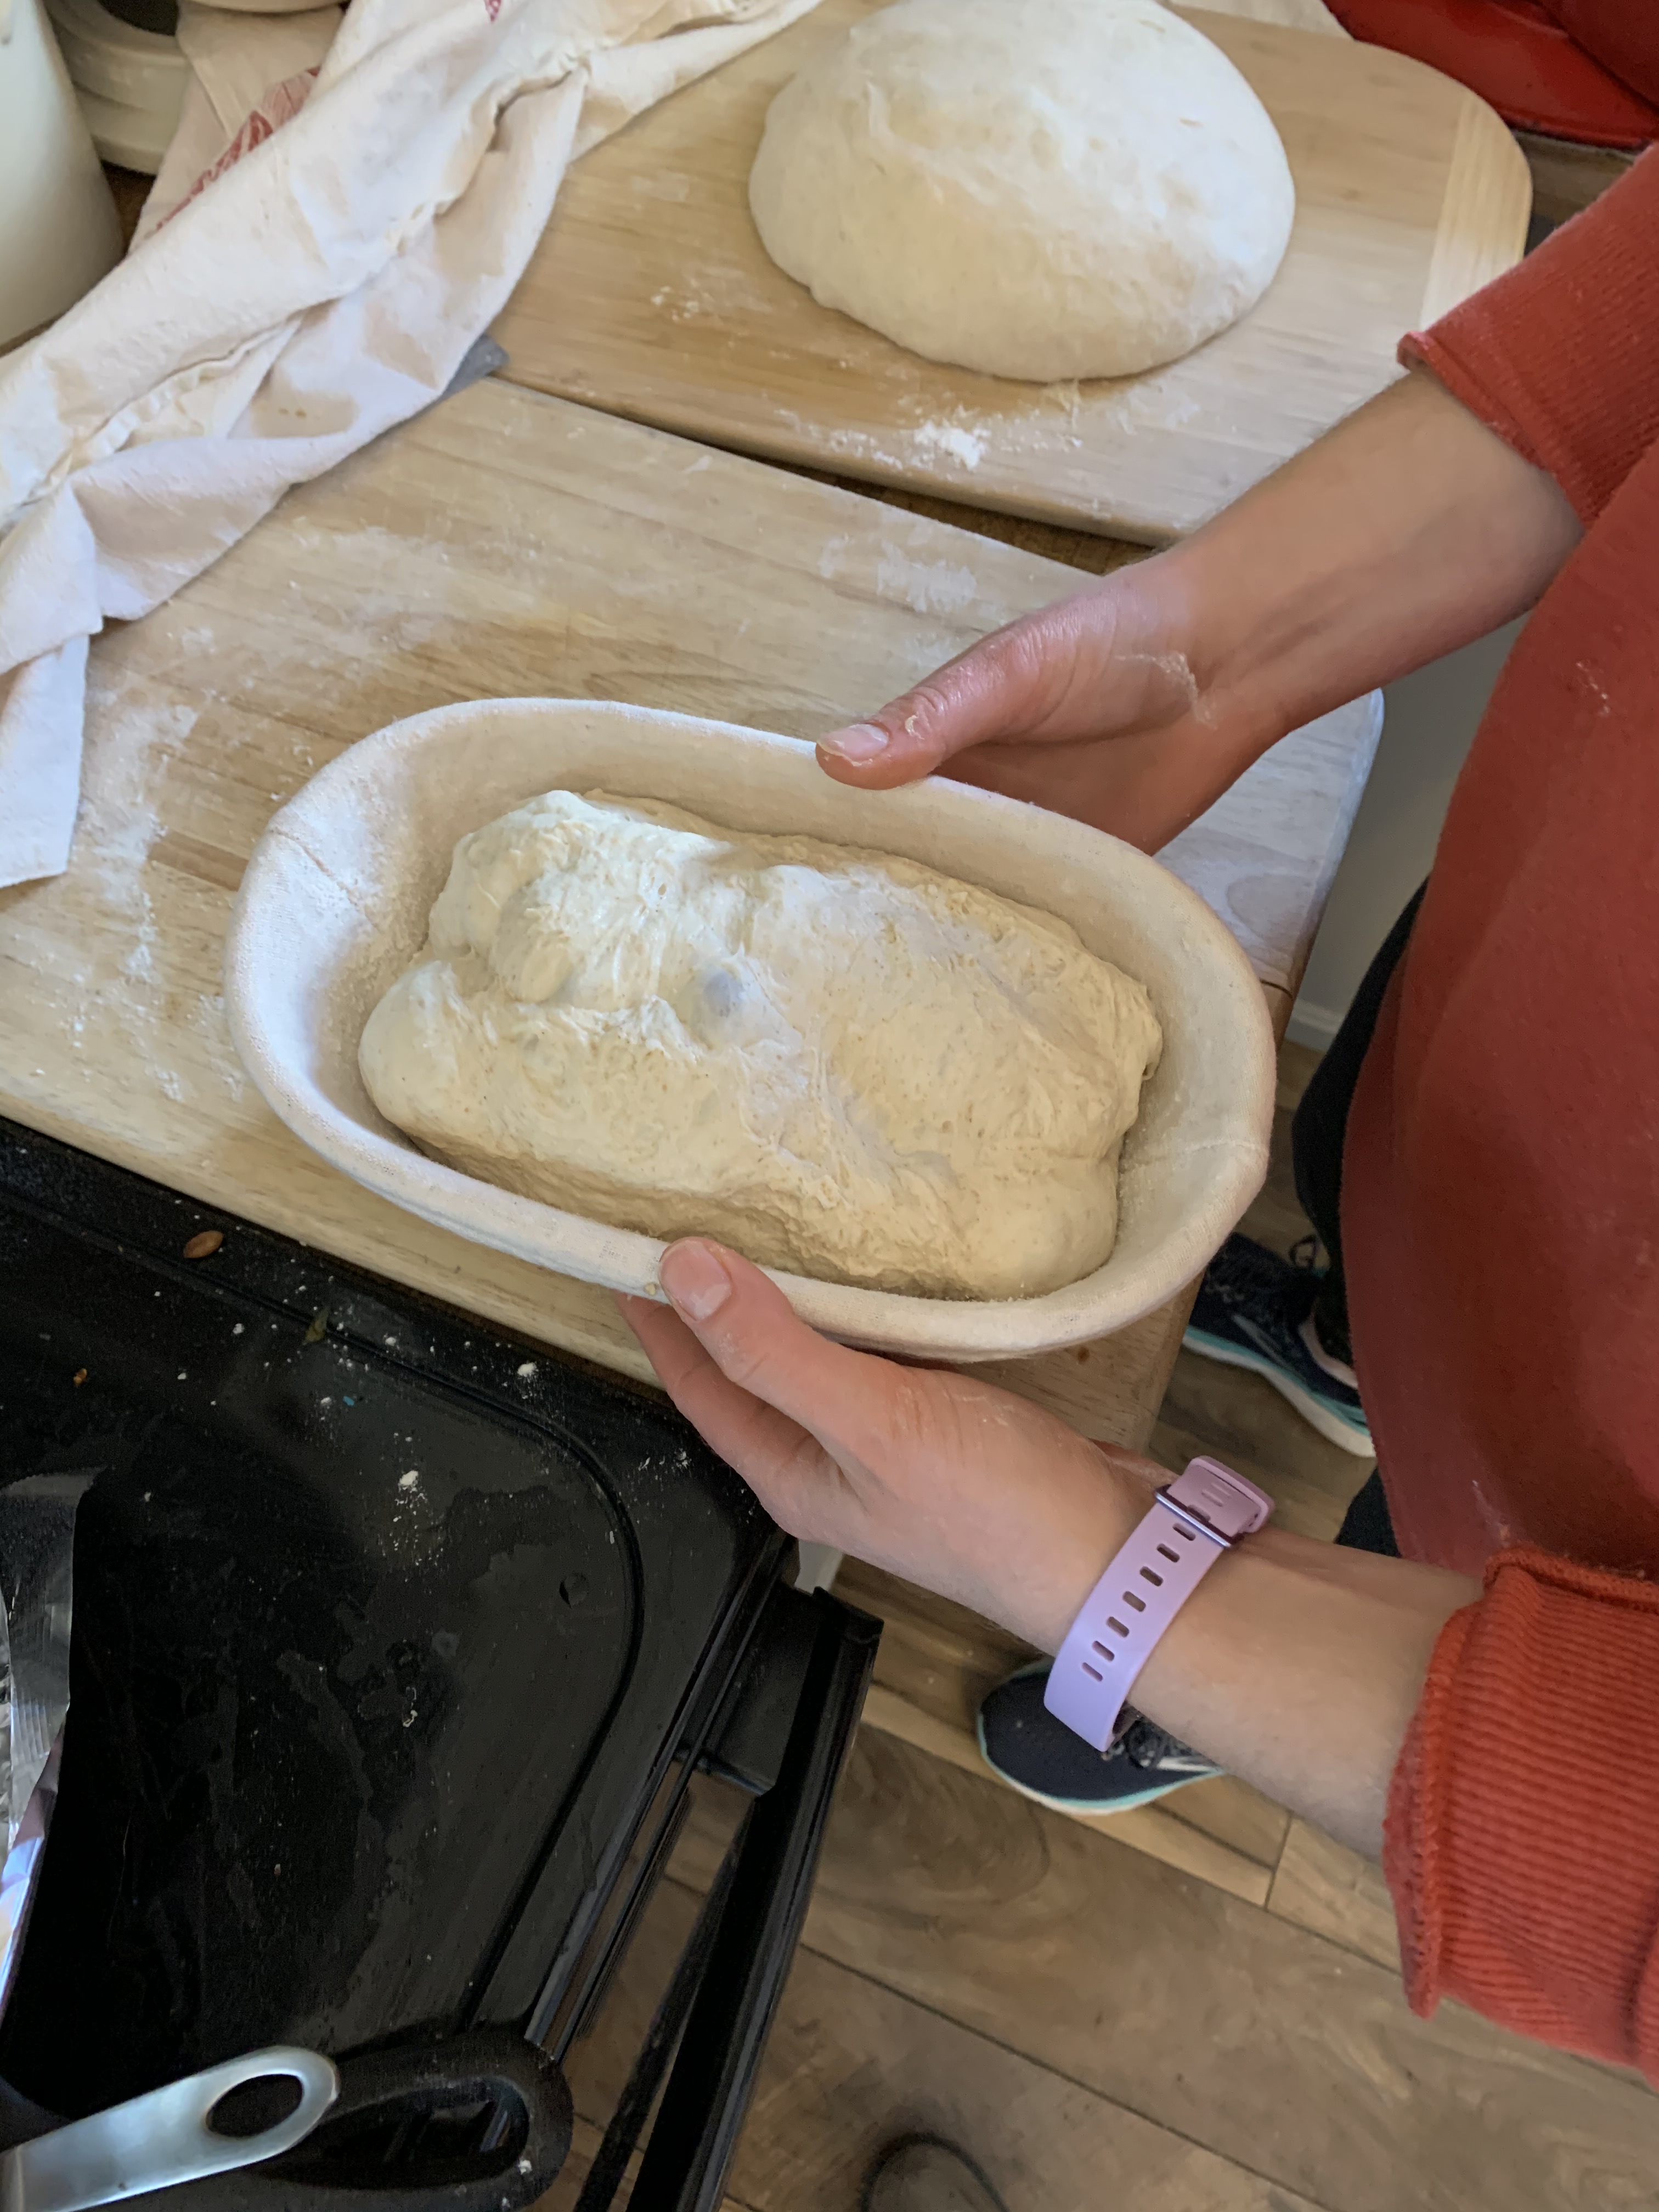
Place the dough into a floured round basket or a towel-lined bowl seam side up.

Place the bowls/baskets into plastic bags and tie them in a way that there is still air in the bag and it doesnt touch the top of the dough. Place these baskets in the fridge and let them incubate overnight.

I do one round and one oval loaf because I have one round and one oval Dutch oven for baking.
Baking the loaves
After an overnight incubation in the fridge, remove the loaves from the fridge. They will have grown a little bit, but not too much. Its finally time to bake! Place a round and an oval Dutch oven into the oven with the lids on and heat to 500F. When the oven pre-heats, continue heating the Dutch ovens for at least 30 minutes. If you only have one Dutch oven or are going to bake two round or two oval loaves, you will cook the loaves one after the other. If doing the latter, only remove one loaf from the fridge at a time.

Place a piece of parchment paper on a cutting board and place that on top of the basket, paper side first. Flip the basket and cutting boards over and remove the basket. If the cloth sticks to the dough, use more flour next time to dust the cloth. Use a lame, razor blade or a very sharp knife to score the loaves. Score the oval loaf right down the middle and the round loaf in a square. Cut the parchment paper to fit the loaf.
When the Dutch ovens have pre-heated for 30 minutes, open the oven and remove the Dutch ovens, but keep the lids in the oven. Working quickly so that the Dutch ovens dont cool down too much, place each loaf into their respective Dutch ovens, open the oven, top them with their lids, and return them to the oven. Immediately reduce the temperature to 450F and bake with the lid on for 20 minutes. After 20 minutes, remove the lids from the Dutch ovens. Continue baking without the lids on for 25-30 minutes.
Remove the Dutch ovens containing the loaves from the oven, take the bread out and let it cool for 1 hour on a wire rack. If baking loaves back to back, return the Dutch oven to the oven and heat back to 500F. Heat the Dutch oven again for 30 minutes. Bake the second loaf just like the previous one.
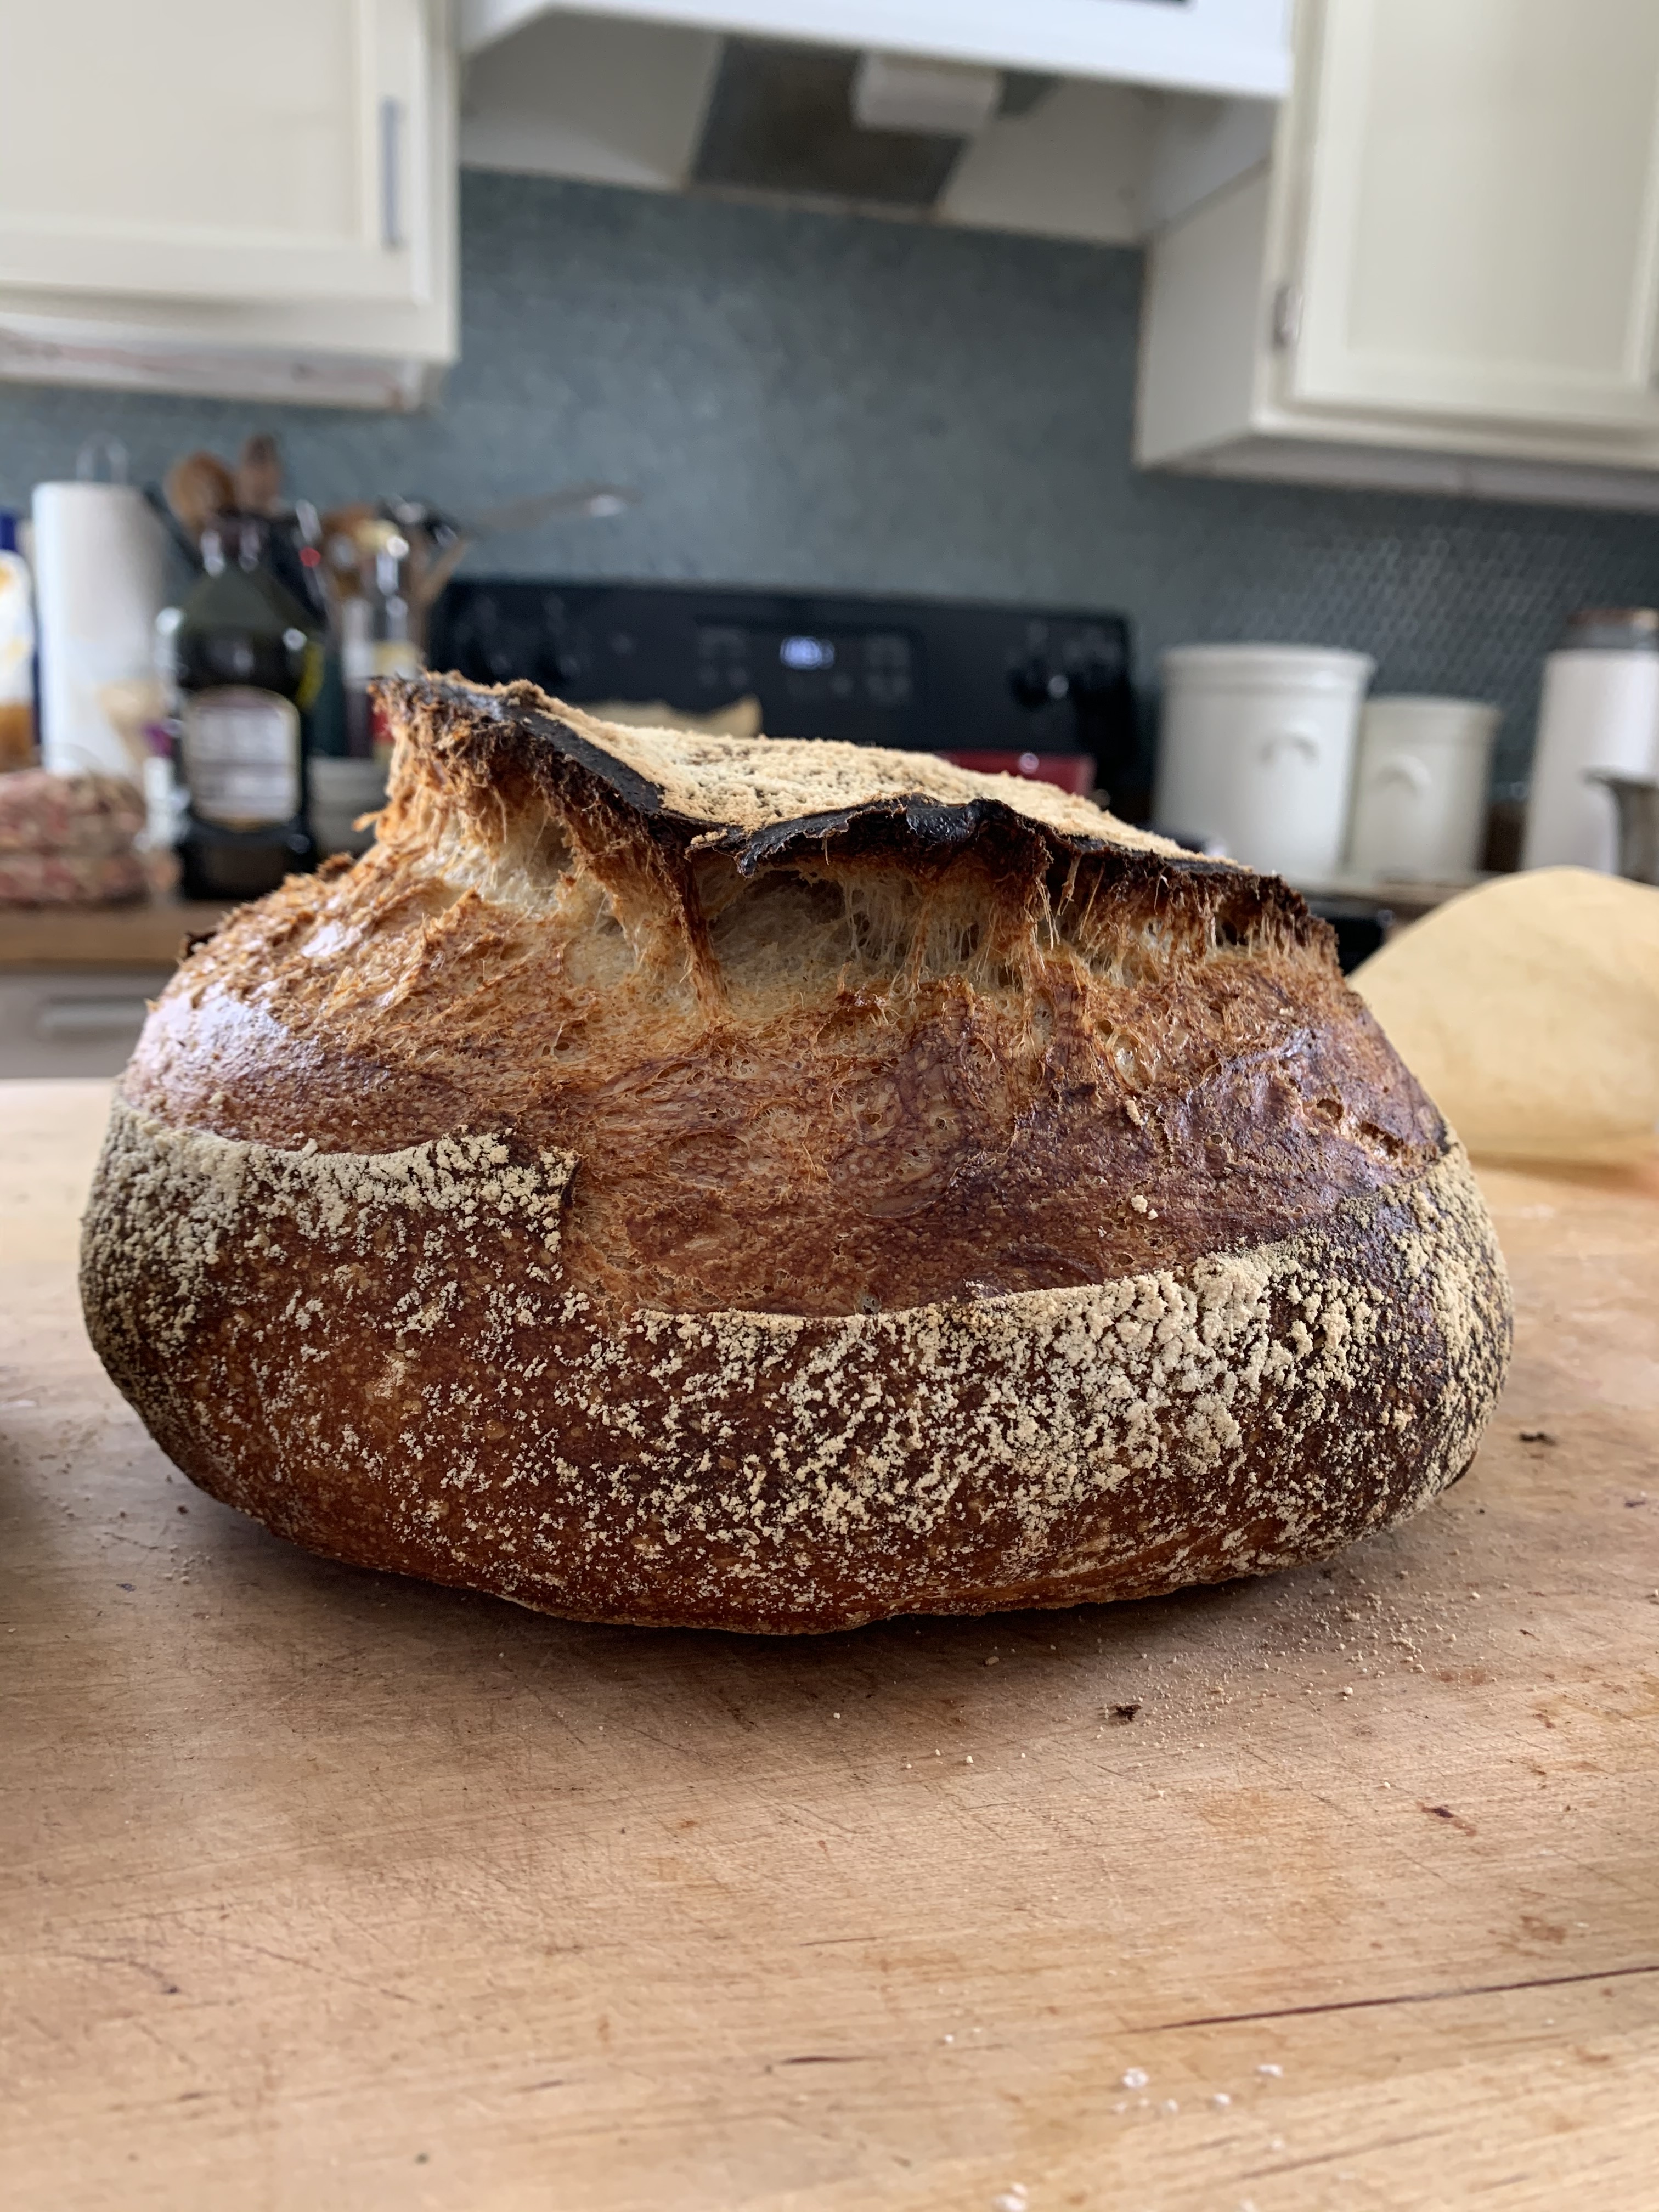
While the bread is cooling, listen to it and you will hear a light crackling sound. The song of the bread as the author of Tartine said. Flip the bread over and knock on the bottom. It should sound hollow, which is how you know the bread is cooked.
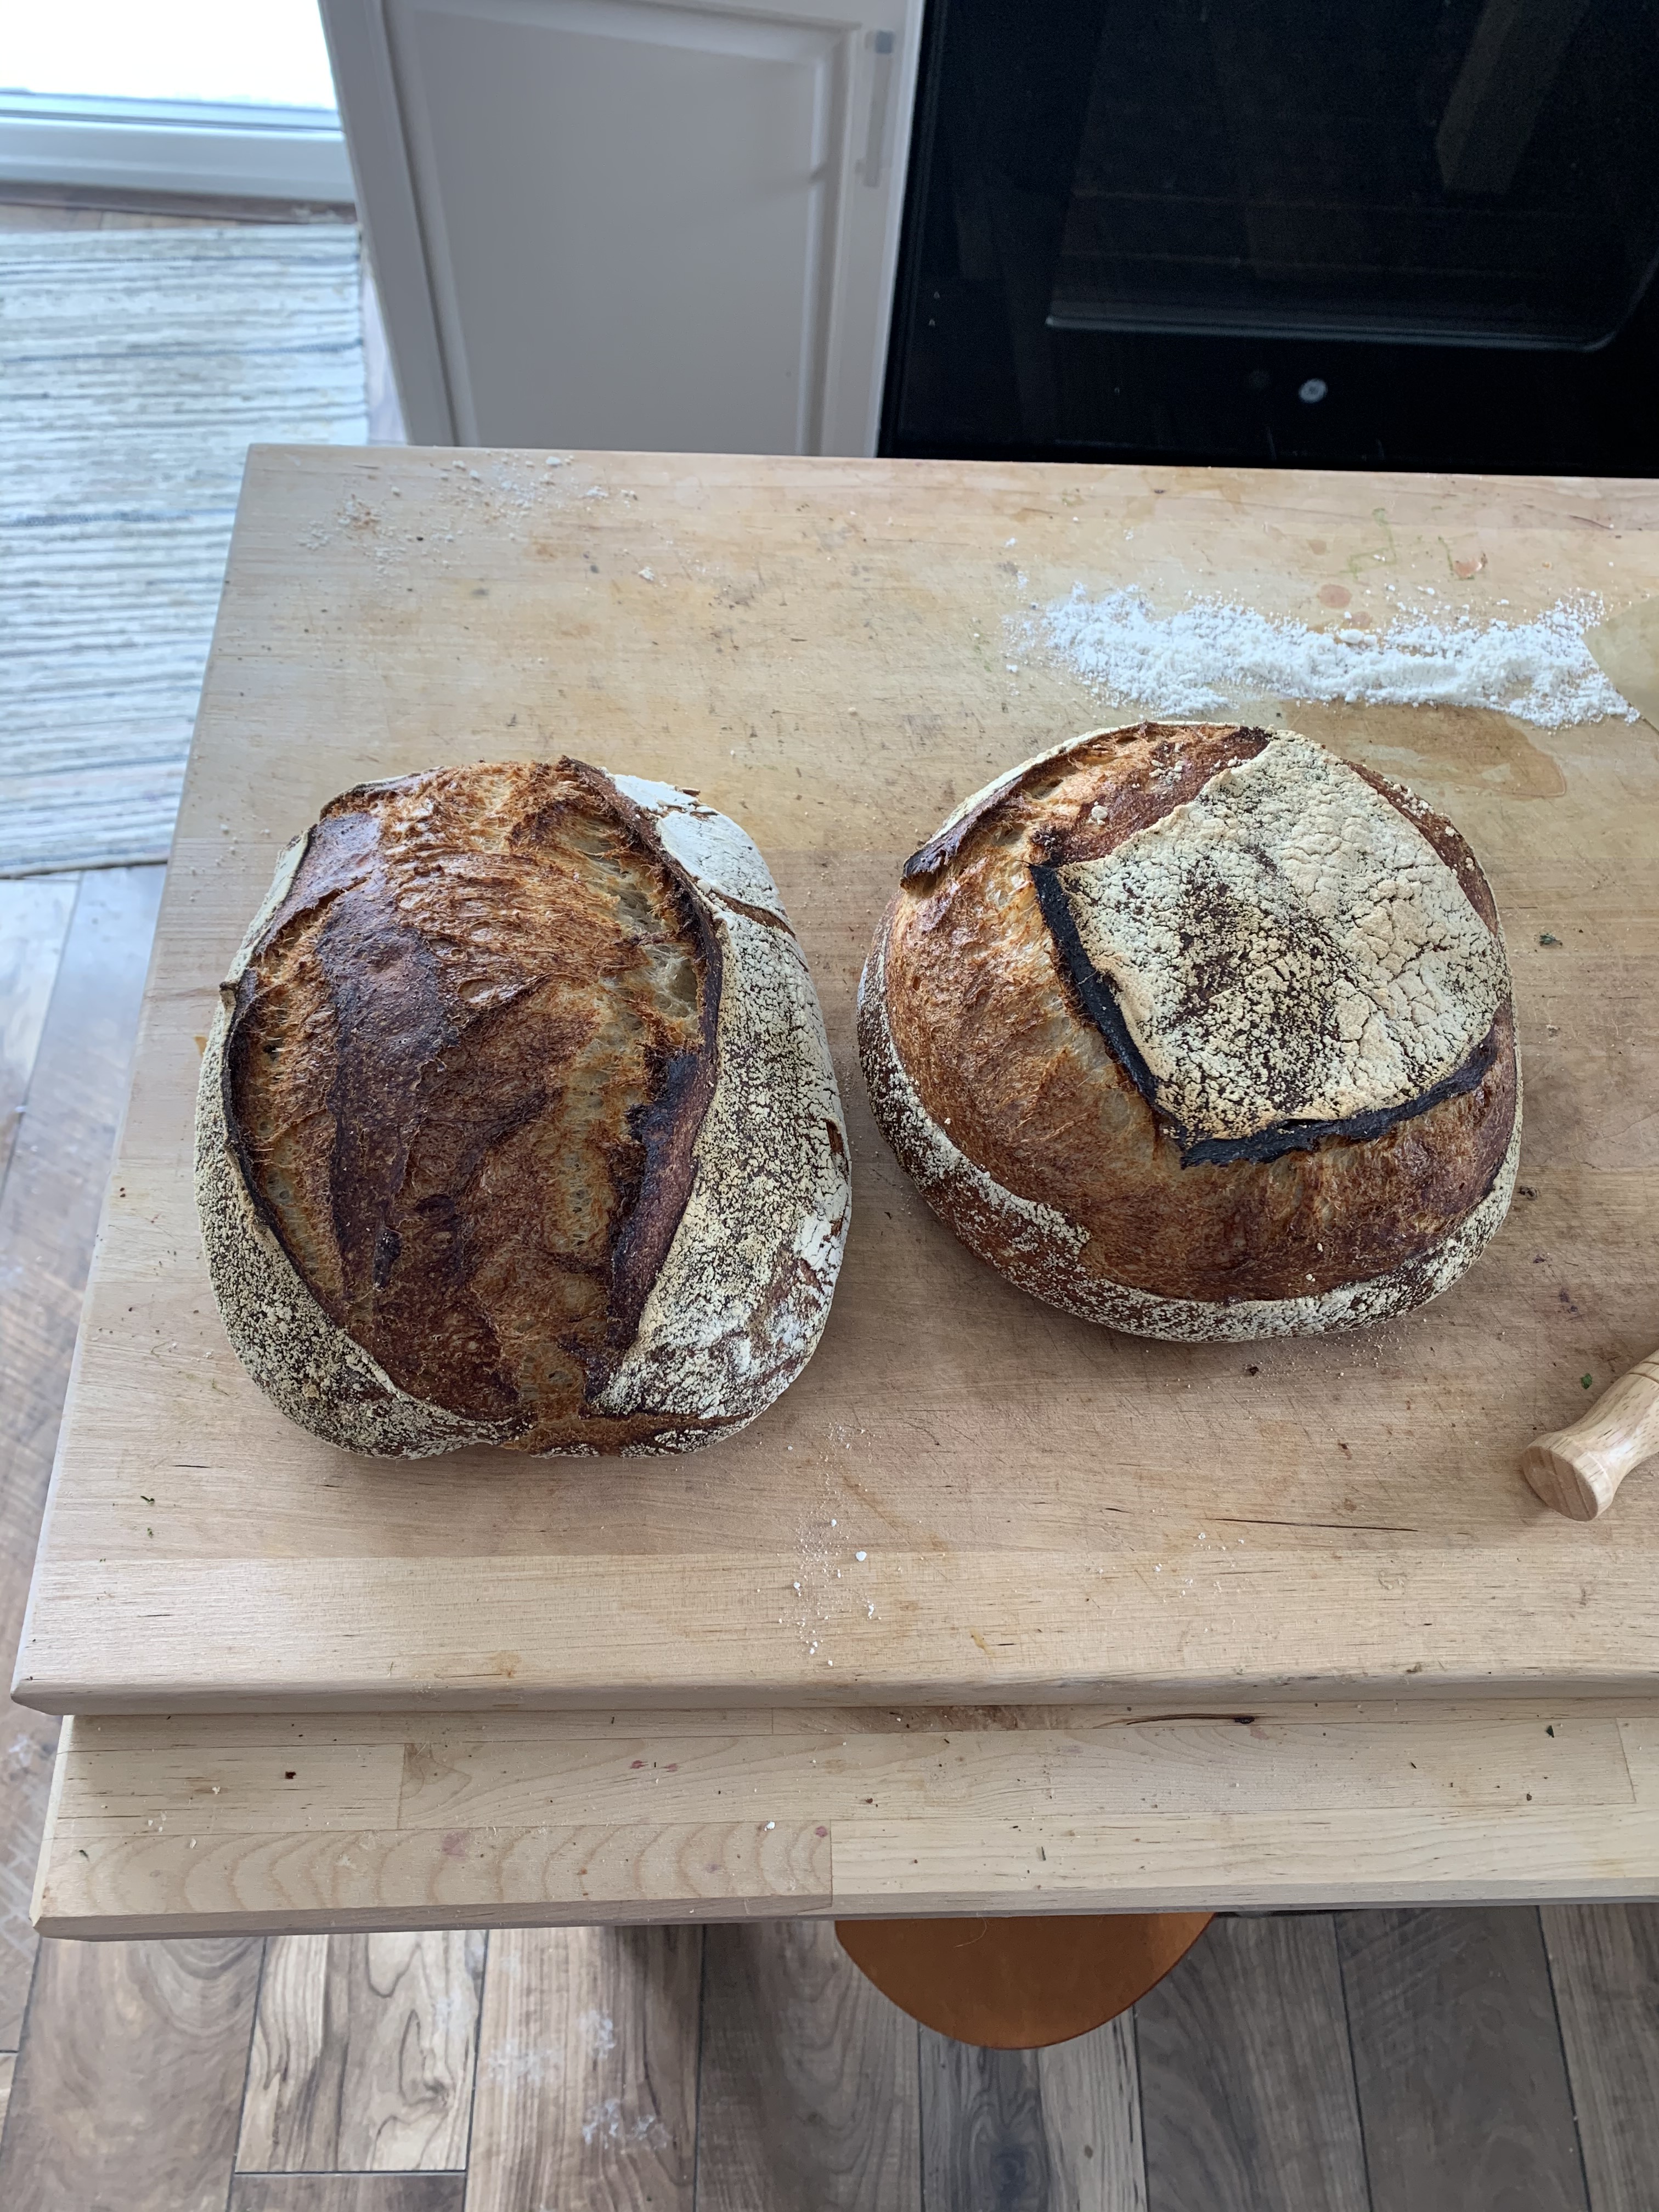
It should smell amazing. Looking at the bread, you should see places where the crust has broken away from the rest of the bread, THIS is the alluded to oven spring. For me, a good oven spring equates to an excellent crumb structure, or the amount of holes on the inside.

After an hour, slice into the bread, slather a generous portion of butter on it and ENJOY the fruits of your labor!
