

This is a sponsored post written by me on behalf of Hobby Lobby. All opinions are 100% mine.
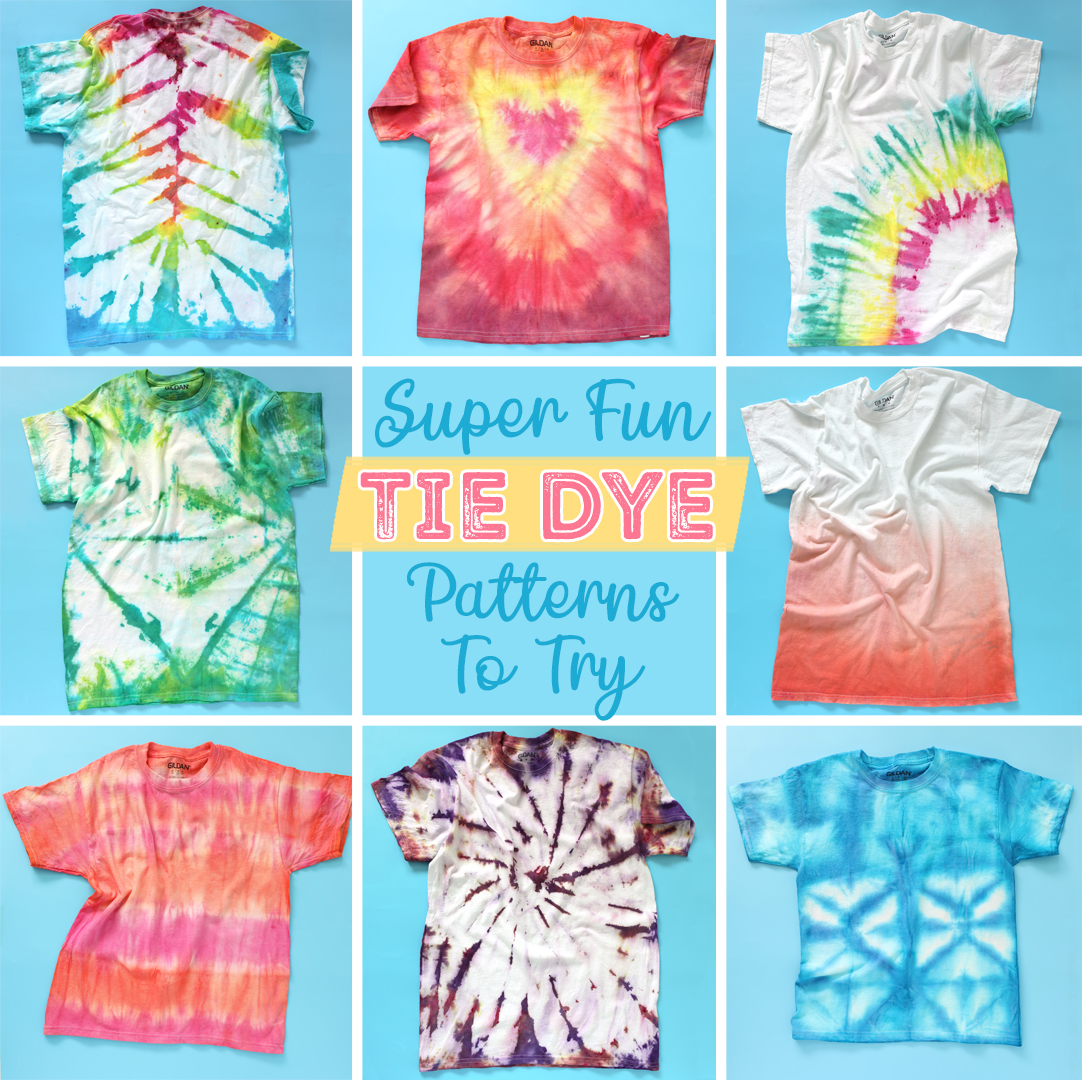
Tie dye is all the rage this summer and it is such a fun activity! Today I’m going to show you eight of my favorite tie dye patterns and how to fold them.
Where’s The Best Place to Buy A Tie Dye Kit?
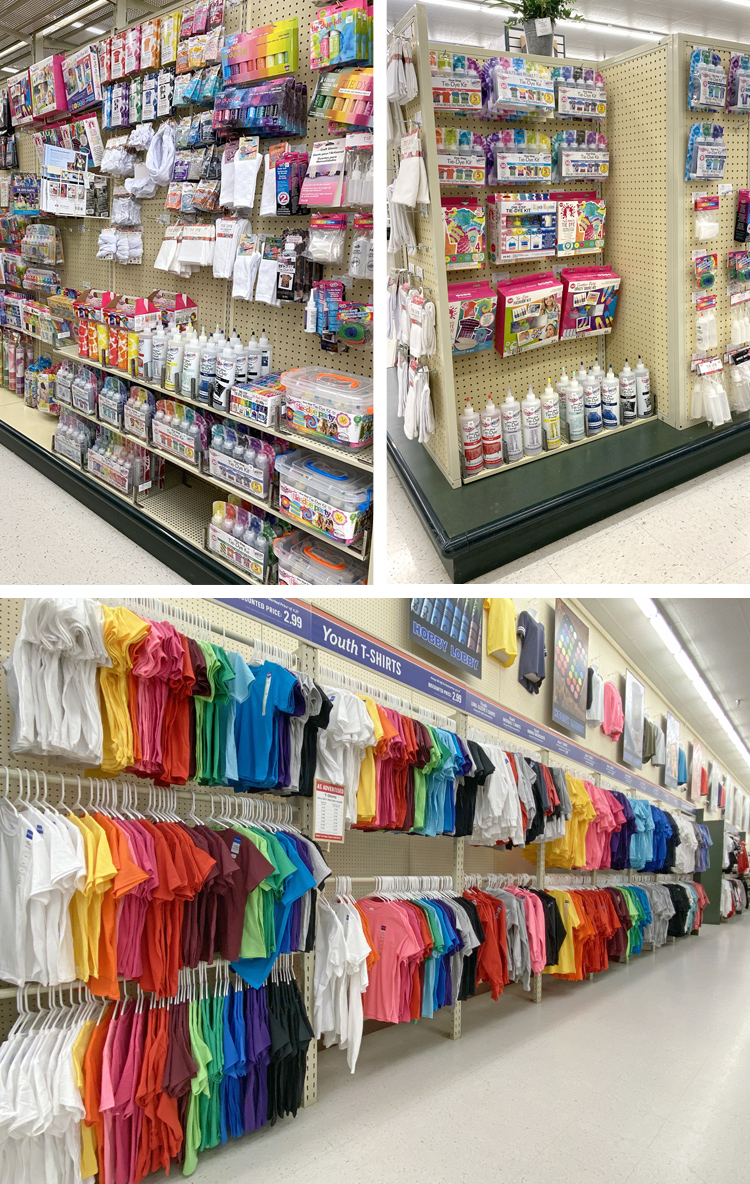
They have every dye kit you could ever want and their shirts are a total bargain so it is a one-stop-shop. Hobby Lobby has all sizes of cotton t-shirts in stock, including baby, toddler and children’s sizes all the way up to adult plus sizes. They also have long-sleeved tees, baseball tees and solid white sweatshirts.
Which Tie Dye Kit Should I Buy?
There are two factors to consider: how many shirts you will be dying and the colors that you would like to use.
Every package of tie dye will give you an estimated number of shirts that can be dyed with the amount of dye included. Once the dye powder has been mixed with water, it has to be used within 72 hours, so don’t buy a kit that is bigger than you need because you can’t really save it for later. Also, I have found that I can never make quite as many shirts as the package says. I would say 2/3 is a good rule of thumb… if the package says 36, you can probably get 24 shirts out of it.
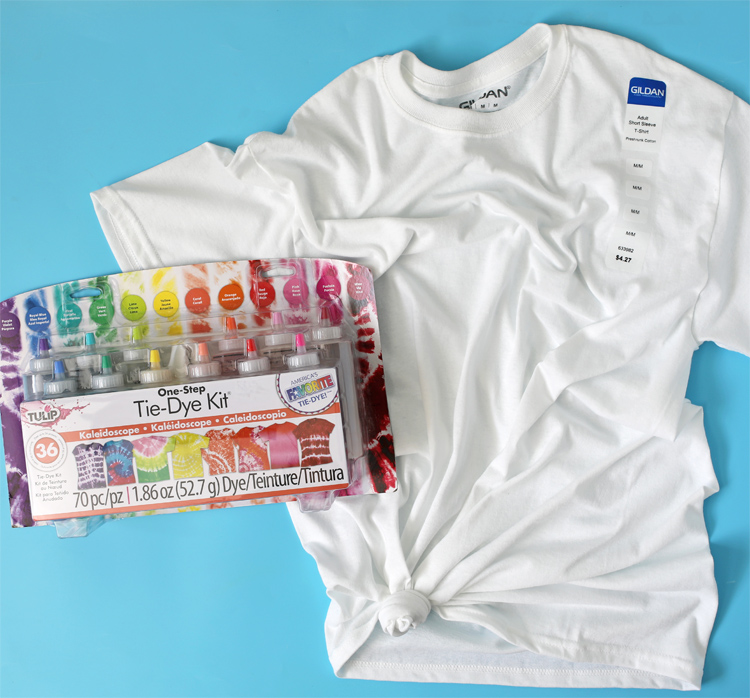
Then the only thing you need to decide is which colors you want to use. The package I picked had the whole rainbow of colors because, well, I am me. LOL. Give me all the rainbows! They also sell single color kits in larger amounts if you want to dye a bunch of shirts the same color (like for a dance team, etc.)
What Supplies Do I Need To Tie Dye?
Most tie dye kits come with everything you need minus the actual shirt, but here is a list with a few extras that are helpful.
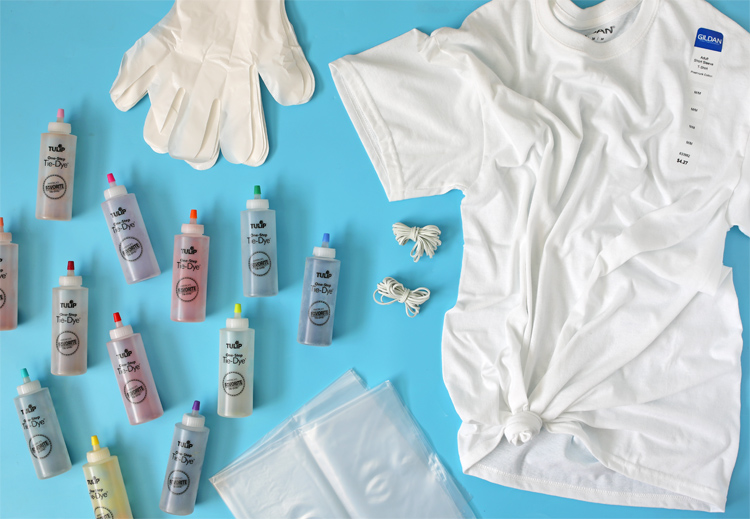
Supplies Needed
- Cotton T-Shirt
- Tie Dye Kit
- Dye Bottles
- Rubber Bands
- Rubber/Plastic Gloves
- Plastic Drop Cloth
- Water
- Spray Bottle (in case parts of the shirt start to dry out)
- Paper Towels and/or Baby Wipes (for cleaning up drips)
- Cooling Rack (keeps the project away from dye puddles)
- Gallon Sized Zip Bags (to put the shirt in while the dye sets)
Tie Dye Folding Techniques
The easiest way to learn these techniques is to watch the video. Every pattern is shown in the same order in greater detail.
VIDEO TUTORIAL
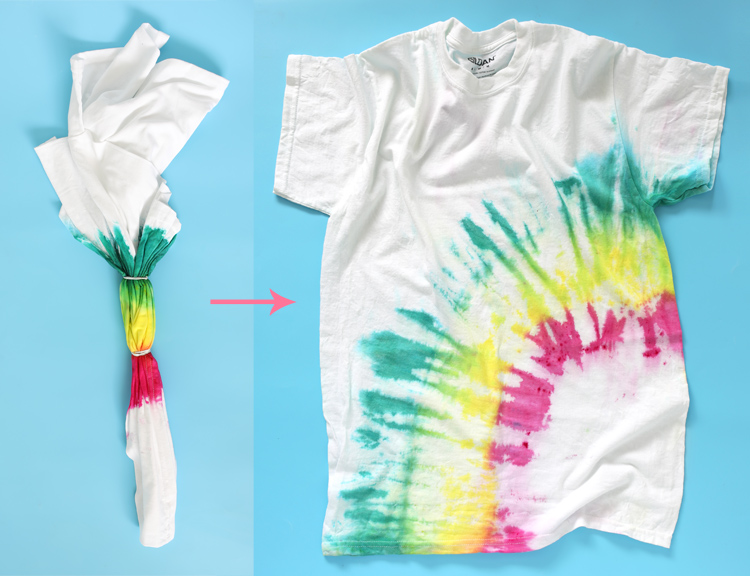
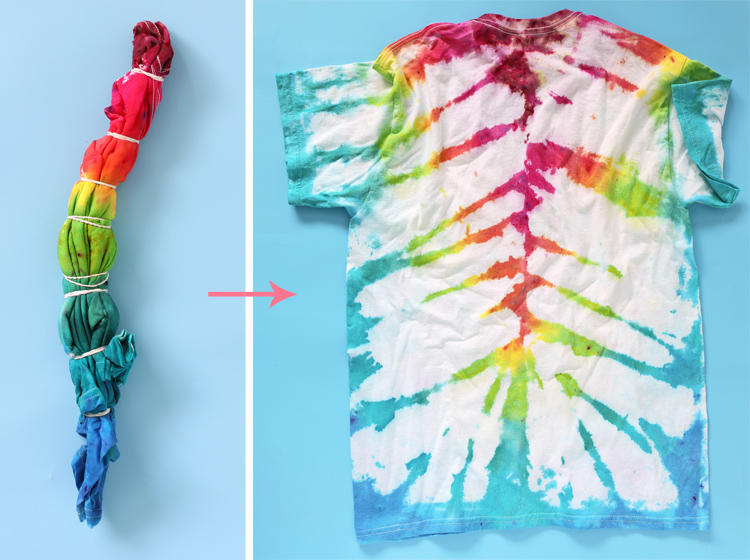
Rainbow Tie Dye Design

Step 1: Lay a damp shirt flat on a plastic drop cloth.
Step 2: Draw a rainbow shape on the bottom of the shirt, then draw a second line that parallels the first.
Step 3: Pleat the shirt along the first line, turning the curved line into a straight line. Secure with a rubber band.
Step 4: Repeat with the second line.
Step 5: Add dye. In this case, I wanted to keep the majority of my shirt white, so I had to be extra careful while applying the dye. Using the cooling rack really helped. Excess dye dripped down and under the cooling rack instead of getting onto the shirt where I didn’t want it to.
V Tie Dye Design
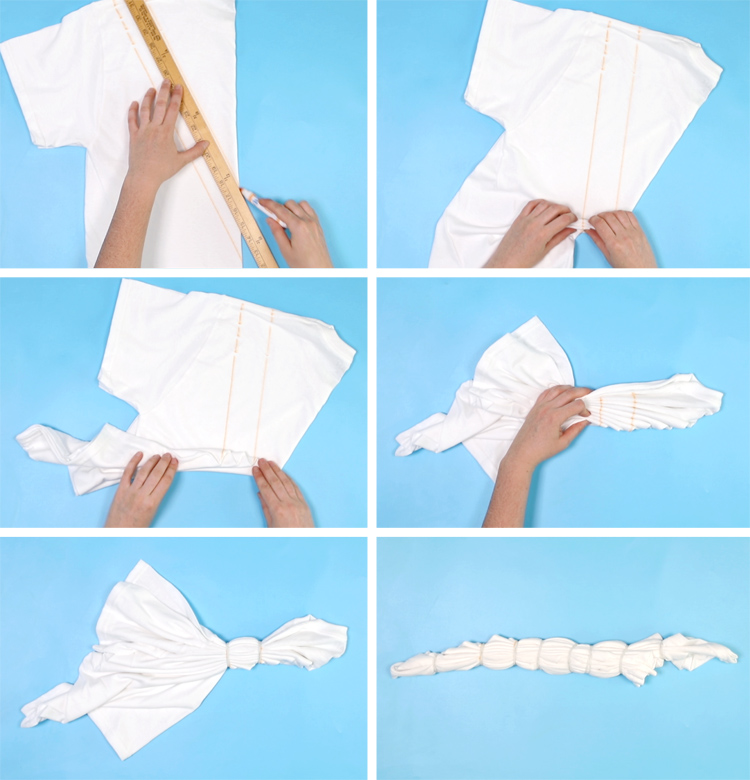
Step 1: Fold a damp shirt in half with the front of the shirt facing outwards.
Step 2: Use a washable marker and a ruler to draw two perpendicular straight lines across the shirt.
Step 3: Gather the fabric along the first line, keeping the line straight as you bunch. Place a rubber band on the line, then double check that everything stayed straight. The line should be under the rubber band. Repeat for the second line.
Step 4: Add more rubber bands on both sides of the two lines, until the entire shirt is bunched and banded.
Step 5: Add dye to the shirt in any way you’d like. I added a different color to each banded section in rainbow order. Just make sure the colors next to each other mix together well. (Complimentary colors turn brown when mixed together so it’s better to put colors together that are next to each other on the color wheel.)
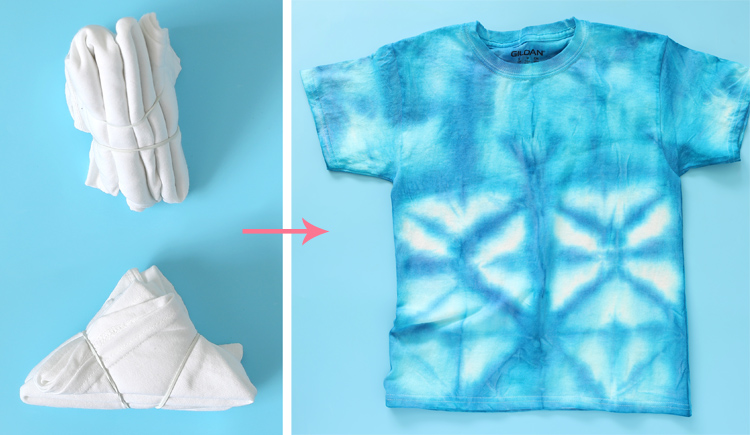
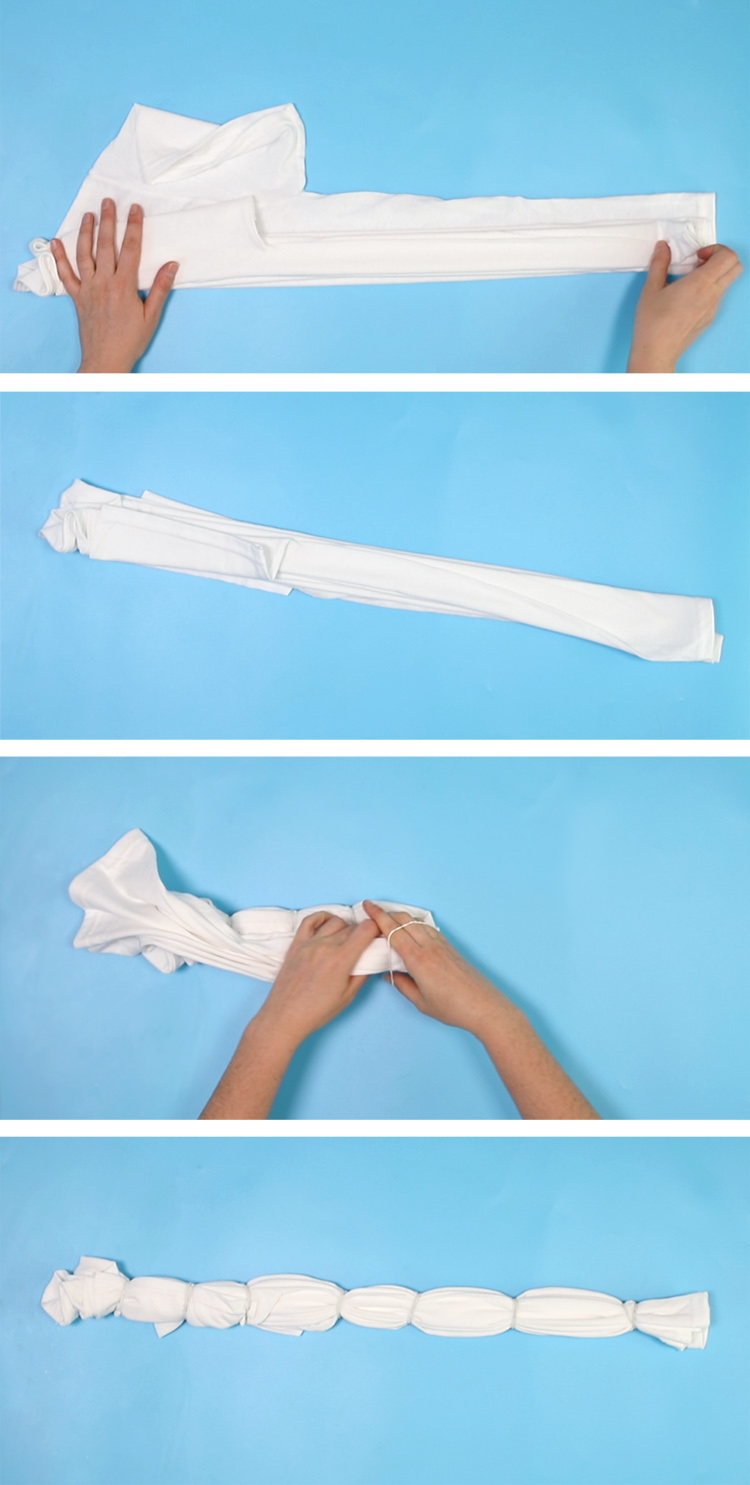
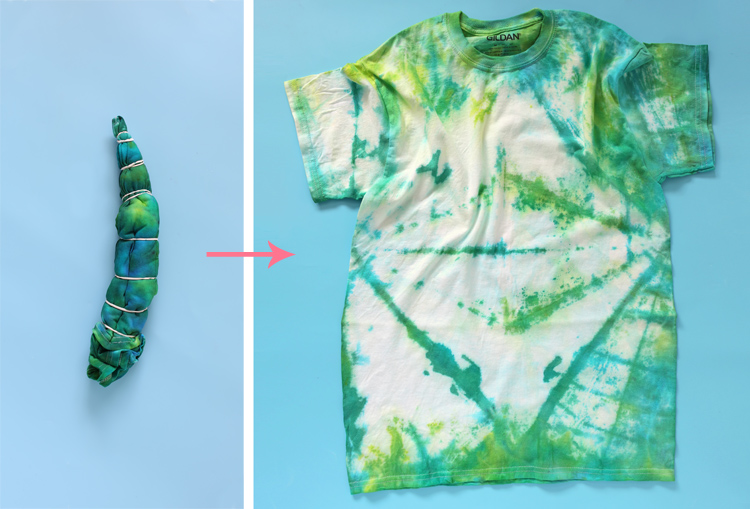
Shibori Tie Dye Design
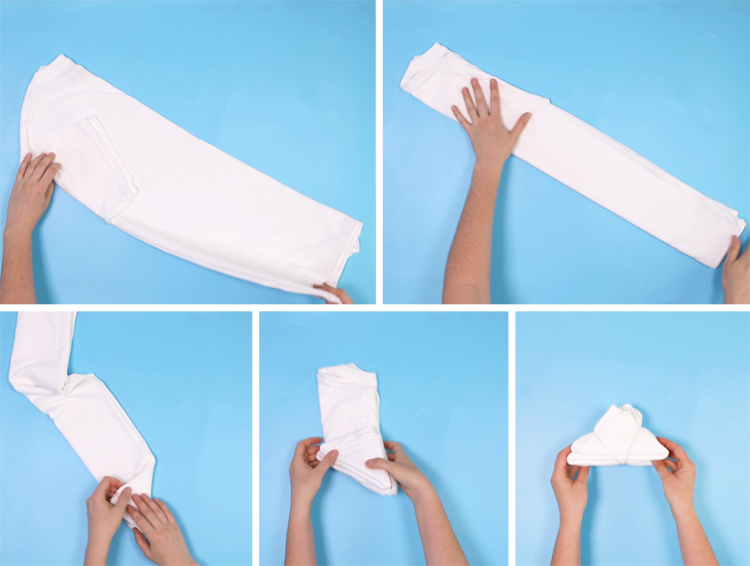
Step 1: Fold a damp shirt in half lengthwise, then in half again to make a long skinny rectangle.
Step 2: Accordion fold triangle shapes all the way up the fabric. Secure with rubber bands.
Step 3: Add dye only to the three outside edges of the triangle, but make sure the dye soaks into all the nooks and crannies.
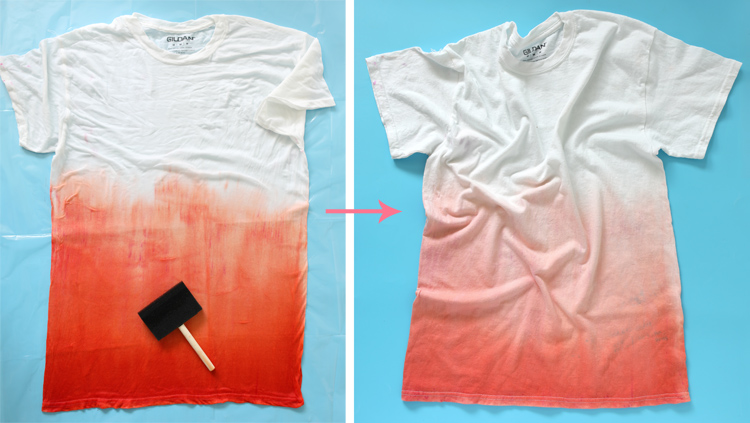
Ombre Tie Dye Design
Step 1: Lay a damp shirt out flat on a plastic drop cloth.
Step 2: Squeeze a generous amount of dye onto the bottom edge of the shirt, then use a foam brush to gently push the dye upwards until it fades out.
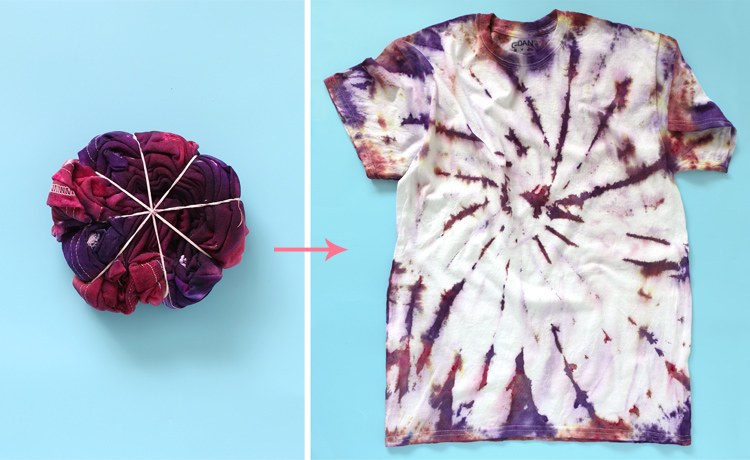
Swirl Tie Dye Design
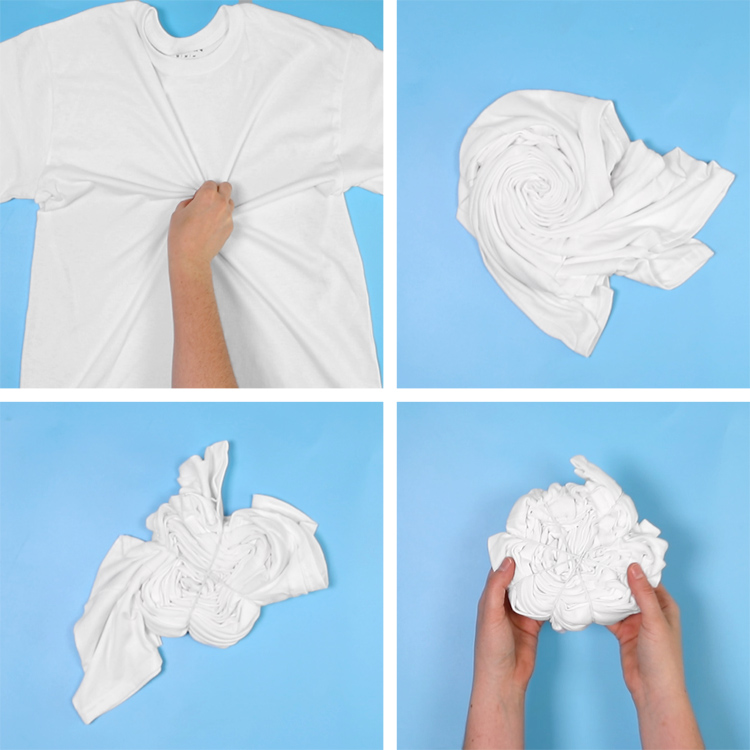
Step 1: Flatten out a damp cotton shirt.
Step 2: Pinch the center of the shirt (or where you want the center of the spiral to be), then start to swirl both layers of the fabric around the center point until the whole shirt forms a circle shape.
Step 3: Place rubber bands across the circle to hold the folds together. Each band should meet in the center.
Step 4: Add dye to each wedge shape of the circle. Be sure to get deep into the folds. The more dye you use, the less white space your finished design will have.
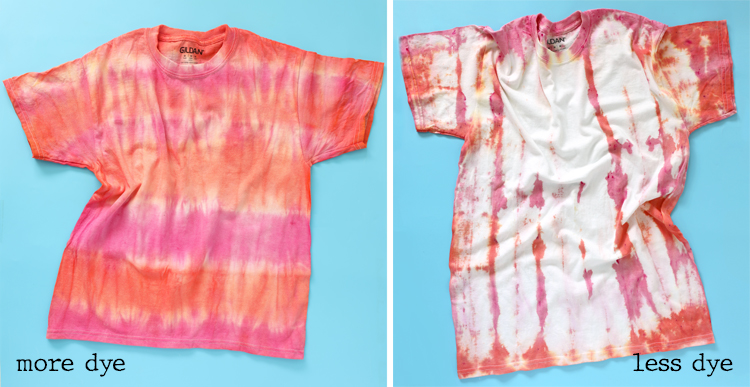
Stripes Tie Dye Design
Step 1: Lay a damp shirt out flat on a plastic drop cloth.
Step 2: Begin accordion folding lengthwise across the shirt.
Step 3: Add rubber bands to hold the folds in place.
Step 4: Add dye to each section between bands.

Here’s an example of the same folding pattern and the same colors, but the first one I totally saturated with dye and the second one I only used a little bit of dye. I actually like both looks, but I thought it was a good illustration of how the finished look can change depending on how much dye is applied.
Mandala Tie Dye Design
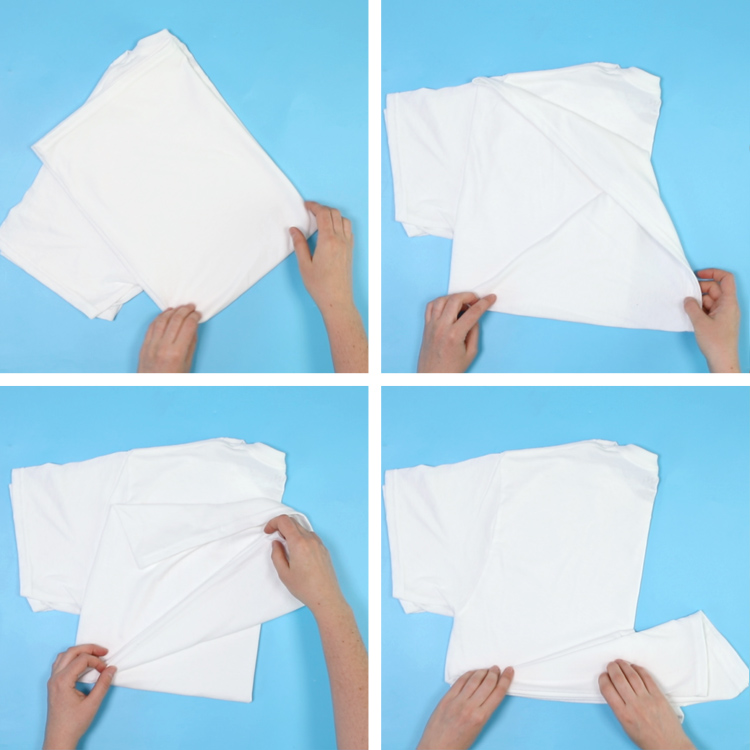
Step 1: Fold a damp shirt in half lengthwise, then in half again crosswise to make a square with four layers.
Step 2: Peel back one layer and fold it into triangle thirds.
Step 3: Repeat again with the second layer.
Step 4: Flip the shirt over and fold the other two layers into triangle thirds also.
Step 5: Carefully keep all of the layers in line as you add rubber bands down the whole shirt.
Step 6: Add dye… and lots of it! Be sure to get dye deep down into the inner layers. You can see in the example shirt that some areas remained white and the cool pattern that’s in the bottom right hand area of the shirt didn’t seep through all the layers. Oops!
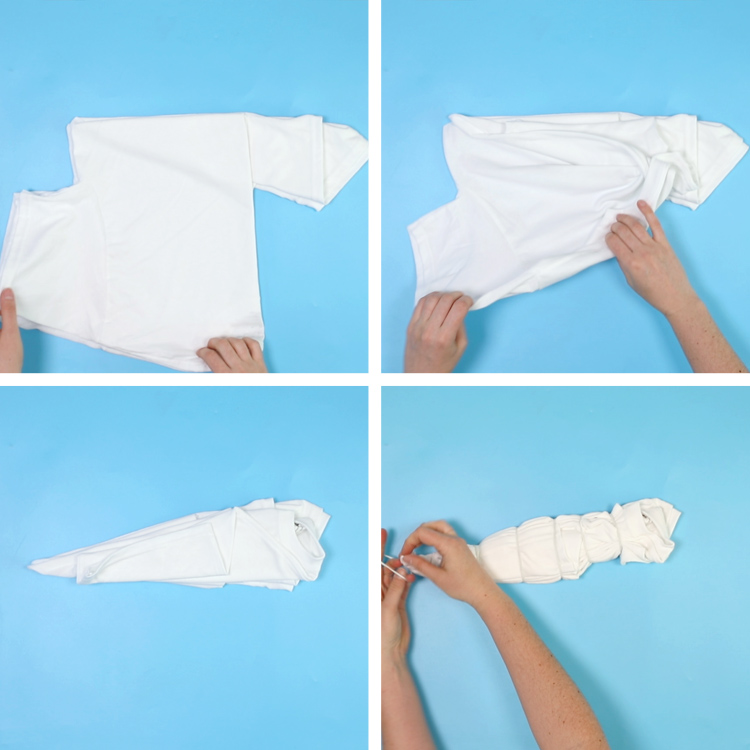
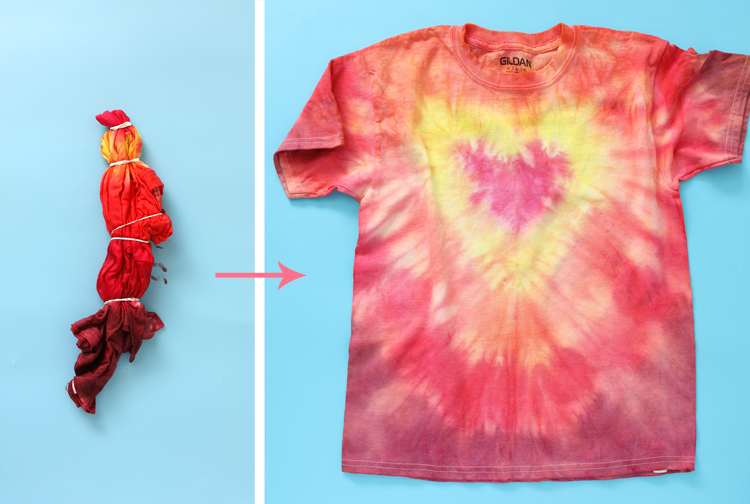
Heart Tie Dye Design

Step 1: Fold a damp cotton shirt in half straight down the middle.
Step 2: Draw half of a heart shape along the fold line using a washable marker.
Step 3: Begin pinch pleating along the line. You will basically be turning the curved heart shape that you drew into a straight line.
Step 4: Place a rubber band over the drawn line to keep it in place.
Step 5: Add more rubber bands down the remaining length of the shirt.
Step 6: Add dye between bands.
Final Steps of Tie Dye
Once the dye is added to your shirt in the design of your choosing, these are the next steps to follow:
- Place dyed shirt in a zippered plastic bag and seal it up tight.
- Let the dye set for at least 8 hours or up to 48 hours. The longer the dye sets, the more vivid the colors will be.
- Remove the shirt from the plastic and rinse out the excess dye. This can be done in a stainless steel sink or outside with the hose. I recommend wearing gloves again for this step. Be careful not to get dye on anything.
- Wash the shirt alone in the washing machine and dry alone in the dryer on high heat.
- Now your shirt is ready to wear, but you will still need to wash it separately the first two or three times to prevent dye bleeding onto other clothing items.
Here’s to making this summer a tie dye summer! Happy crafting!
The post Cool Tie Dye Patterns To Try appeared first on The Craft Patch.