

Making a dreamcatcher is easy to do with a few materials you can buy at a craft store. Learn how to make a dreamcatcher with these easy instructions. This post contains affiliate links.
Dreamcatchers are beautiful and intricate, but they are more than just a piece of artwork.
The dream catcher is actually a part of native history and culture. By creating this tutorial, I do not mean to disrespect native culture and/or heritage in any way.
Dreamcatchers started with the Ojibwe, a native Indian Nation.
The Ojibwe would hang the dreamcatcher above the bed as a charm to protect sleeping people, usually children, from nightmares.
All dreams would pass through the net. The bad dreams would stay in the net, disappearing with the daylight. The good dreams would pass through and slide down the feathers to the sleeper.

More Home Decor Tutorials:
Crafting is so much fun when you make something that you can add to your home decor, and we have lots of tutorials to show you how! Like this Frame Diamond Art in 4 Easy Steps, this Old Hello Porch Sign, and this DIY Coat Rack.
Be sure to look around the blog for more craft tutorial ideas!
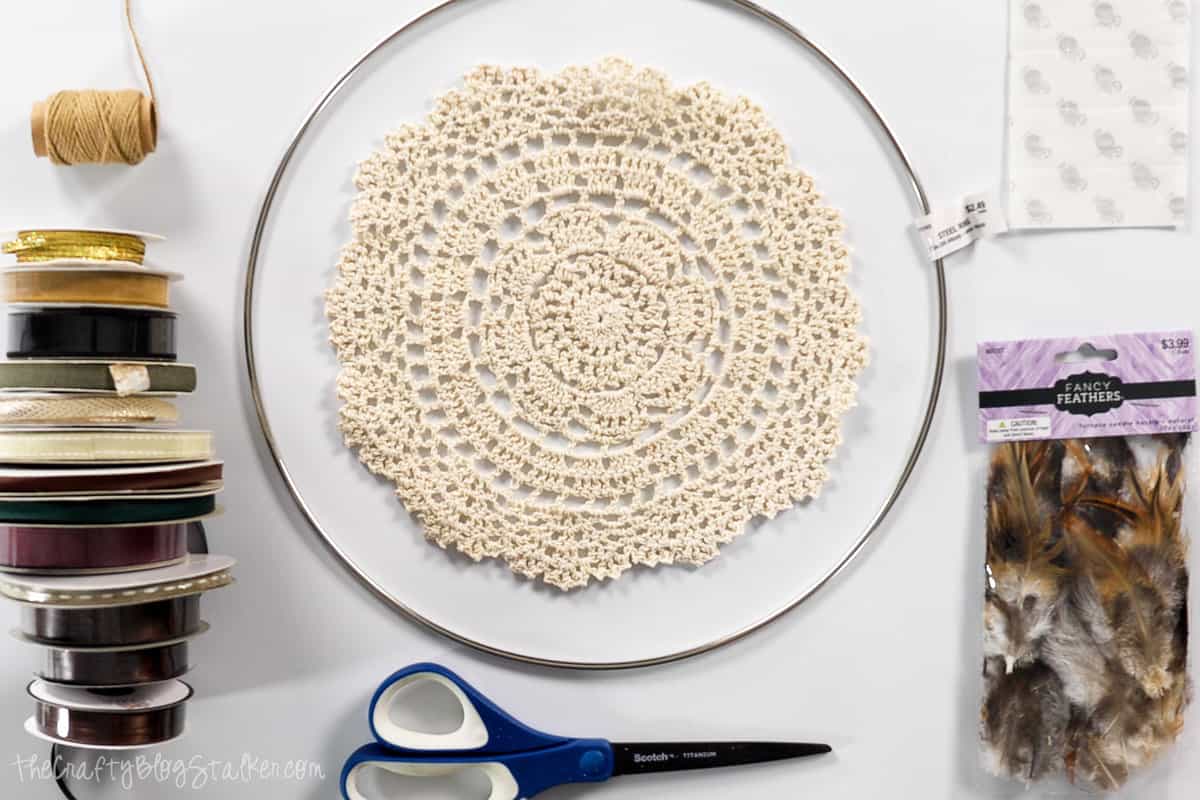
Supplies You'll Need to Create this Project:
- 12-inch Steel Hoop
- 10-inch Crocheted Lace Doily
- Large Eye Needle
- Twine
- Ribbon Assortment
- Feathers
- Scissors
- Glue Dots
How to Make a Dreamcatcher:
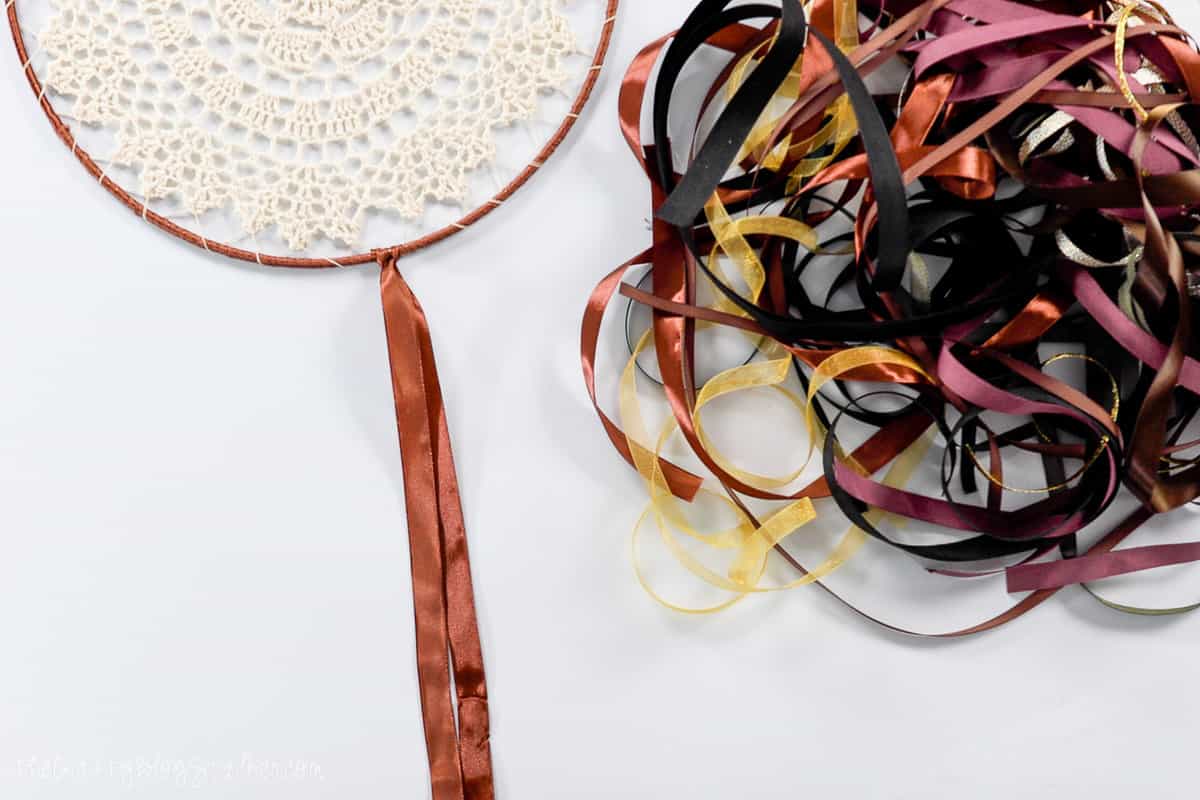
Step 1: Wrapping the Wire Ring with Ribbon
The ribbon I used to wrap was a soft satin ribbon with a width of ½-inch.
Pick up a glue dot by placing the end of the ribbon on the glue dot and peeling it up from the backing sheet.
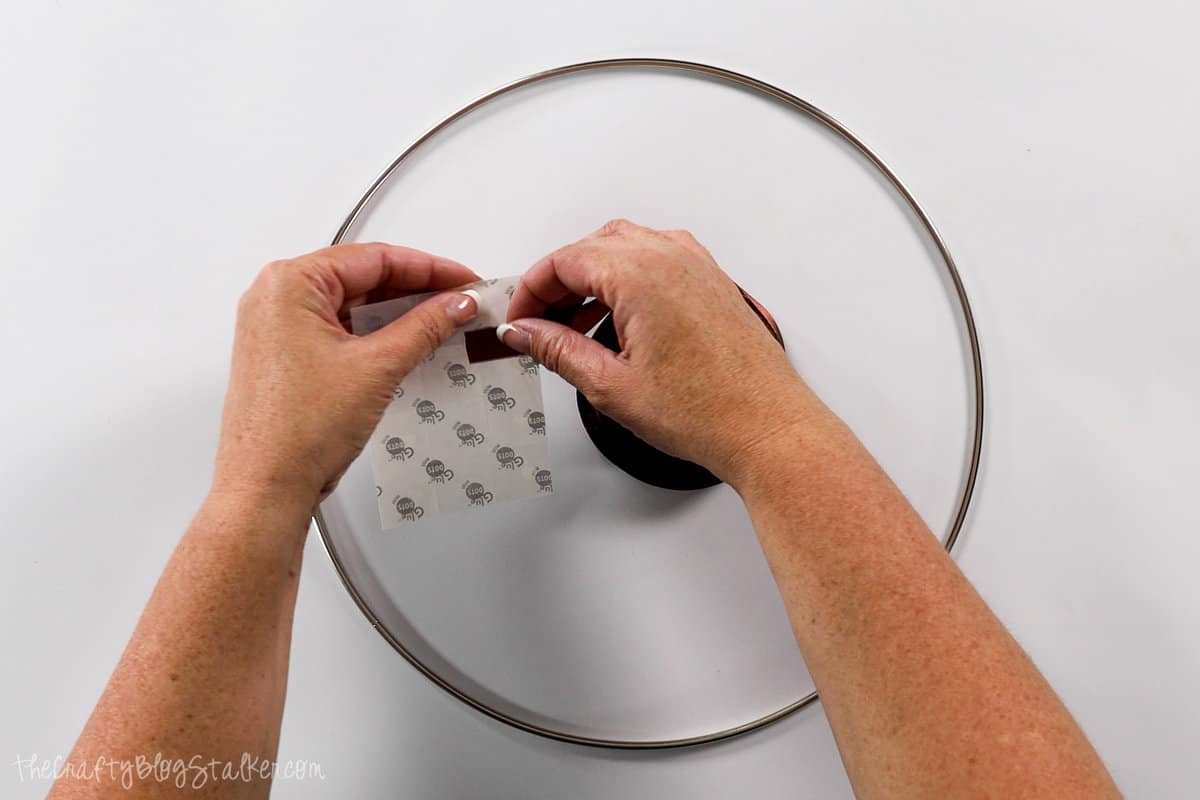
Adhere the glue dot/ribbon to the steel ring at a slight angle and begin wrapping the ribbon all the way around the ring.
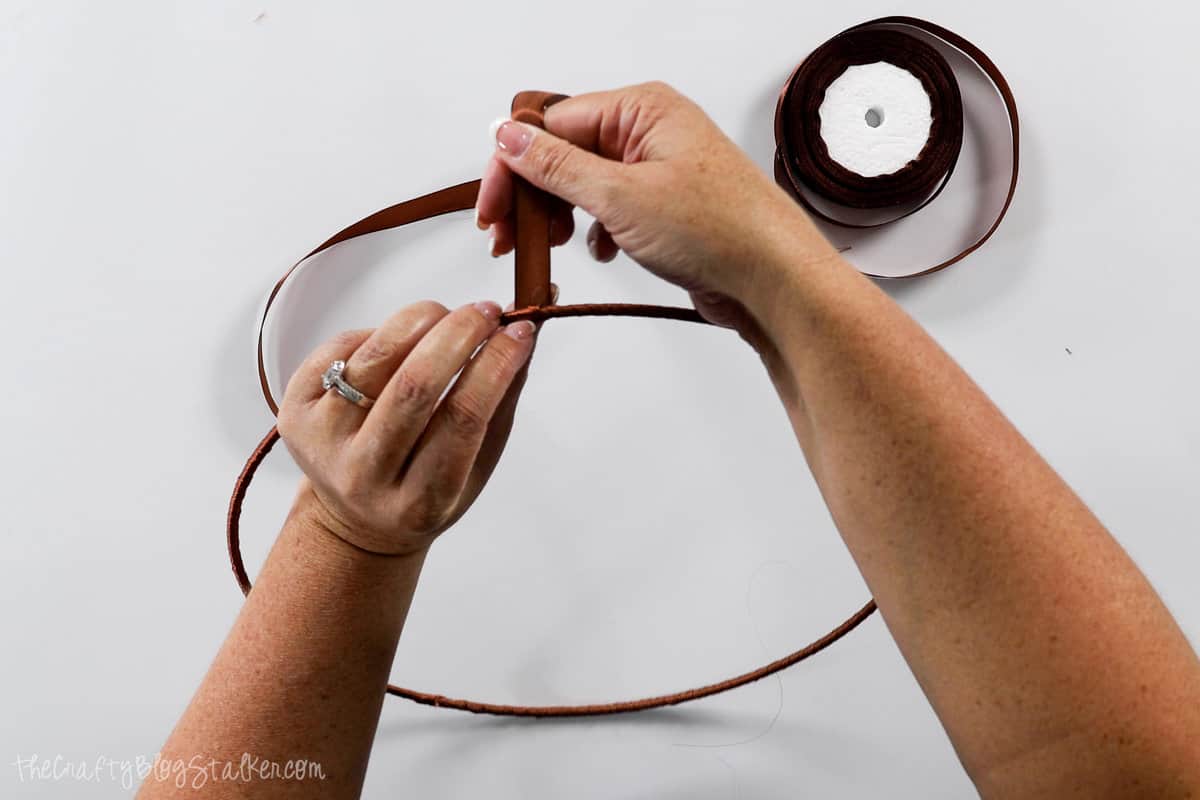
When finished, use another glue dot to secure the end of the ribbon to the ring and trim off any excess.
Step 2: Attaching the Doily to the Ring
Thread a large needle with a long length of twine.
Lay the doily in the center of the ring.

Attach the doily using the twine and needle by stitching the thread through a hole in the doily at each point and wrapping it around the ring to the next point of the doily.
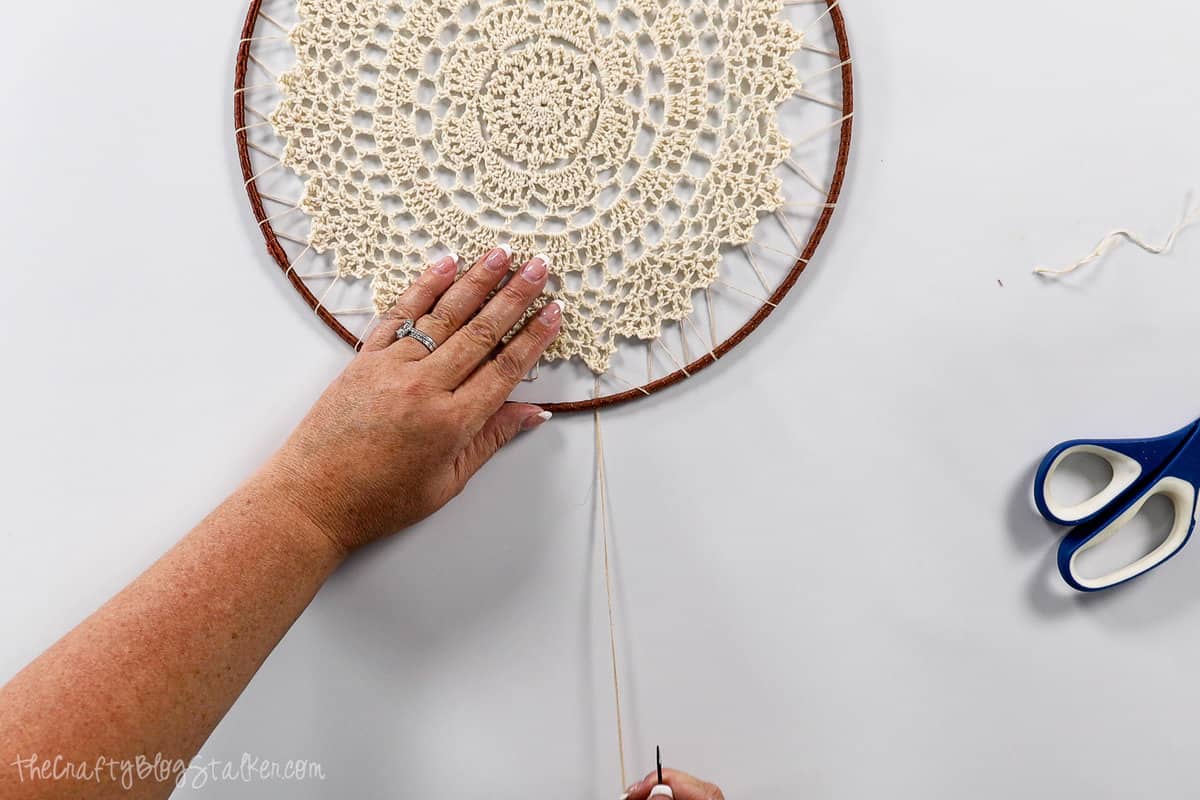
When all points have been stitched through, tie the two ends of the twine together.
Make sure the twin is tight and the doily is centered on the ring. The doily placement can be adjusted by pulling on the threads until it is right where you want it.
Step 3: Adding the Ribbon Strands
Cut the different colors of ribbons into 34-inch lengths. You can go longer if you would like longer ribbon strands.
Remember, they will be folded in half. So multiply your desired length by two for each length of ribbon.
Once all the ribbon is cut, it is time to start attaching it to the dream catcher ring. Find where you want the bottom center to be this is where you attach the first ribbon strand.
To attach, use a looping technique. Fold the ribbon in half with the fold at the top, just under the wire ring. Pull the loose ends of the ribbon over the ring and through the folded loop at the top and pull tight.
Continue attaching ribbon strands in this way alternating to the left and right of the original until you are out of ribbon.
If you would like, you can trim the bottom of the ribbon strands either straight across or in a triangle shape.
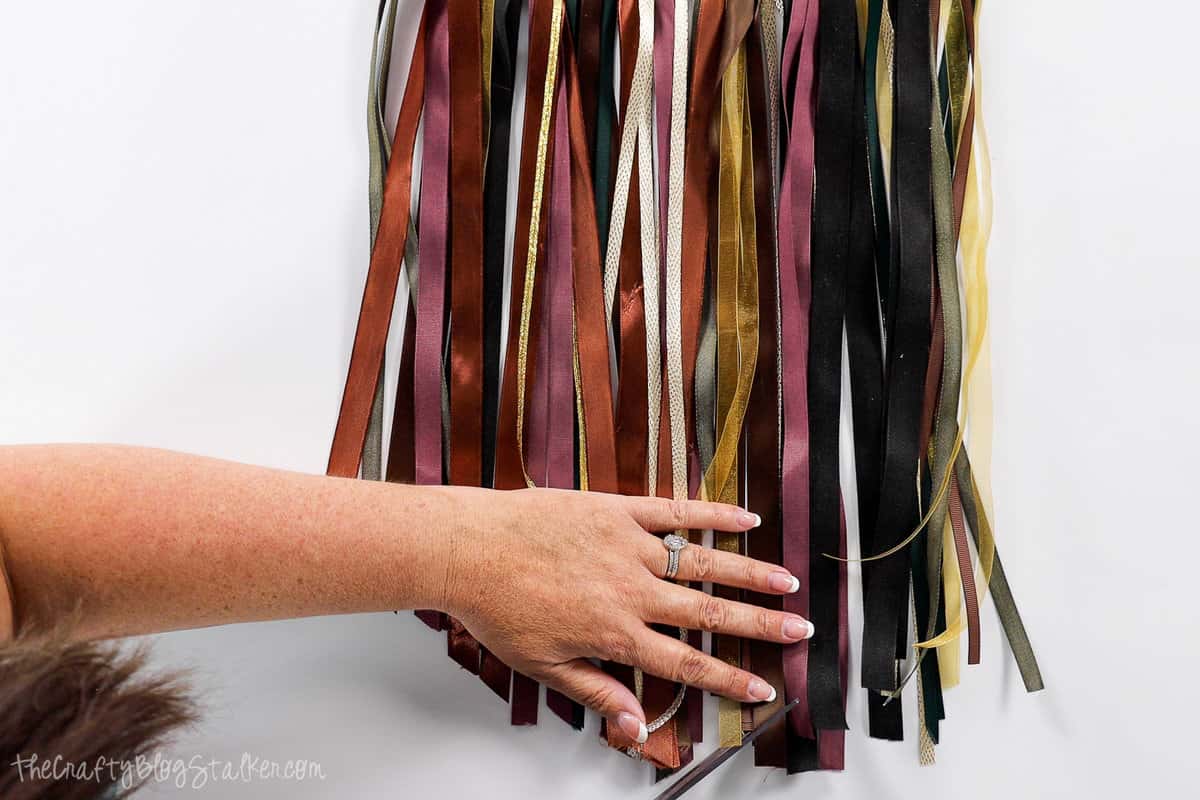
I created a slight triangle shape on the bottom of my dreamcatcher.
Step 4: Add Feathers
Tie a strand of twine to the end of the feather, and tie the other end to the ring. You can hide the knot into the ribbon strands.
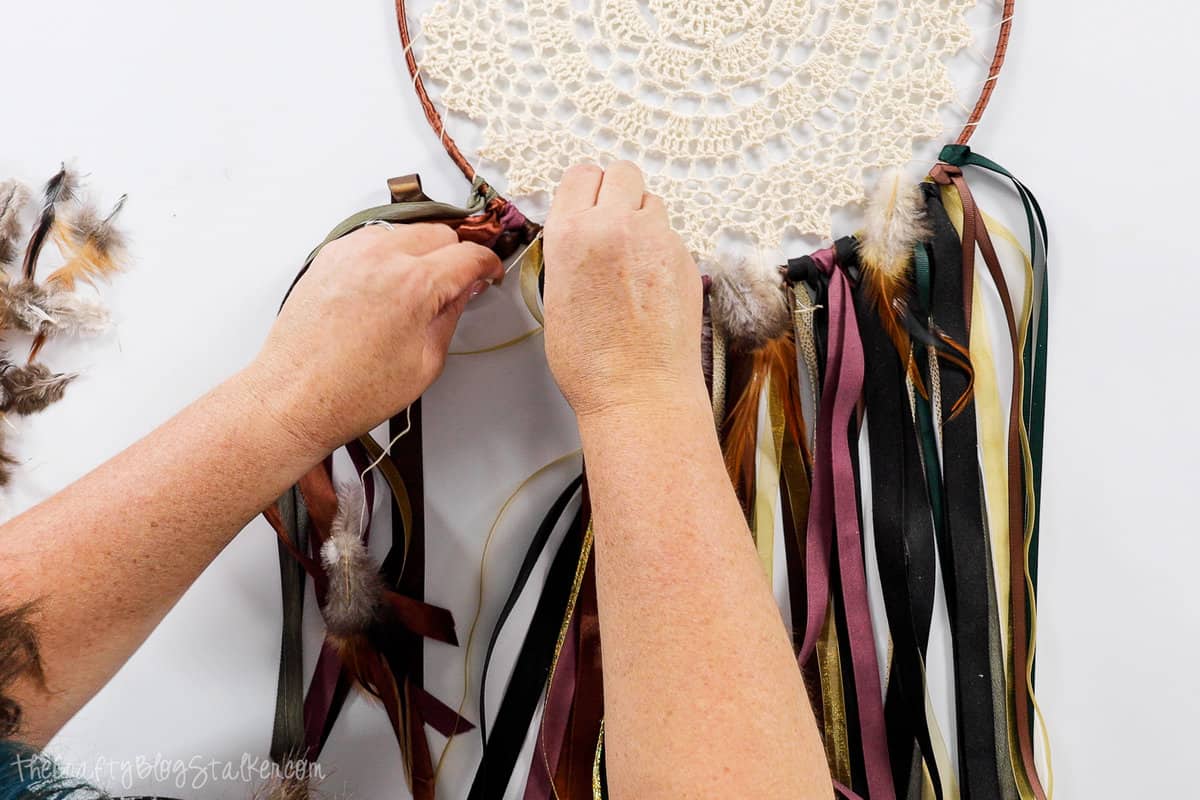
I tied a total of 5 feathers onto the ring in different places, hanging at different lengths.
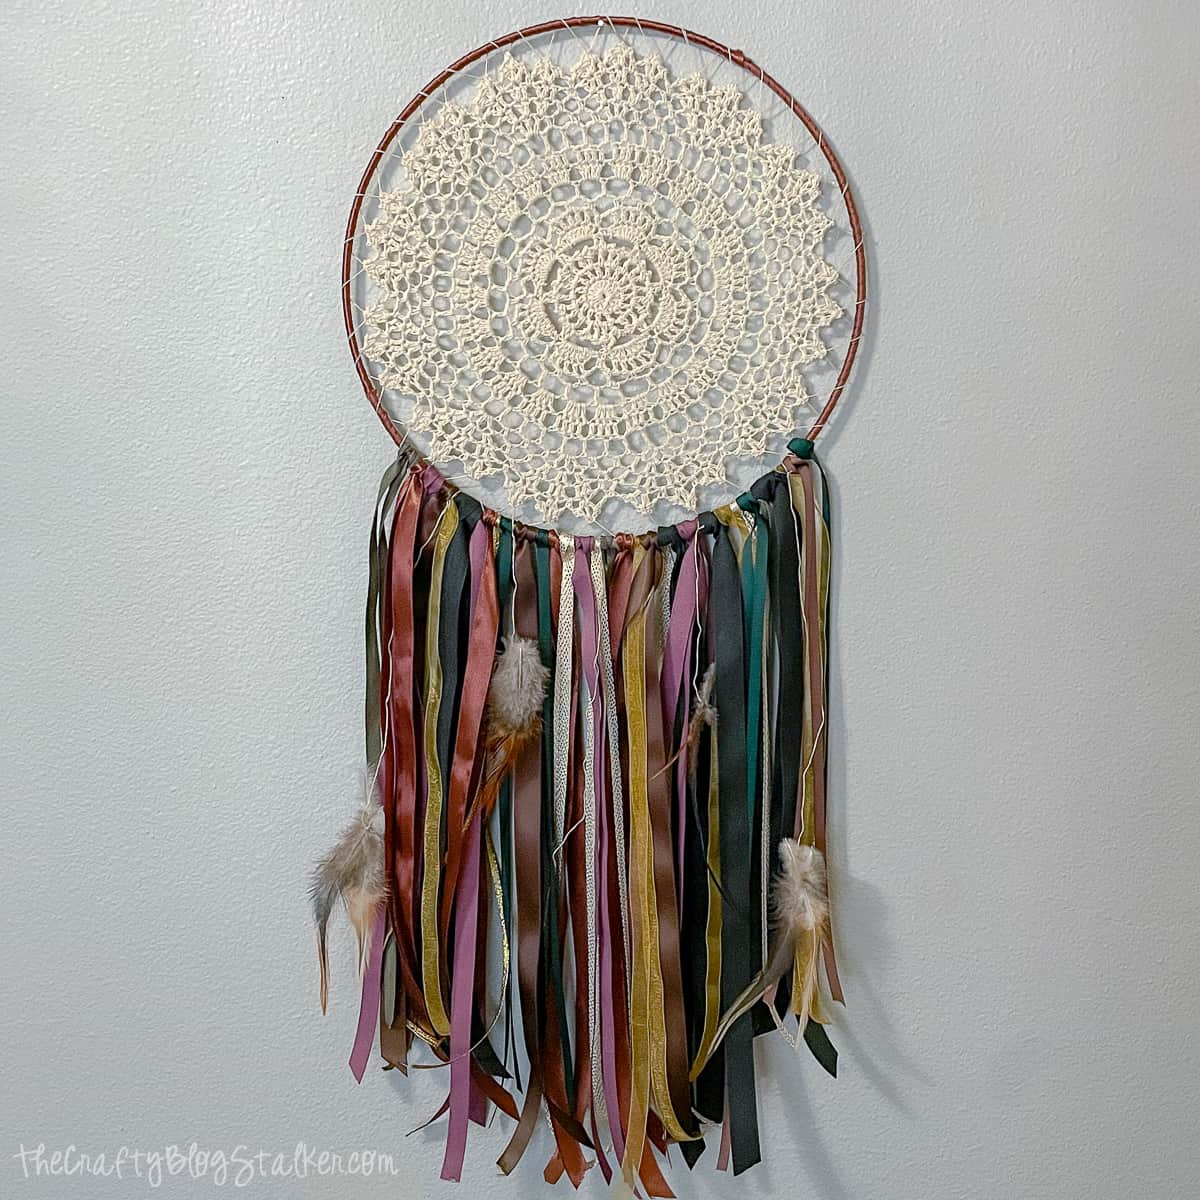
I absolutely love the finished look of my dream catcher!
Craft Tutorial Video:
Like videos? I have a video tutorial for you! Please subscribe to my YouTube Channel so you don't miss out on any future video tutorials!
Our Crafting Essentials List:
- The Cricut Cutting Machine is easily our favorite crafting tool. We use it in so many of our tutorials!
- These MakerX Crafting Tools are perfect to keep in the craft room, and are always ready when you need them!
- This Fiskars Paper Trimmer is easy to use and cuts nicely without frayed edges.
- These Scotch Precision Scissors cut like a dream and you get multiple pairs in a pack!
Follow The Crafty Blog Stalker

The post How to Make a Dreamcatcher with Easy-to-Follow Instructions appeared first on The Crafty Blog Stalker.