

We are so excited to welcome back Geri of @geri_in_stitches to the blog today! Geri will joining us all week long for an extra special tie-dye takeover! In addition to her vibrant makes, amazing reels, and fun dance moves—Geri is also an incredibly talented tie-dye artist. And what better canvas is there for tie-dye than the Reynolds Top and Dress?! Over the next five days, Geri will be showing us the ins and outs of sewing your own garments with tie-dye, including how to use different techniques to create unique designs. Let’s jump in!

1st Installment – Preparation & Crumple Dyeing
This is the first installment of a 5-part series where we take a tie-dyeing journey using the Reynolds Top and Dress by Helen’s Closet Patterns as the canvas for our tie-dyeing creations. This sewing pattern is ideal for tie-dye because it is a classic sundress without gathers or pleats, so the tie-dye patterns can take center stage on the garment.

In this series, I will share with you some of my favourite techniques that are easy and effective for any beginner new to tie-dyeing. I will also guide you through how I mix and match these different techniques on a single Reynolds Dress.
Tie-dye is one of the best ways for me to personalise my me-made garments. It involves making folds in the fabric, then binding these folds before dyeing so that the folds create patterns on the fabric. There are different ways of folding and binding, and this tie-dye series will explore these different techniques.

Every tie-dye creation is unique, and the same technique and same dye colors will not produce the exact same patterning twice. There is always the sweet element of surprise when the tie-dye project is unbound to reveal the kaleidoscope of patterns and color, which is part of the fun and beauty of tie-dye. Here are some of the tie-dye patterns that you can look forward to creating:


For tie-dyeing projects, the dyeing process is usually done one of two ways:
- On the fabric before it is cut up and sewn; or
- On the garment after it has been sewn.
I am offering a third option, which is to apply the tie-dye after the fabric has been cut up into pattern pieces and before sewing up the garment.
Advantages of the 3rd option:
- Dyeing can be less cumbersome, and it is easier to handle in a home set-up since we are dyeing smaller pieces of fabric (rather than 2 or more meters of the required fabric for the garment). It also makes pattern placement of the tie-dye more site-specific.
- You can separate the different pattern pieces of the garment before dyeing, which opens up options for mixing and matching tie-dye colors and patterns on individual garment pieces. For example, the front and back of the garment can be dyed in different colors, or the left and right side of the garment can be a combination of different tie-dye patterns.
To maximise the color and print matching possibilities, Part 1 of this first installment will guide you through how to create a center front seam on the Reynolds Top and Dress, and how to prepare the separate pieces before dyeing.
Part 2 of this installment will start off with one of the easiest tie-dye techniques which is crumple-dyeing. The following installments will explore other fun techniques like spiraling, fan folding, and creating Mandala patterns. At the end of this series, you will see how I combine at least 4 tie-dye techniques on one single Reynolds Dress.
Dyeing Product:
The product that I’ve chosen to use is Rit All-Purpose Liquid Dye.

This is a commercial product that is readily available to me at the store, and comes in a variety of colors. Their website also offers different color formulas to create the exact shade that you desire. What I like about Rit Dye is that their products are easy to use for a beginner, and they also have a ColorStay Dye Fixative which is very effective at reducing color-bleeding after the dyeing process.
Nevertheless, you can use any fabric dye product that is more readily available to you. Just make sure that you follow the product instructions carefully, and modify the dyeing process accordingly. In addition, these folding, binding, and tying techniques can also be used for natural dyes. Natural dyeing requires a different dyeing process but the same tie-dye techniques can be used as well.
Fabric Recommendations for Tie-Dye:
All the fabrics recommended by Helen for the Reynolds Top and Dress are good options. Whatever you choose, check to make sure that the fabrics are 100% natural fibres like cotton, linen, rayon, viscose or silk. Fabric blends between natural fibres (e.g. cotton-linen blends) are fine as well. It is best to avoid synthetic fabrics like polyester and polyester blends because the dyes I used (Rit All-Purpose Dye), and the tie-dye method are not ideal for polyester fibres.
I have chosen to work with a white mid-weight 100% linen, because I like the crispness and drape of linen for my Reynolds Top and Dress.
It is possible to choose a colored fabric for your tie-dye project as well. I recommend starting with lighter colors so that you will get greater contrast when dyeing with colors darker than your fabric. However take note that the color of your fabric will affect the dye color that you apply. For example, if you are using a pale blue fabric and a reddish dye, then the resulting dye color may turn out to be purple. Dye colors may change and blend with the existing color that is on the fabric.
Pretreating the Fabric:
The fabric must be pretreated before cutting the top or dress pattern. Wash the fabric according to the washing instructions that come with it, but be sure NOT to use any fabric softeners in the wash. Washing removes stains and any chemical coatings (like fabric softeners or stiffeners) that are applied to the fabric by the manufacturer, and these coatings may prevent dyes from being fully absorbed into the fibres. Similarly, do not use any fabric softening dryer sheets when machine-drying your fabric. After washing and drying, give the fabric a good press, and then it will be ready to be cut, sewn and dyed.
Part 1: Creating a Center Front Seam & Preparing the Fabric Pattern Pieces for Dyeing
A. Creating a Center Front Seam for the Reynolds Top and Dress
For a center seam to be added to the front of the Reynolds Top and Dress, a ⅝” (1.6 cm) seam allowance has to be added to the center front line. This is also the fold line on the center front of the pattern piece. This can be done by adding the center front seam on the paper pattern before cutting the fabric. This method is preferable for fabrics that are more slippery like silk or rayon.

Alternatively, the seam allowance can be drawn directly onto the fabric (with an erasable fabric marker or chalk) after pinning the original front paper pattern piece to the fabric just before cutting:


After cutting you will end up with 2 mirrored pieces of the front top/dress instead of one piece cut on the fold.

The 2 front pieces will be attached after dyeing in the same way that the back top/dress is attached according to Helen’s instructions.
B. Preparing the Fabric Pattern Pieces for Dyeing
There are two main goals to achieve before the dyeing can begin:
- Finishing all the raw seams of the fabric pattern pieces to prevent fraying and warping of the edges while the fabric pieces go through the dyeing process.
- Attaching as many of the fabric pieces as possible to simplify the dyeing process. For example, the pocket pieces will be sewn onto the front and back dress pieces because I plan for them to be dyed in the same dye pattern and colors.
While you are preparing these fabric pieces, there are some decisions that must be made regarding the design of the tie-dye before you proceed. For example, I’ve decided that for my Reynolds Dress (which will be revealed at the end of this 5-part series), I will be using similar colors for all the pattern pieces, but different tie-dye techniques for each of the different panels (front right, front left, back right, back left). This means that these different panels will not be sewn together until after the dyeing happens. For today’s crumple-dyeing tutorial, I will be doing the opposite. I will be using one tie-dye technique but alternating color combinations for the front and back of my Reynolds Top. This also means that the different panels will not be sewn together till after the dyeing process.
You may decide that only one front panel will be a separate color or tie-dye pattern. In that case, you could sew up the two back panels together before dyeing. There are many possibilities here, and what’s important is to have an idea of what tie-dye design you want for your garment before preparing the fabric pieces.
At this point, it is helpful to keep Helen’s instructions for the Reynolds Top and Dress close at hand, because we will be following her recommended sewing order (with modifications inserted where applicable). Remember that some of the sewing will be completed before dyeing, and the rest of the sewing will be completed after dyeing.
The following are steps modified from the Helen’s sewing order to prepare the fabric pieces for dyeing:
Step 2:
Staystitching is crucial for all the raw edges of the fabric pattern pieces. Go ahead and stay-stitch the armscye if you do not own a serger. This will protect the edge from warping. Then finish the armscye seam by stitching a wide zig-zag stitch (a 2.5-3 stitch setting on both stitch length and widtch) or a faux serger stitch within the seam allowance and as close to the raw edge as possible. This will minimise fraying.


If you have a serger, feel free to serge the armscye seam instead, taking extra care not to slice off any fabric with the knife of the serger. Serging is the best way to prevent fraying. It will also prevent the edges from stretching or warping, making staystitching unnecessary.
Step 3:
Pre-pressing the hem is not necessary right now. Instead, finish or serge the bottom edge of the front and back pieces.
The advantage of serging this edge is that the serged stitches automatically create a ¼” (0.6cm) border. This provides the first pressing line you can use after dyeing. If you do not have a serger, try to stay-stitch at ¼” (0.6cm) away from the raw edge. Then zig-zag stitch within the ¼” (0.6cm) stay-stitching line.

Step 4:
Again, pre-pressing is not necessary at this point, but serge or finish the side slits of all front and back pieces of the dress, the same way you did for the hem.

Make sure to do the same for the diagonal edges that join the side slits to the hems.
Step 5:
After completing the straps, serge or finish both short edges of each strap. Set them aside.

Step 8:
Skip the step of attaching the two back pieces together if you’ve decided that they are going to be dyed in a different color or use different tie-dye techniques. Instead, serge or finish the center back and top edges of the back pieces (the back neckline).
Similarly, if you’ve decided that the two front pieces are going to be dyed in a different color or tie-dye technique, then serge or finish the center front and top edges of the front pieces (front neckline).
Step 13 & 14:
Skip these two steps if the front and the back of the top/dress are going to be dyed in a different color or tie-dye technique.
If you choose to attach these pieces later, make sure to thread trace the dot marking at the slit so that it is preserved during the dyeing process. I do this by hand, sewing a cross-stitch to mark the dot, in a contrasting thread color for all of the front and back dress pieces.

Step 15:
Do not attach the front and back of the garment together for now if you’ve decided that these pieces are going to be dyed in a different color or tie-dye technique. Instead, serge or finish the side seams of both front and back pieces.
Fitting Checkpoint
If your front/back and left/right pieces are not attached right now, the fitting checkpoint cannot be done until after the dyeing process (unless you temporarily baste the pieces together). However, I recommend making a muslin as Helen suggests before working on your actual tie-dye fabric. That way you can make all of your fitting adjustments to the fabric pieces before tie-dyeing them.
Step 16:
Skip pre-pressing the bottom edges of the facings for now.
Step 17:
If you’ve already made a muslin, completed the fitting checkpoint, and made the fitting modifications to your facings, then go ahead and sew the front facing to the back facing at the side seams, and finish and press the seams. In addition, serge or finish the armscye and the top and bottom edges of the facings.

If you are going to do the fitting checkpoint later, then I suggest finishing all the edges of the front and back facings separately using your preferred method. Baste the side seams together.
Step 18:
There are a few options to consider when attaching the straps. They can either be attached to the front pieces, the back pieces, or the facings.

Where you decide to attach them will depend on what colors and tie-dye techniques you’ve decided to use. If they will be the same colors as the front pieces, then you can attach them only to the front. You could also attach one to the back piece and the other to the front piece. You could also decide to attach them to the facings. Whatever you decide, I recommend attaching only one end of the strap to the fabric pieces.
If you are attaching the straps to the front and back pieces, place the right sides together matching the notches and basting with a ½” (1.3 cm) seam allowance. Serge or finish the top edges of the front and back pieces together with the straps.
If you are attaching the straps to the facings, make sure that the right side of the facing is facing the wrong side of the straps. Pin and baste at a ½” (1.3 cm) seam allowance. Serge or finish the top edges of the front and back facings together with the straps.
The preparation of the fabric pattern pieces is now complete! Make sure before dying any of the pieces that all of the raw edges are finished or serged.

The following picture shows all of the separate pieces that I have prepared, with the straps attached to the front and back bodice:

The following pictures show how I prepared my fabric pieces for my Reynolds Dress (which I will reveal at the end of this 5-part series). For this dress, the straps were attached to the facings:


PART 2: CRUMPLE DYEING
Materials and Tools Required:

- Your fabric, fabric pieces, or garment for dyeing (made with 100% natural fibres)
- Rit All-Purpose Liquid Dye in your chosen colors
- Rit ColorStay Dye Fixative
- Squeeze bottles, with a volume of 125ml or 250ml. I use the smaller bottles for the dyes and the larger one for the ColorStay Dye Fixative
- Measuring cup and measuring spoons
- Large wire rack
- Large plastic container that the wire rack can sit on
- Large plastic sheets/covers or dollar store shower curtains to protect your work surface
- Salt for cotton, linen, rayon, viscose; vinegar for silk and wool
- Gloves
- Plastic wrap or cling film
- Microwave-safe container or microwave safe plastic bag
- Spray bottle to dampen the fabric
- Paper towels to clean up any spillage (always leave these nearby)
- Large pot to boil water
- Rubber bands
There are many different ways to apply dye to your garment. The main method used in this series is the squeeze bottle technique. Many of the tools that you see listed above are kitchen tools and utensils, and can be found easily at a dollar store. These tools MUST be set aside specifically for dyeing, and kept separately from the utensils that are used in your kitchen. The dyes will remain on the tools used and are toxic when used for food preparation.
Setting up your Tie-Dye Work Station:
- Before I gather my tools and materials and set up my workspace, I like to begin by heating up a large pot of water on the stovetop. This way the water will be ready to make the dye solution by the time I’ve set up my tie-dye station.
- Line your tie-dye station with a large plastic sheet or shower curtain to protect your furniture.
- Place all materials and tools on your tie-dye station within easy reach.
- Set a large wire rack on top of a large container that will catch the extra dye solution.
- Prepare the dye solution
Dye Recipe:
Once the water is at least 60 degrees Celsius or 140 degrees Fahrenheit, the dyes will be ready to be mixed. I prefer to work with water that is almost boiling. Put on your gloves to protect your hands from getting stained and help insulate them from the heat.
1. Fill a squeeze bottle with 125ml (4 ¼ oz) of hot water

2. Add ½ tbsp of salt

3. Add at least ½ tbsp of dye color. You can intensify or darken the color by adding more dye. Use small fabric scraps or paper towels to do a quick color test.

The hot water / salt / dye ratio listed above can be multiplied for larger dyeing projects. If you are dyeing one garment and using more than one color, then 125ml (4 ¼ oz) of hot water per color is more than enough dye. You can always make more if needed.
Close the nozzle and shake the bottle to mix well and to help dissolve the salt. If you are working with silk or wool, then replace the salt with ½ tbsp of vinegar. If you are working with a fabric that is a blend of silk and wool with cotton, linen, viscose or rayon, then use ½ tbsp of salt and ½ tbsp of vinegar in the dye solution.
For my crumple-dyed Reynolds Top I am using four different colors: Tangerine, Violet, Aquamarine and Golden Yellow. Each of the colors will be prepared in a different squeeze bottle. Prepare all of the colors needed for dyeing.
Crumple-Dye Technique
Preparation:
Fill a spray bottle with water and dampen your fabric pieces slightly.

Make sure the pieces are facing right side up, and that the strap is folded to the wrong side of the bodice.

The right front of my Reynolds Top will have the same colors as the left back, and the left front will have the same colors as the right back. Therefore, I will lay the right front (right side up) on top of the left back (right side down) since both can be dyed together. The strap is sandwiched in between the bodices.

Folding & Binding:
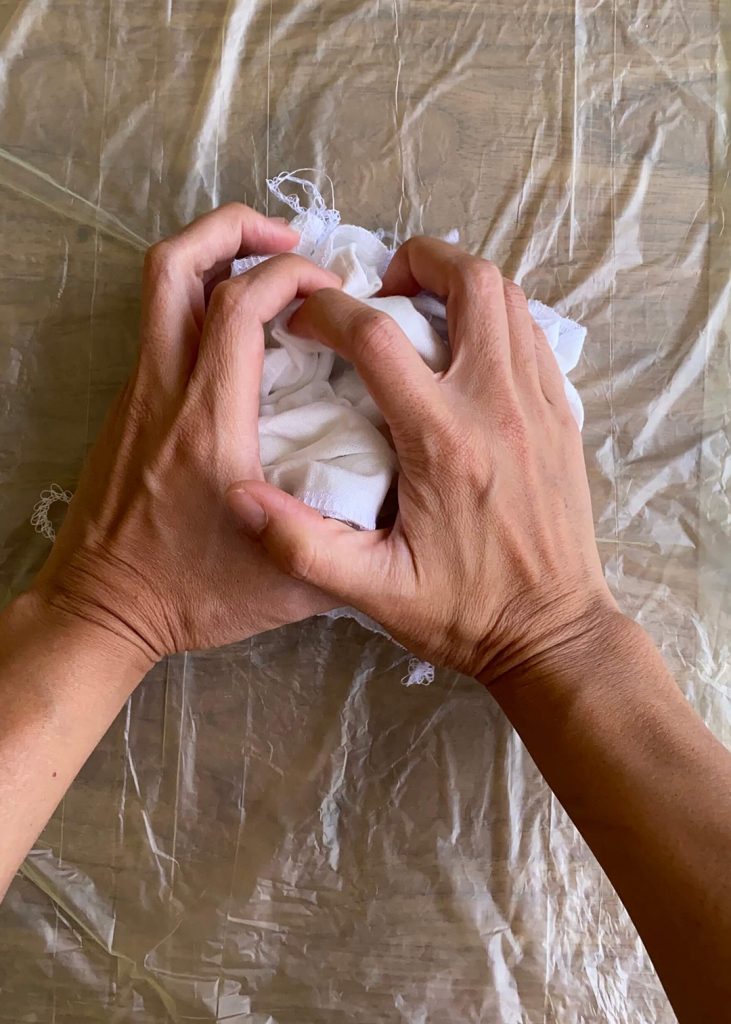
The folds that produce this tie-dye pattern are made by crumpling the fabric. To make sure that there are folds throughout the garment, I start by crumpling the layered fabric pieces at the hem.

Then I walk my fingers up towards the top of the fabric piece and continuing to crumple the fabric beneath.

I form a crumpled ball and secure this crumpled shape with several rubber bands.


Then I repeat the same process for the left front and right back pieces.
The facing is also crumpled and bound in the same way.


The more tightly bound the crumpled fabric piece is, the more white space will be left undyed. The reverse is true: the looser the fabric piece is bound, the less white space will be left undyed. Therefore, finding the right number of rubber bands, the right crumpled circumference, and the right amount of band tension to bind the fabric is key. Here are my three bundles of crumpled Reynolds Top fabric pieces ready to be dyed:

Dyeing:
Make sure your gloves are on while applying the dye.


Since I am working with relatively small pieces of fabric for the top, I am careful not to apply too much dye and over-saturate the fabric. I didn’t leave too many visible white areas uncolored, so I am guessing that there will be very little white left in the top. However, I also exercised restraint by NOT applying too much dye. This way there will be a good proportion of blending and contrast between the colors that I am using. If the fabric is oversaturated with too much dye, it can result in a more homogenous blend of the two colors, and the overall contrast of colors will be reduced. Furthermore, when using more than one color on a single fabric piece, oversaturation can produce an unintended murky brown or grey. Knowing how much dye to apply without oversaturating the fabric comes with practice and experimentation. Through trial and error, and the subsequent experience gained from it, you will get better and better at producing the right blend of dyes.
Tip: when applying the color, angle the fabric towards the tip of the bottle opening to catch any dye squirting dye. This will help prevent the dye solution from going where it doesn’t belong.
Turn the fabric pieces over and repeat the dyeing process on the other side.

As you can see from the picture above, the Golden Yellow and the Aquamarine dyes have blended together to form a green shade.
If you plan on using more than one set of colors at your tie-dye station, remember to wipe down the wire rack before placing any undyed fabric pieces on it.

Here are the three bundles of fabric after they are dyed:

Take note that the facings (bottom left corner) are dyed in all the four colors. For these pieces I exercised even more restraint in applying the dye, because the fabric pieces are very small and there is the increased risk creating murky shades when blending multiple colors.
After dyeing, immediately saturate the fabric pieces with ColorStay Dye Fixative.

ColorStay Dye Fixative Recipe:
- 250ml (8 ½ oz) of hot water in a squeeze bottle
- 2 tbsp of ColorStay Dye Fixative
Shake the bottle to mix well, then squirt the fixative all over the fabric pieces.

Turn the pieces over and saturate them on the other side as well. Leave the fabric pieces to marinate in the fixative for 20 minutes. Then wrap the fabric pieces separately in plastic wrap.

I find that the fixative really helps with color retention. It also prevents color bleeding and keeps the white areas of the pattern from being stained by the color.
Place the wrapped-up pieces in a microwave safe container to catch the excess dye solution that may flow out of the wrapped pieces. Alternatively, you can place the pieces in a microwave-safe plastic bag.

Zap the fabric pieces on high for two minutes. The heat of the microwave will help set the dyes.

If you do not have a microwave, you can also use a hairdryer to create the same amount of required heat. Alternatively, you can leave the wrapped pieces in the plastic bag and place them in the sun for 2 hours.
Be very careful when removing the fabric pieces from the microwave, because the steam may burn your hands. Keep your gloves on to handle them.
Allow the fabric pieces to cool completely before removing the plastic wrapping. Rinse the fabric pieces in cold water. While you are rinsing, remove the rubber bands.

Stand back and ogle your one-of-a-kind tie-dye creations. Do a happy dance, and then continue rinsing until the water runs clear.
Wash the fabric pieces quickly in a gentle detergent solution, without soaking them in the soapy water. Squeeze out the excess water and then toss them in the dryer to dry. If your fabric is too delicate for the dryer, hang dry out of direct sunlight. Once dry, give the fabric pieces a good press.


You’ve finished tie-dying! Now you can finish sewing these fabric pieces together following Helen’s instructions from the top, completing any steps we skipped before dyeing the garment.


For comparison, I also crumple-dyed my muslin of the Reynolds Dress, but only after it was sewn up completely. The colors I used were Aquamarine and Indigo. Feel free to apply this simple tie-dye technique to any wearable muslins you’ve sewn up to spice them up.


There are so many more tie-dye techniques to choose from, and in the next installment we will create more patterns with rubber bands. I can’t wait. See you soon!


The post Sewing a Tie-Dye Reynolds with Geri: Part 1 appeared first on Helen's Closet Patterns.