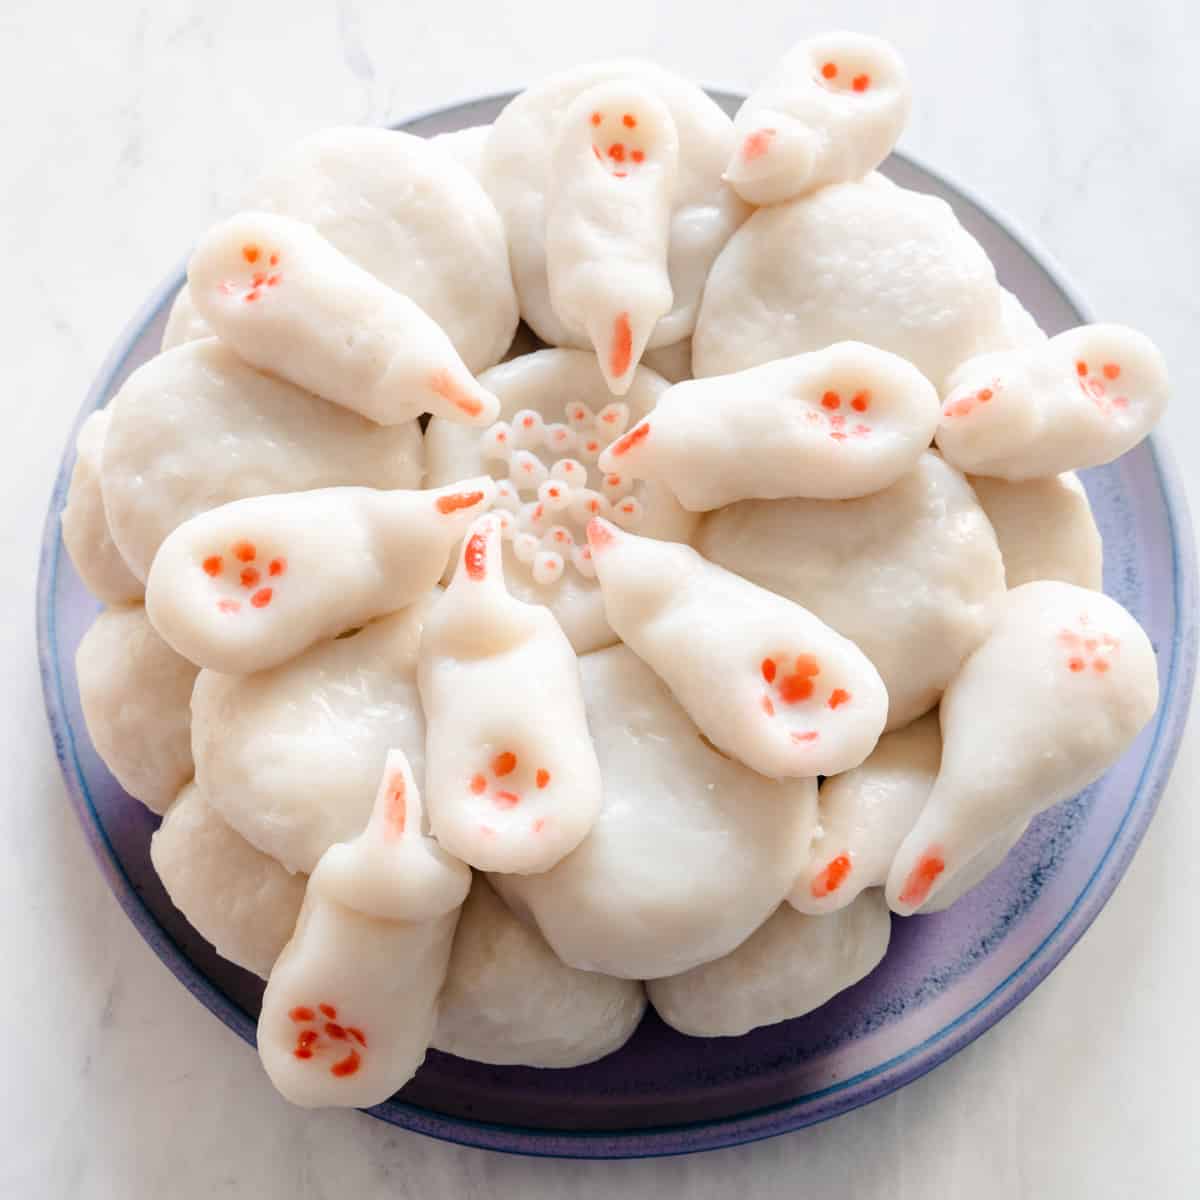
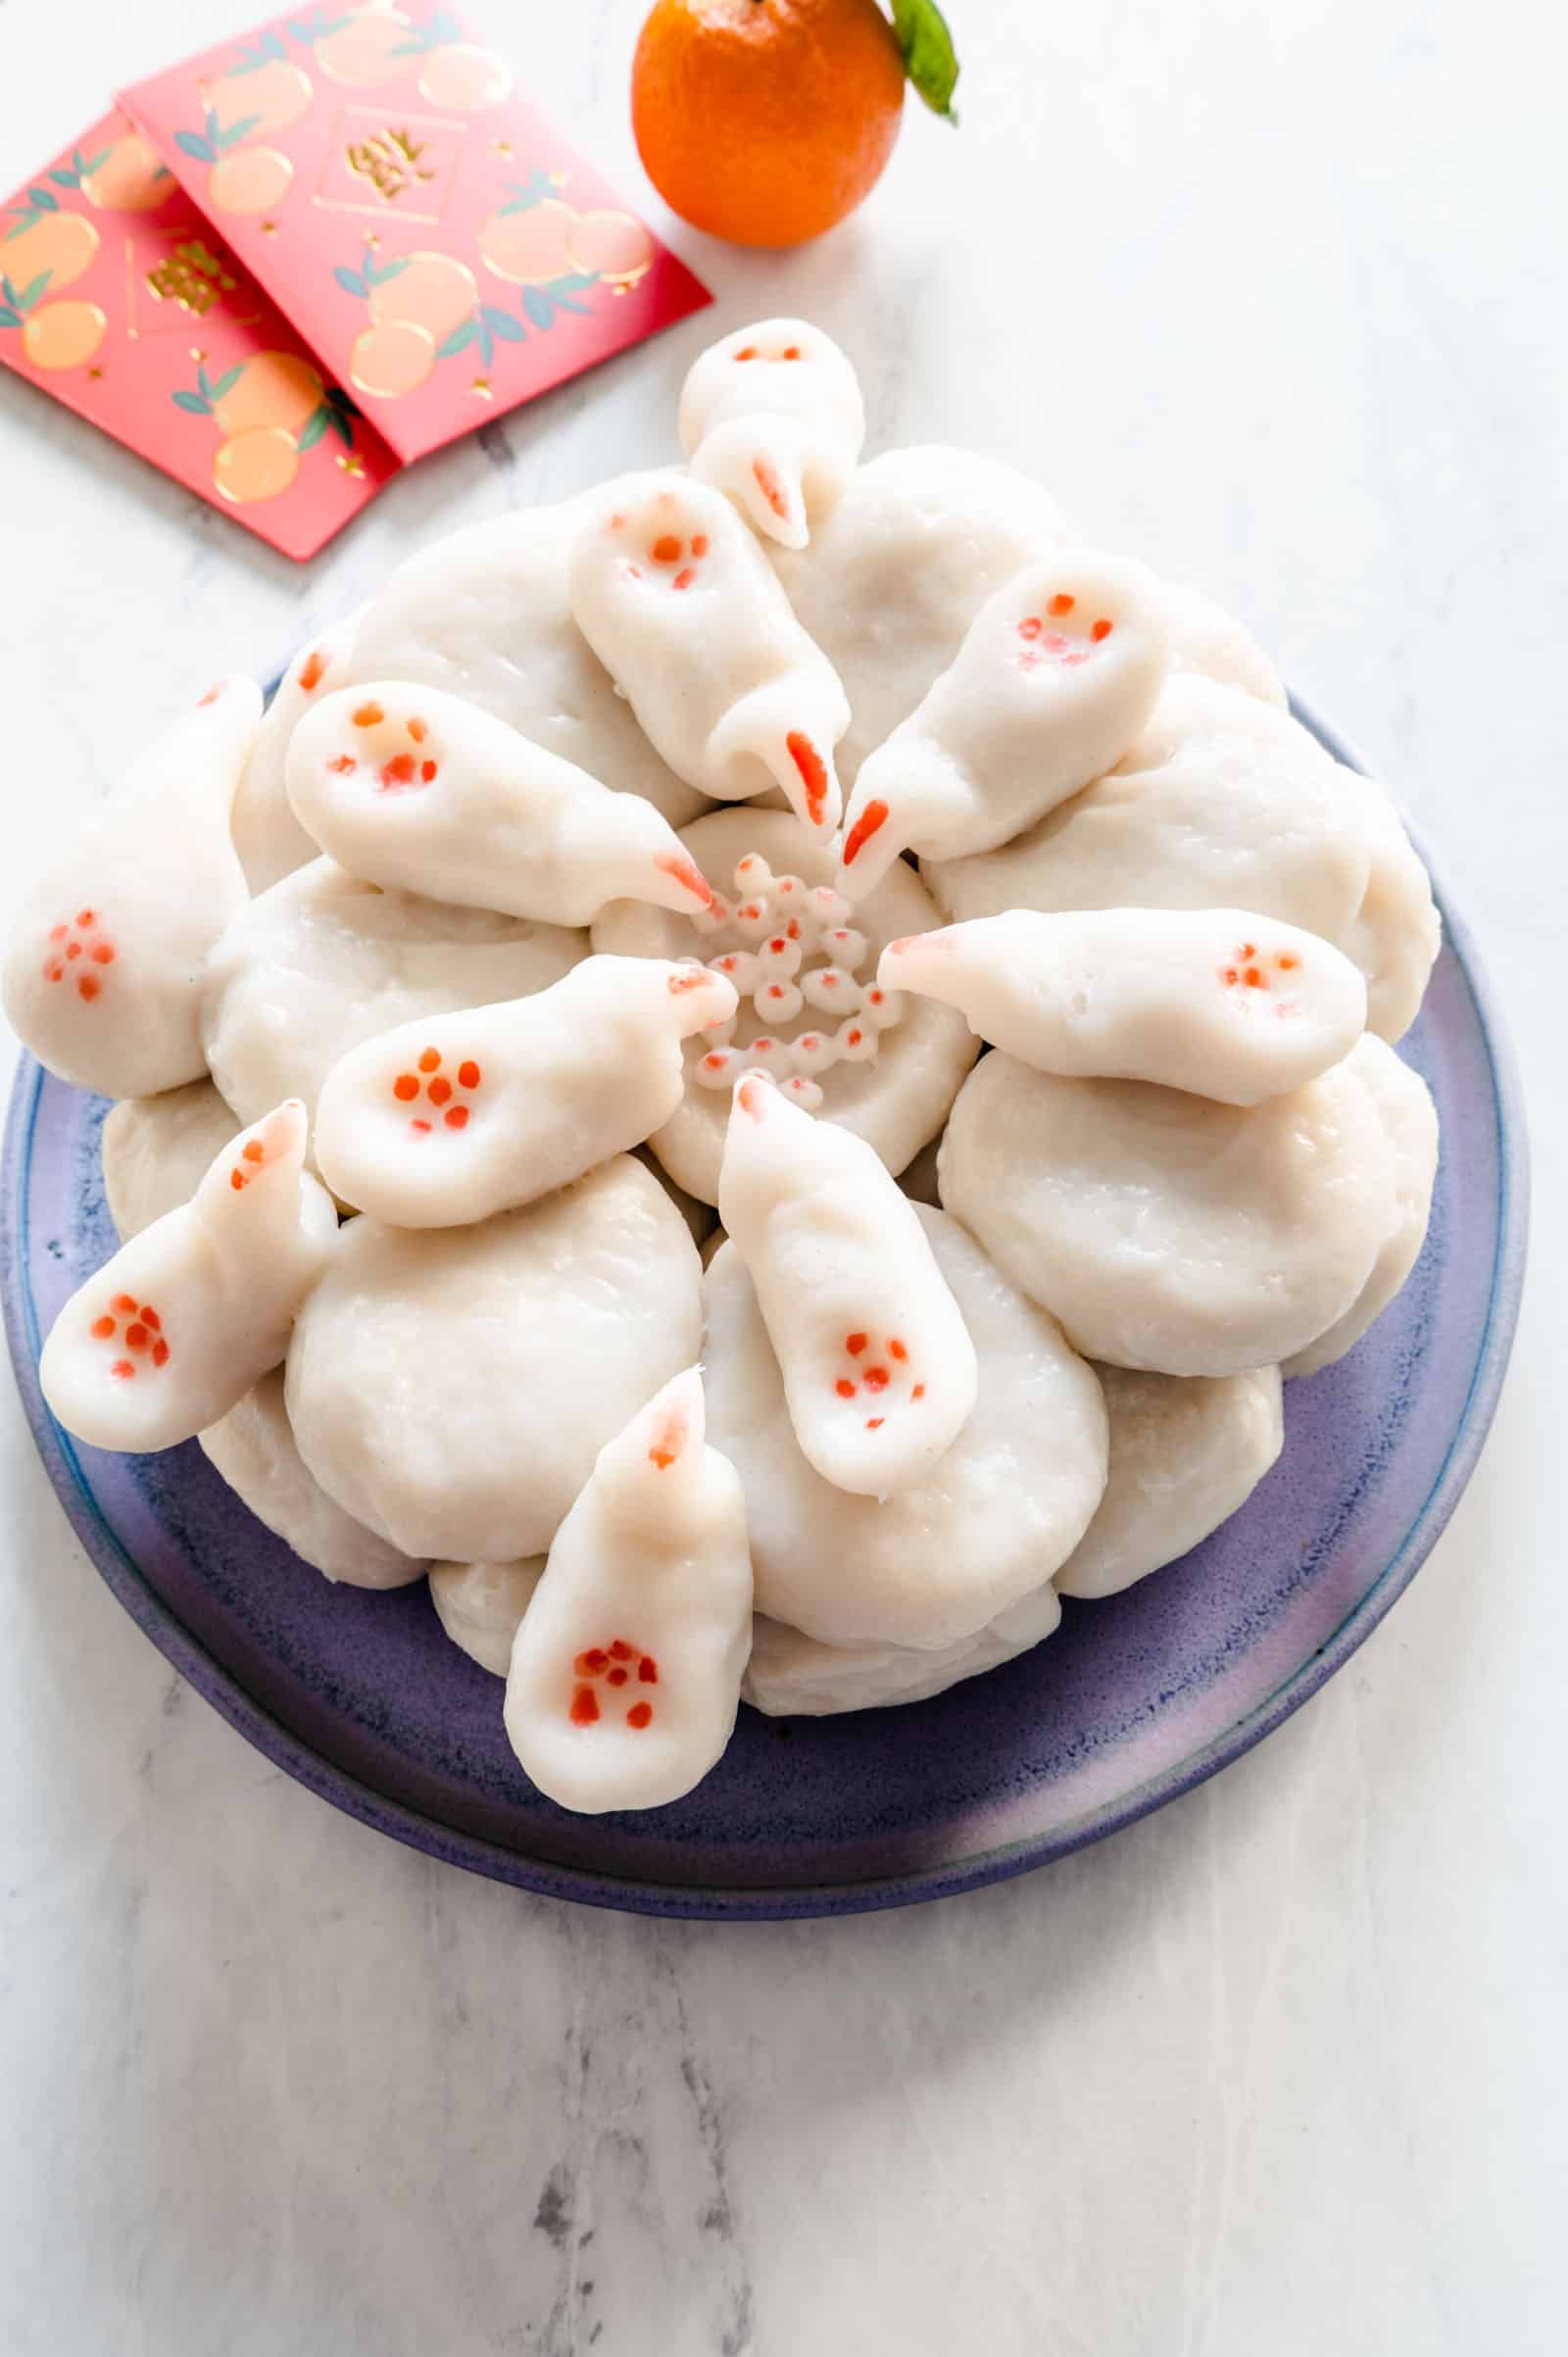
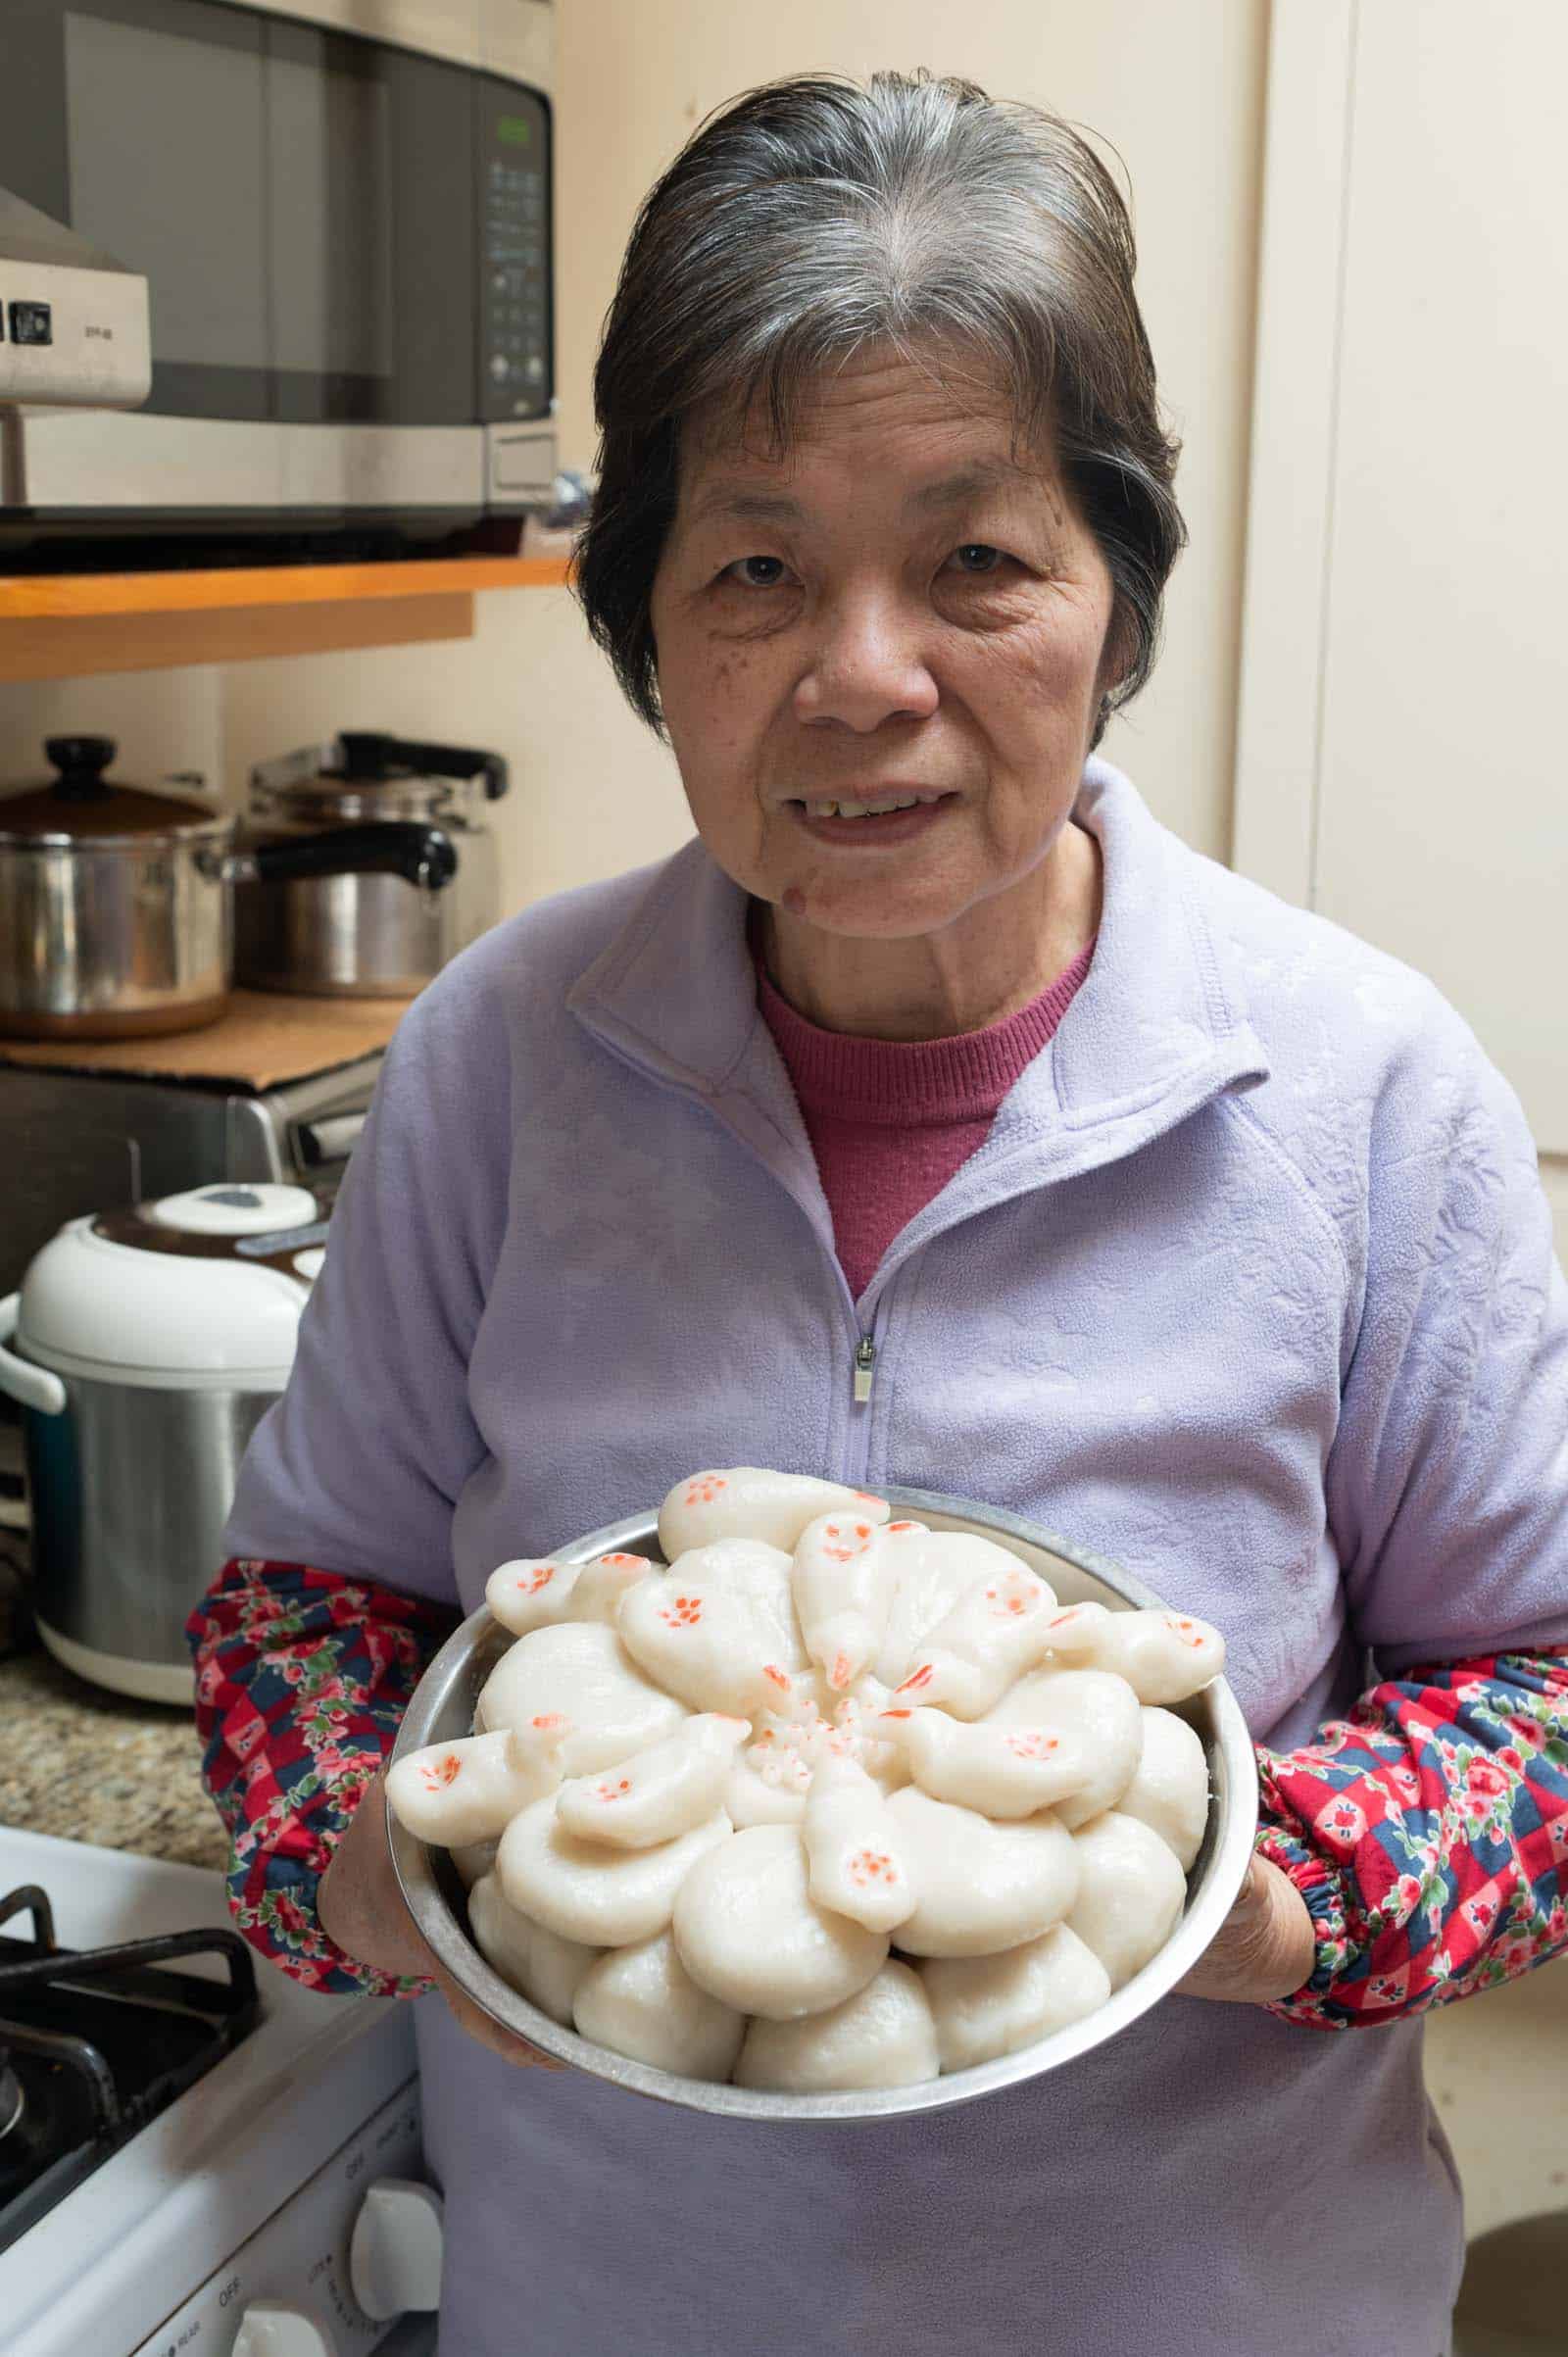
Lunar New Year celebrations aren’t complete without a batch of Mama Lin’s 迎年圓, literally “rice cakes to welcome the new year.” To my knowledge, this type of rice cake is a regional specialty of Toisan (台山) and Hoiping (開平/开平), rural county-level cities in southern China.
There are many names for this dish. One of my sisters told me that growing up, they called it 牙連圓 (牙连圆), literally “teeth linking rice cake.” Some people also call this dish 牛欄圓 (牛栏圆), literally “bullpen rice cake.” I’ve decided to use the name 迎年圓 because it seems the most appropriate for Lunar New Year.
My mom usually places these new year rice cakes on her dining table as new year’s decoration for a day or two. After that, she usually slices the rice cakes and stir fries them. Besides stir frying, these rice cakes are good on their own dipped in soy sauce and/or chili oil crisp!
COOKING NOTES FOR TOISAN NEW YEAR RICE CAKE
FLOURS
You’ll need 2 types of flour for this new year rice cake recipe: rice flour and tapioca starch. In the past, my mom used only rice flour to make the rice cakes. Over the years, she discovered that adding tapioca starch to the dough makes the rice cakes softer, chewier, and less dense.
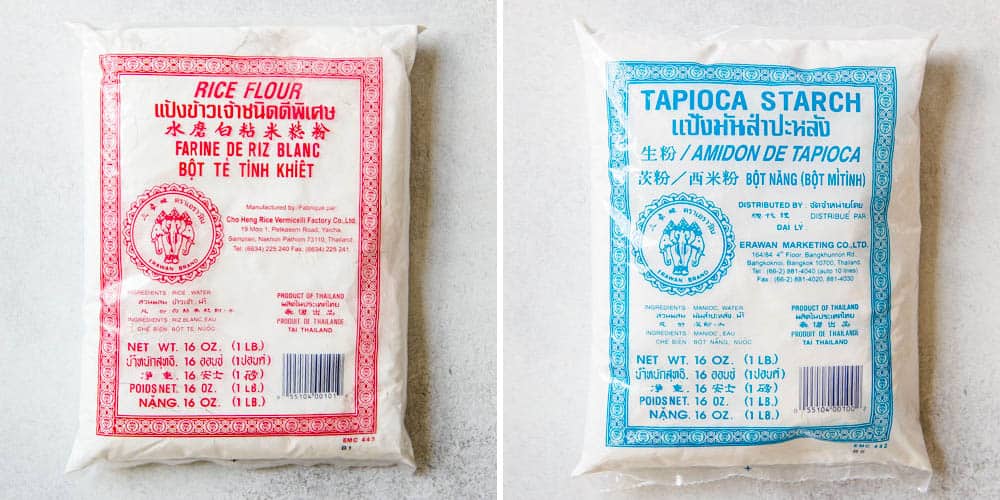
My mom generally uses rice flour from the Erawan brand, which is produced in Thailand and comes in the bags with the red labels. You can also use stone ground rice flour like the one produced by Bob’s Red Mill. Bob’s Red Mill’s white rice flour tends to be a coarser grind, so the rice cakes won’t be as smooth as ones made with Erawan flour. Nonetheless, it is a good substitute if you don’t have easy access to an Asian grocery store.
Do not use sweet rice flour or glutinous rice flour for this recipe. Otherwise, the rice cakes will become too soft and chewy.
In terms of tapioca starch, my mom also uses the Erawan brand, but any brand of tapioca starch will work for this recipe.
USING HOT WATER TO MAKE THE DOUGH
You must use boiling hot water to make the dough. As my mom explains it, the heat of the water “cooks” the flour and turns it into a solid mass. The water must be very hot in order for the flours to gelatinize properly. I also recommend boiling the water over the stove in a saucepan or a kettle. I find that water doesn’t heat as thoroughly in electric kettles.
THE AMOUNT OF WATER YOU’LL NEED VARIES
In general, I try to streamline my mom’s recipes and make them as precise as possible. Unfortunately, I found that difficult to do for this recipe because different kitchen environments can affect the amount of hot water you’ll need to make the dough. My mom uses nearly 6 cups of water when she makes these rice cakes, but I used significantly less water when testing the recipe in my own kitchen. That’s why in the recipe below, I’ll give you rough guidelines, photos, and a video to illustrate how I gauge the right amount of water to add to the flours.
The key to remember is to add hot water to the flour gradually, adding more water only when you see a lot of dry loose flour.
USING A LARGE BOWL TO MAKE DOUGH
If you are making a full batch of these new year rice cakes, I recommend using a large bowl that’s about 11 to 12 inches wide to make the dough. That way, you can easily see where there are dry pockets of flour that need hydration. If you don’t have a bowl of this size, make the dough in 2 smaller bowls.
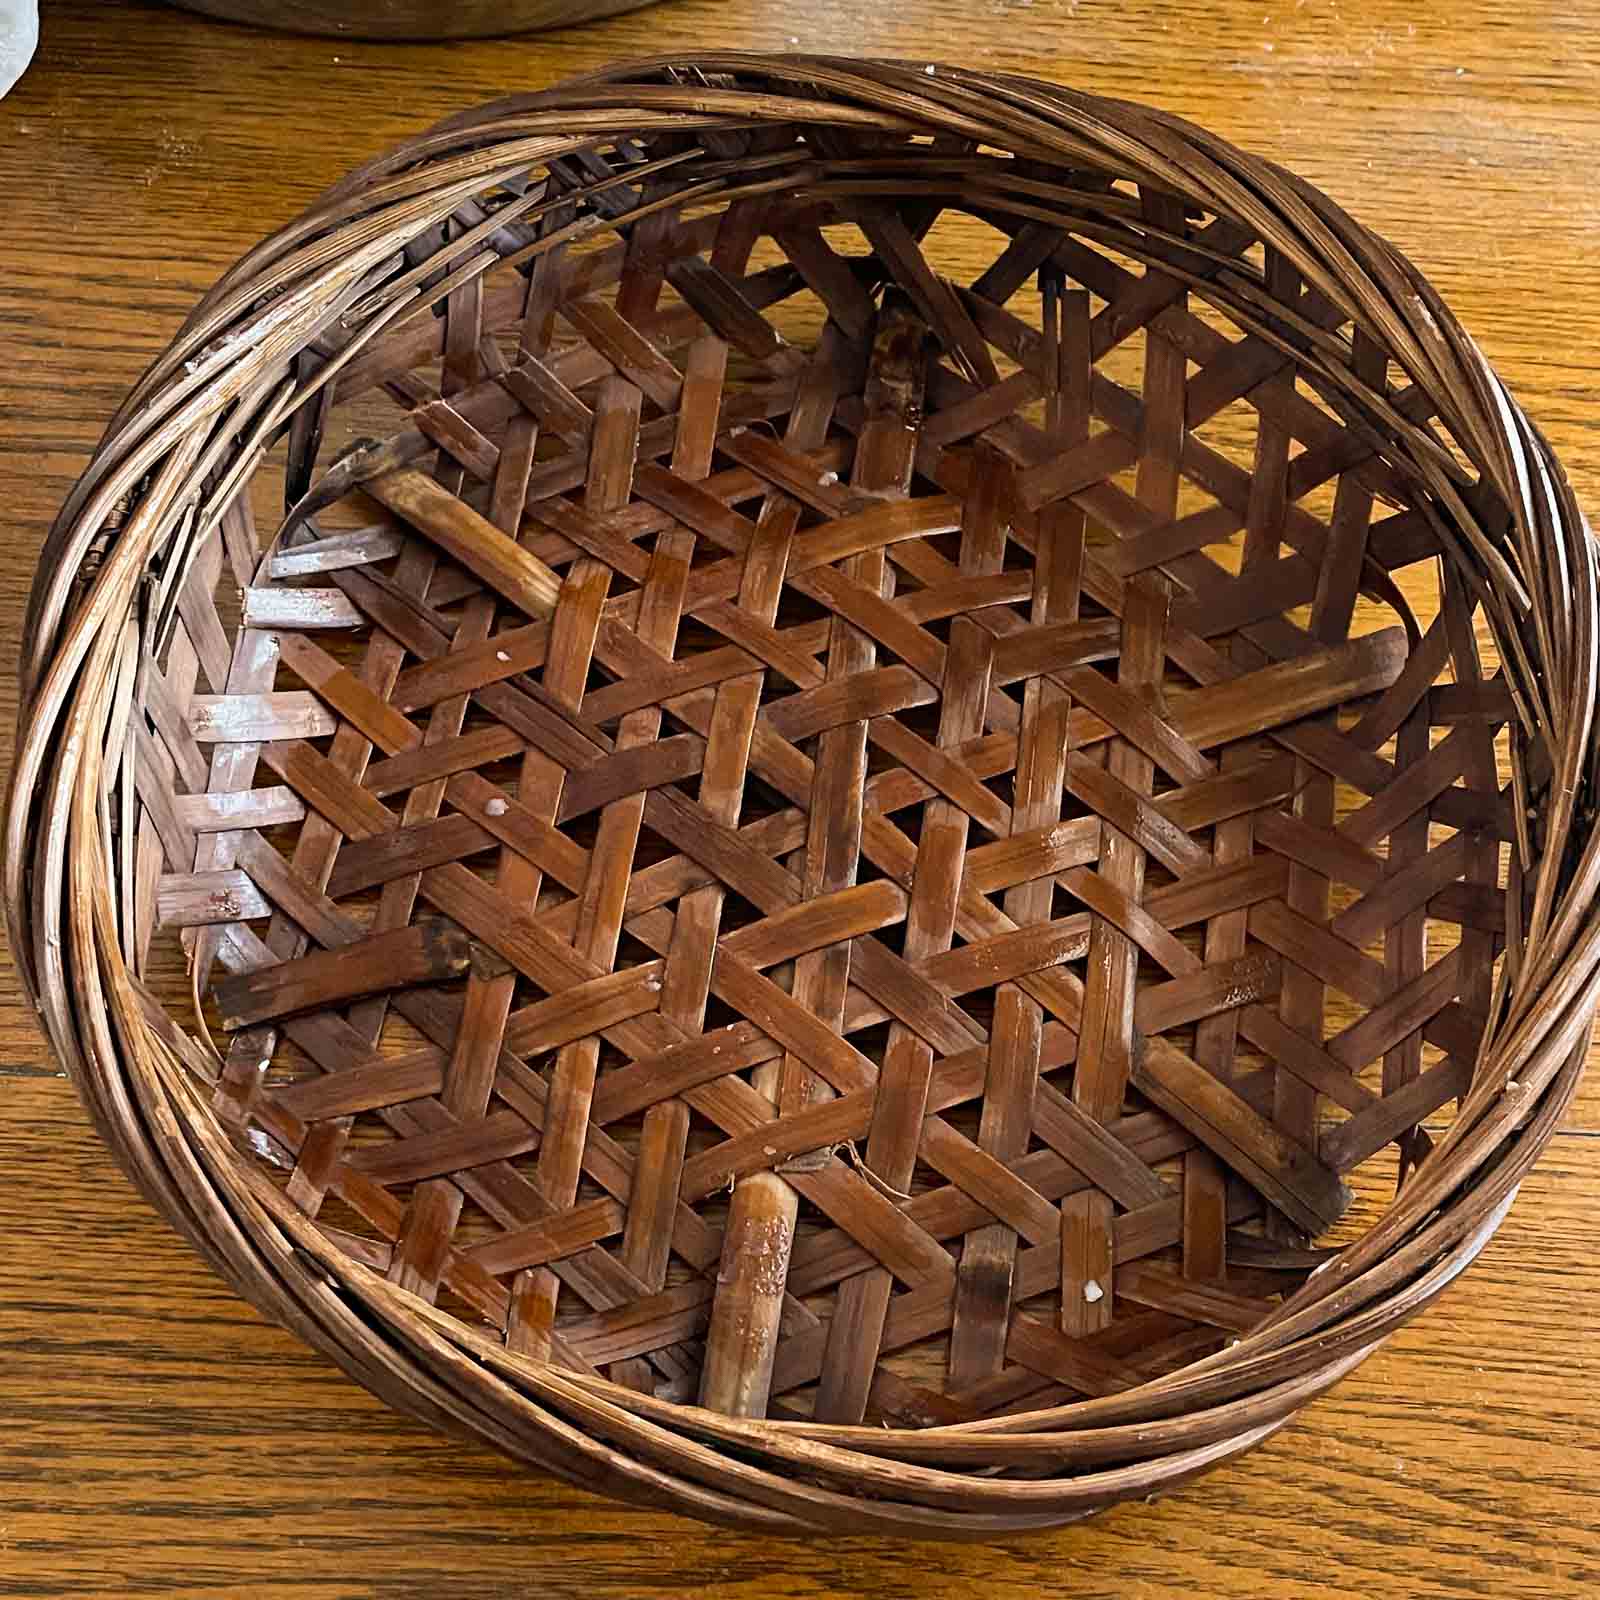
STEAMING BASKETS
My mom always uses a 9-inch woven bamboo basket (photographed above) to steam her 迎年圓. I recently discovered that this basket was made from bamboo that grew around our family home in Toisan, and it was woven by a family friend. This bamboo basket was one of the few possessions from home that my mom brought with her when she immigrated to America.
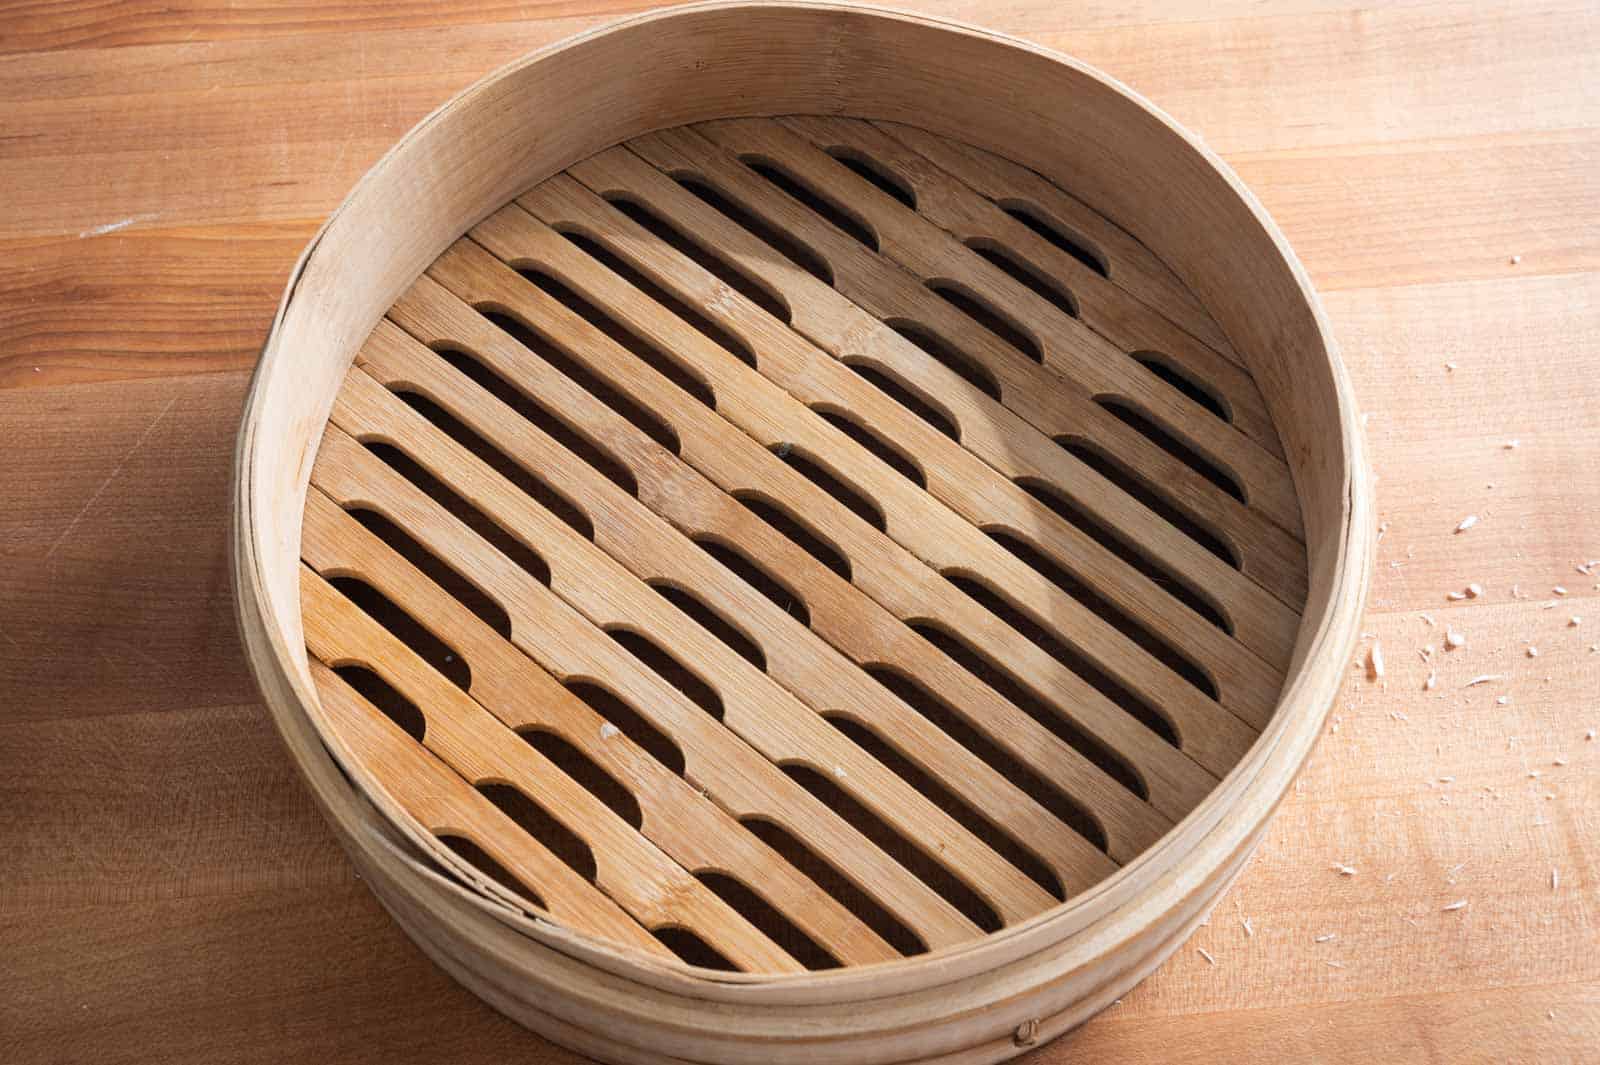
I do not own a basket like my mom’s, but I found that found that bamboo steamers work very well too.
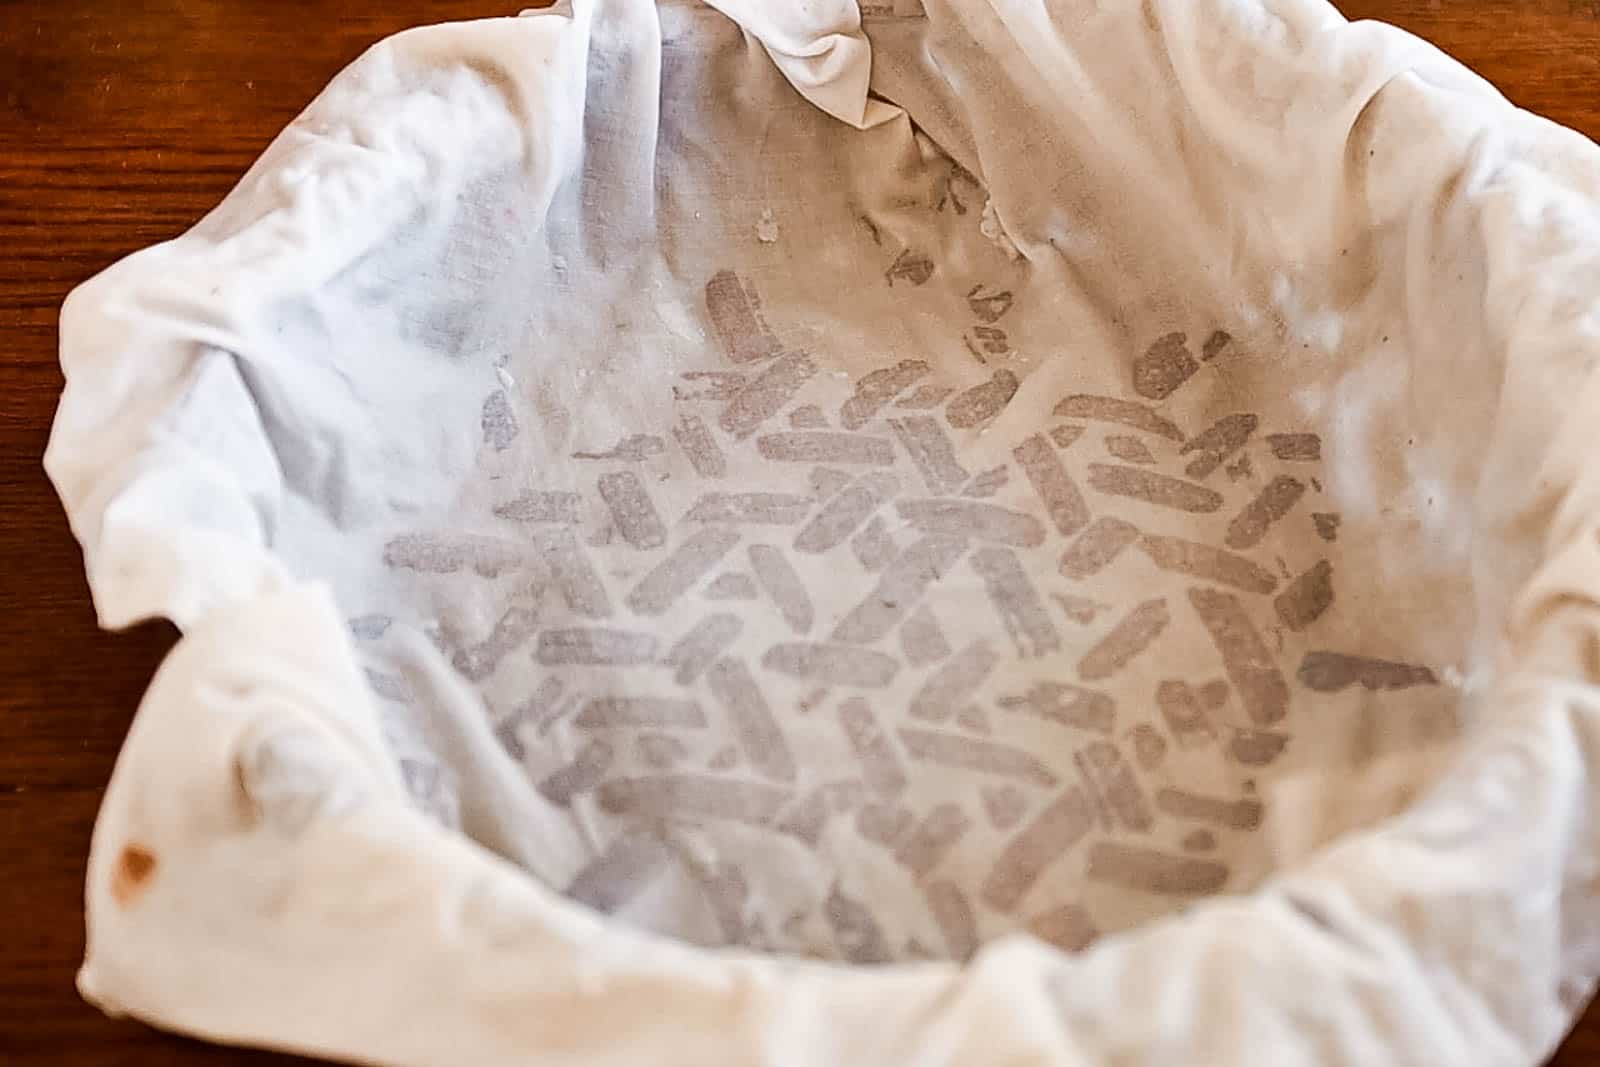
Line the steamer basket with a damp muslin or a cheesecloth. The damp cloth helps to keep the rice cakes from sticking to the basket. Parchment paper works too. If you are using a fairly large cloth, tuck in the cloth under itself so that you have no more than a 1 to 2-inch overhang.
By the way, make sure to wet the cloth before using it to line the baskets. Otherwise, the rice cakes will cling to the cloth. I made the mistake of using a dry cloth and it took me a long time to scrub off chunks of rice cake from the cloth.
SHAPING THE RICE CAKES
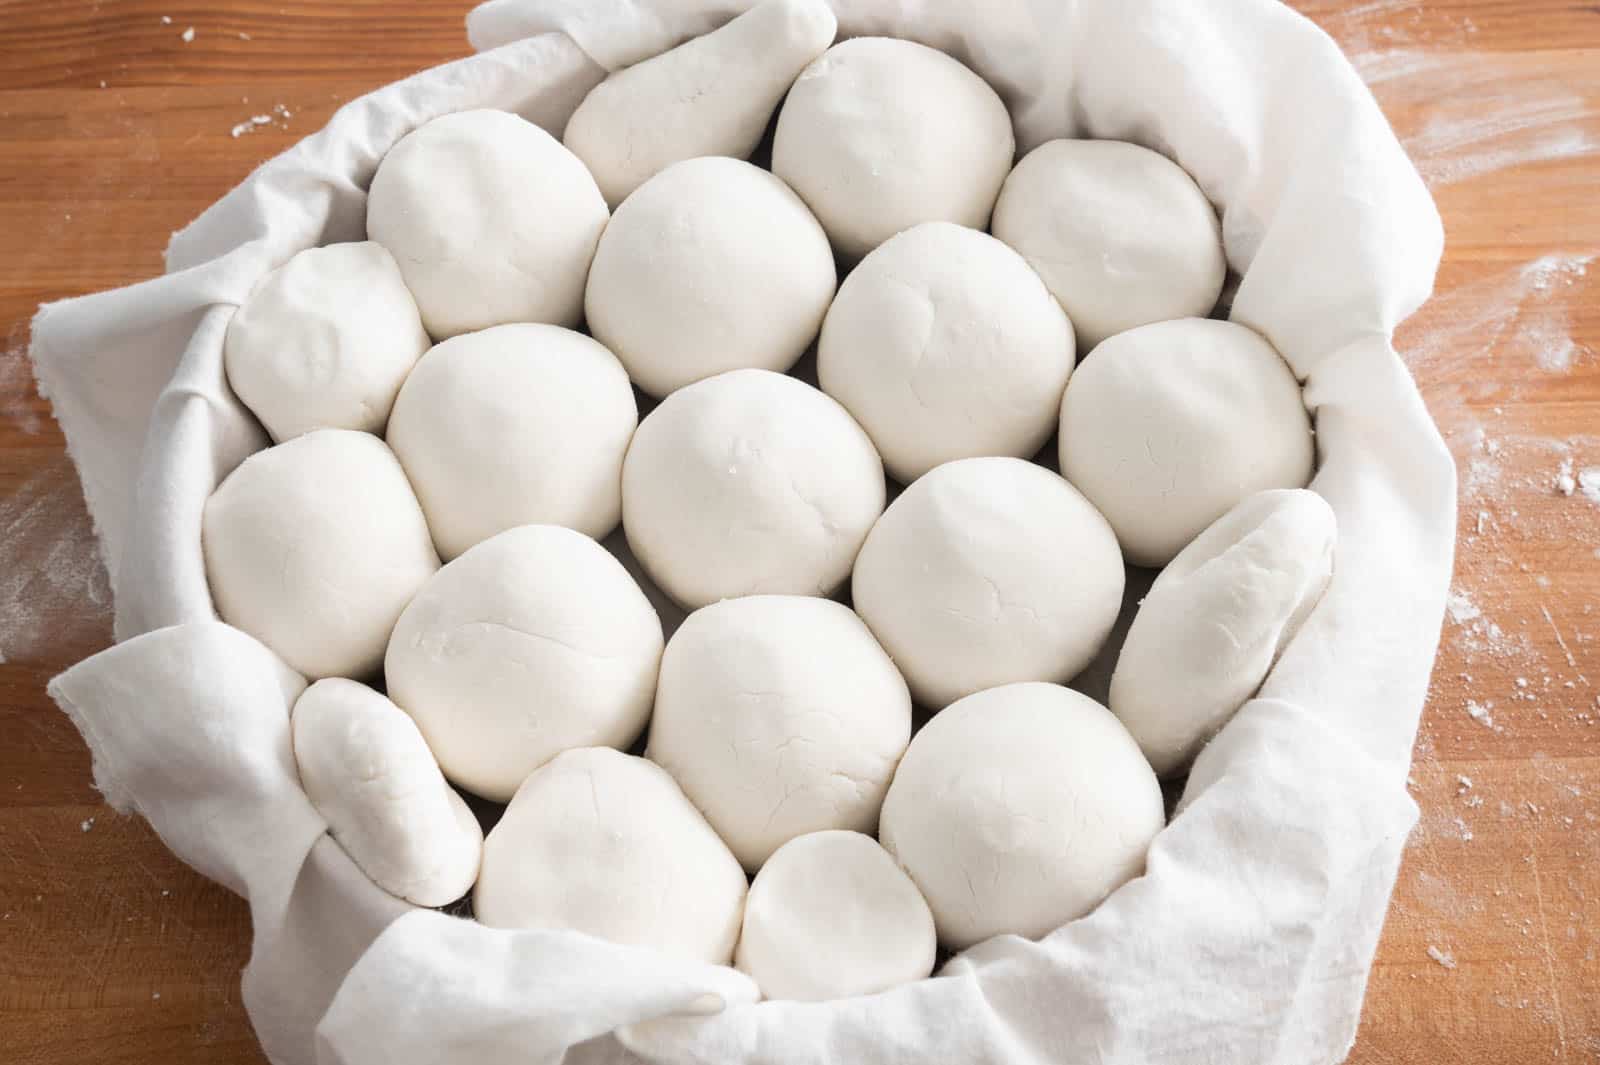
You can shape these rice cakes a number of ways, but the most important shape is the large balls. Their circular shape symbolizes 團圓 or “togetherness” (团圆 in simplified characters). My mom tells me that it’s important to fill the bottom layer with the large rice cake balls. This symbolizes fullness and abundance for the new year.
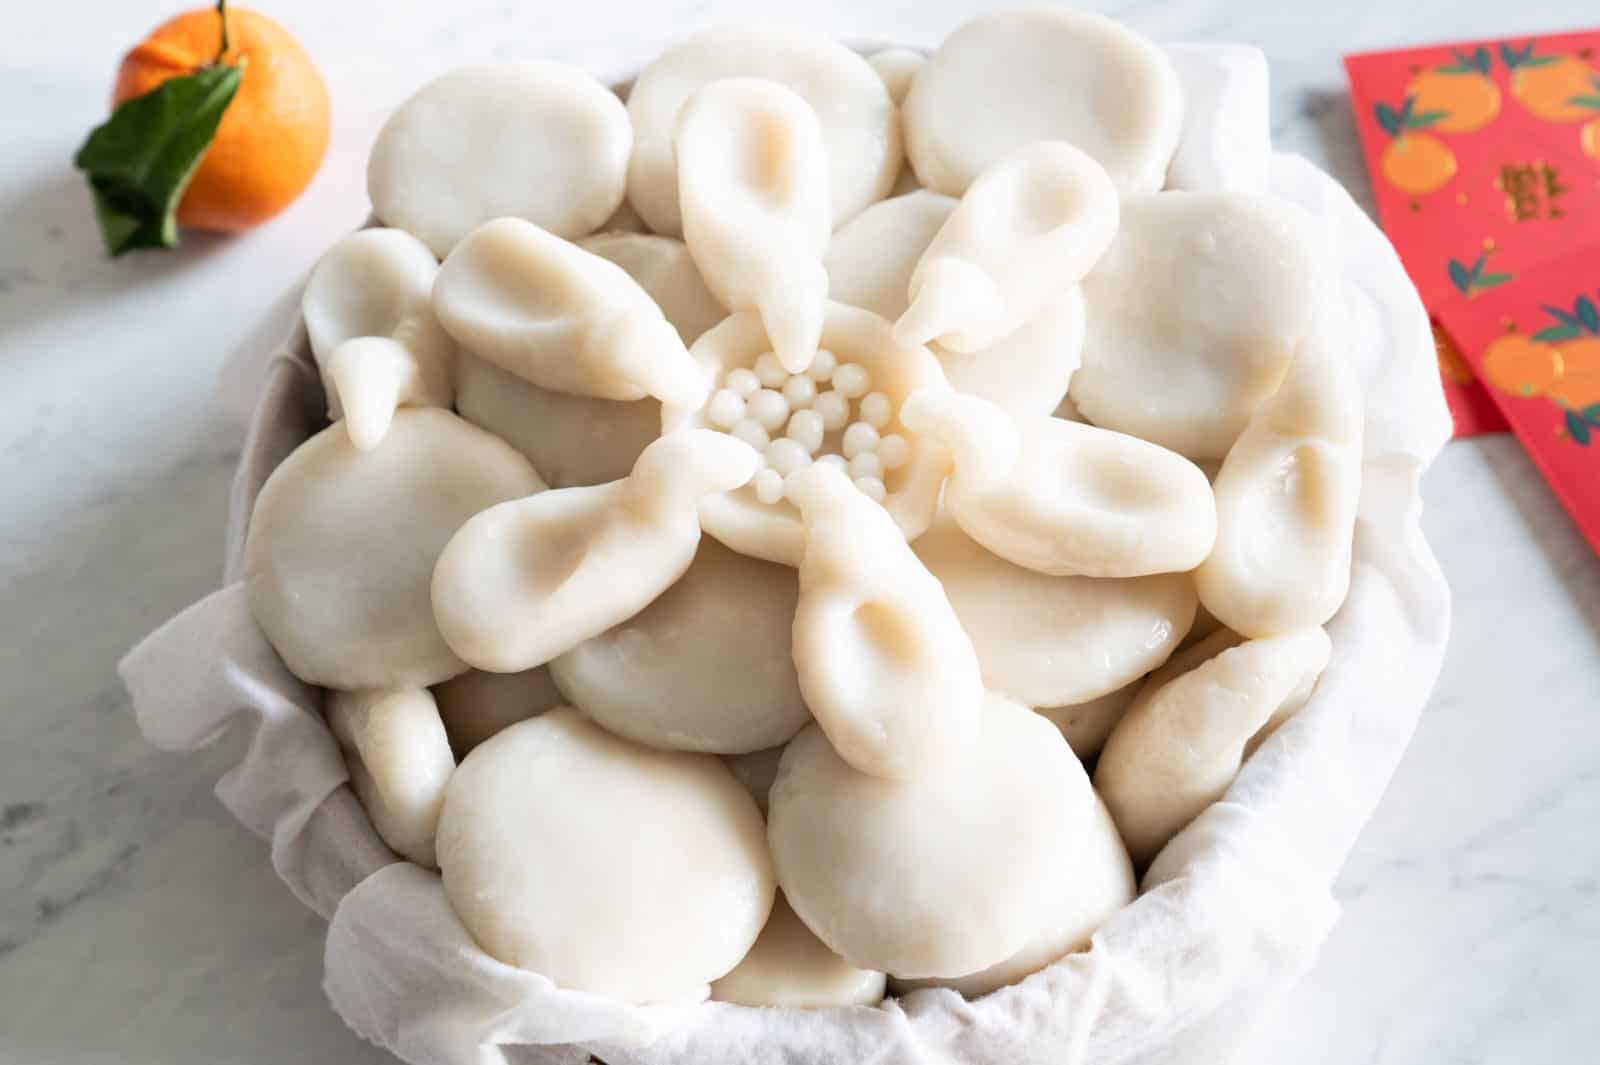
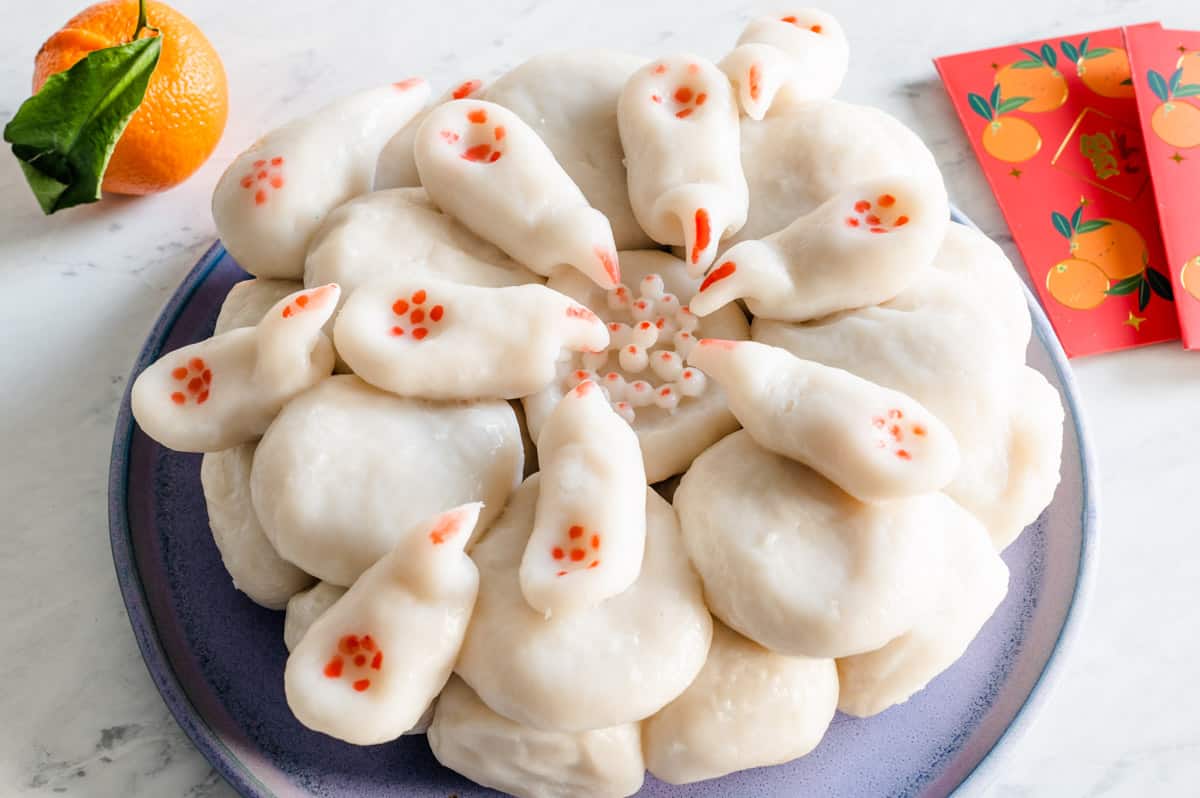
In addition to these large rice cake balls, my mom likes to manipulate the remaining dough into a variety of shapes to create a tableaux. There’s always a layer of coins, at least 6 geese, a bowl with bird feed for the geese, a pig trough, and arrowhead root (茨菰), one of the auspicious foods that people eat during Lunar New Year. This scene that my mother creates with her new year rice cakes is a reminder of our family’s rural roots back in China.
Here is my attempt at recreating my mom’s scene.
STEAMING RICE CAKES
Place a tall steaming rack inside a large wok and fill the wok with water, until there’s about 1/2-inch gap between the water line and the top of the rack. Once the water boils, place the basket of rice cakes over the rack, cover the wok, and steam on medium-high for 45 to 50 minutes. Because of the long cooking time, make sure to replenish the water inside the wok every 20 to 25 minutes, as the water inside the wok will evaporate.
If you are using a bamboo steaming basket, you can place the basket directly inside the wok, without a steaming rack. Fill the wok with water until the bottom 1/2 inch of the bamboo basket is submerged in water. With this steaming method, you must be more diligent about replenishing water during the steaming process. The bottom of the bamboo steamer can burn easily if there’s not enough water. Check the wok every 15 to 20 minutes to make sure there’s plenty of water around the bottom of the basket.
DECORATING WITH FOOD COLORING
My mom likes to decorate her cooked rice cakes with a bit of diluted red food coloring, but that’s optional. I think these rice cakes look beautiful even without food coloring.
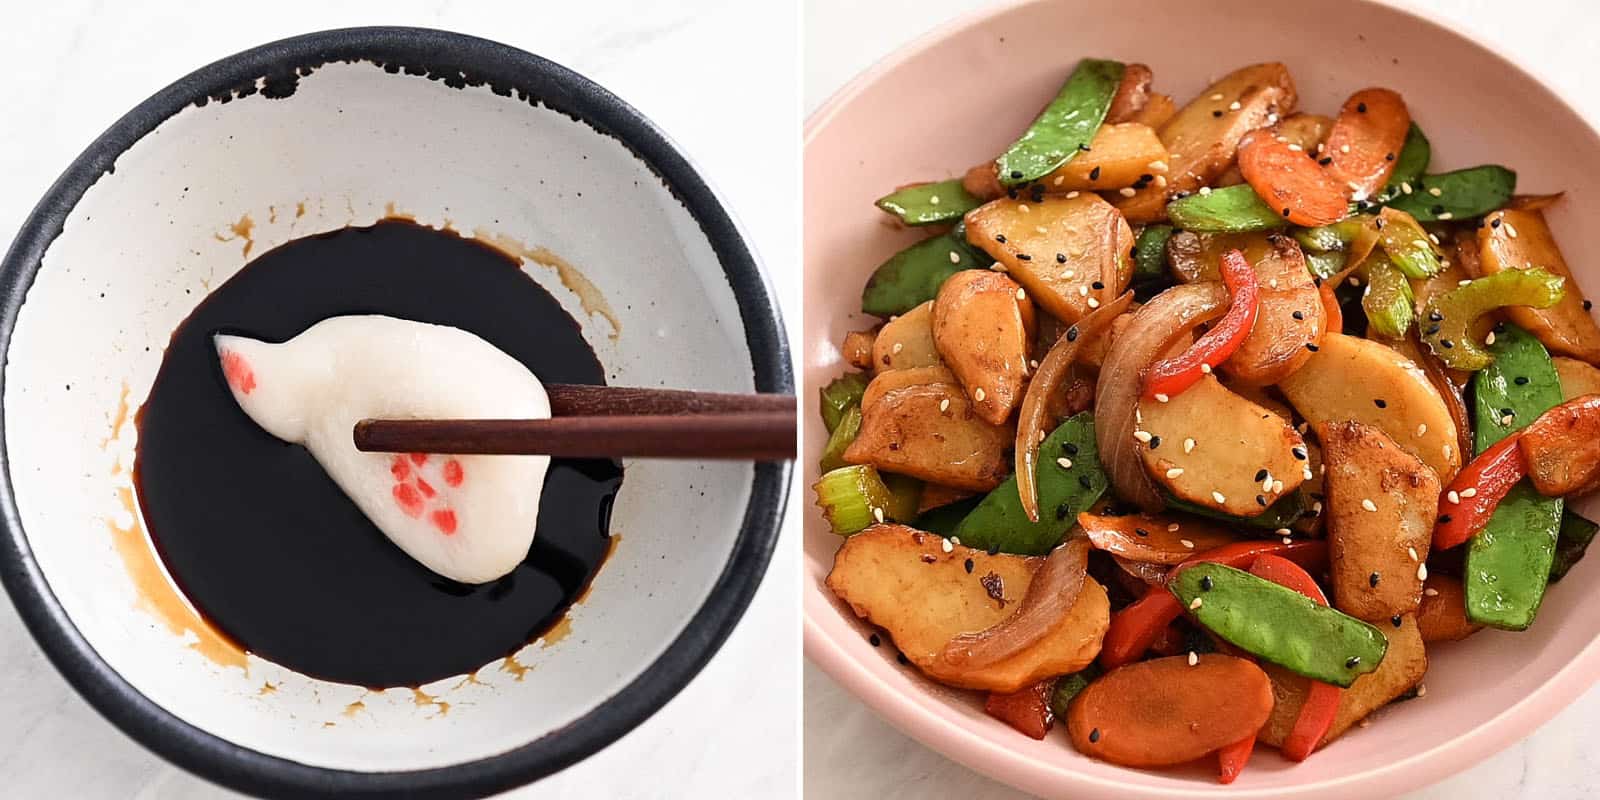
HOW TO EAT TOISAN NEW YEAR RICE CAKE
I love dipping the rice cakes in soy sauce and a bit of sugar. My brother likes to dip them in sugar alone. You can also slice rice cakes and stir fry them with vegetables and your favorite protein. Season the dish with soy sauce and oyster sauce. I usually eyeball the sauces and use enough so that the rice cakes turn brown after you toss everything together. If you plan to stir fry the rice cakes, it’s best to slice the cakes after they have chilled in the fridge overnight.
HOW LONG DO THE RICE CAKES KEEP?
Back when my family still lived in China, there was no such thing as refrigerators. Instead, Mama Lin soaked the 迎年圓 in water and left them in the kitchen for many days, making sure to change the water every day. Nowadays, she still uses this soaking method to preserve the rice cakes. I’m a little more cautious about food safety, so I generally refrigerate the rice cakes after a day.
You can refrigerate the rice cakes for about 4 to 5 days. Because of its high water content, the cakes can start molding, so freeze any that you don’t plan on eating within 5 days. You can re-steam frozen rice cakes or defrost and slice them for stir fries.

Toisan New Year Rice Cakes
Ingredients
- 26 ounces (737g) rice flour (not sweet rice or glutinous rice flour, see note 2)
- 6 ounces (170g) tapioca starch
- 6 cups (1.1L to 1.4L) water
Equipment
- large 11 to 12-inch mixing bowl (see note 3)
- 9-inch bamboo basket or bamboo steamer (see note 4 about using other pans)
- muslin, cheesecloth, or parchment paper
- large steaming rack
- large wok
Instructions
Make Dough (See video below for a detailed demo)
- Add the rice flour and tapioca starch to a bowl and whisk together.
- Boil 6 cups of water, but know that you might not need all of it. For reference, I used about 4 3/4 cups of hot water to make the dough, but my mom uses about 5 1/2 to 6 cups. The amount of water you need may vary. Make sure to boil the water over the stove instead of using an electric kettle. This ensures that the water heats thoroughly. (See note 5)
-
Once boiled, pour about 1/2 to 2/3 of the boiling water into the bowl with the flours. Do not pour the water all at once. Stir the flour and water together, so that clumps of dough start to form. There’s likely a lot of dry flour around the edges of the bowl, so add a good splash of water (not all of it) over the dry flour and mix again. If you see more loose flour, drizzle some water and mix.
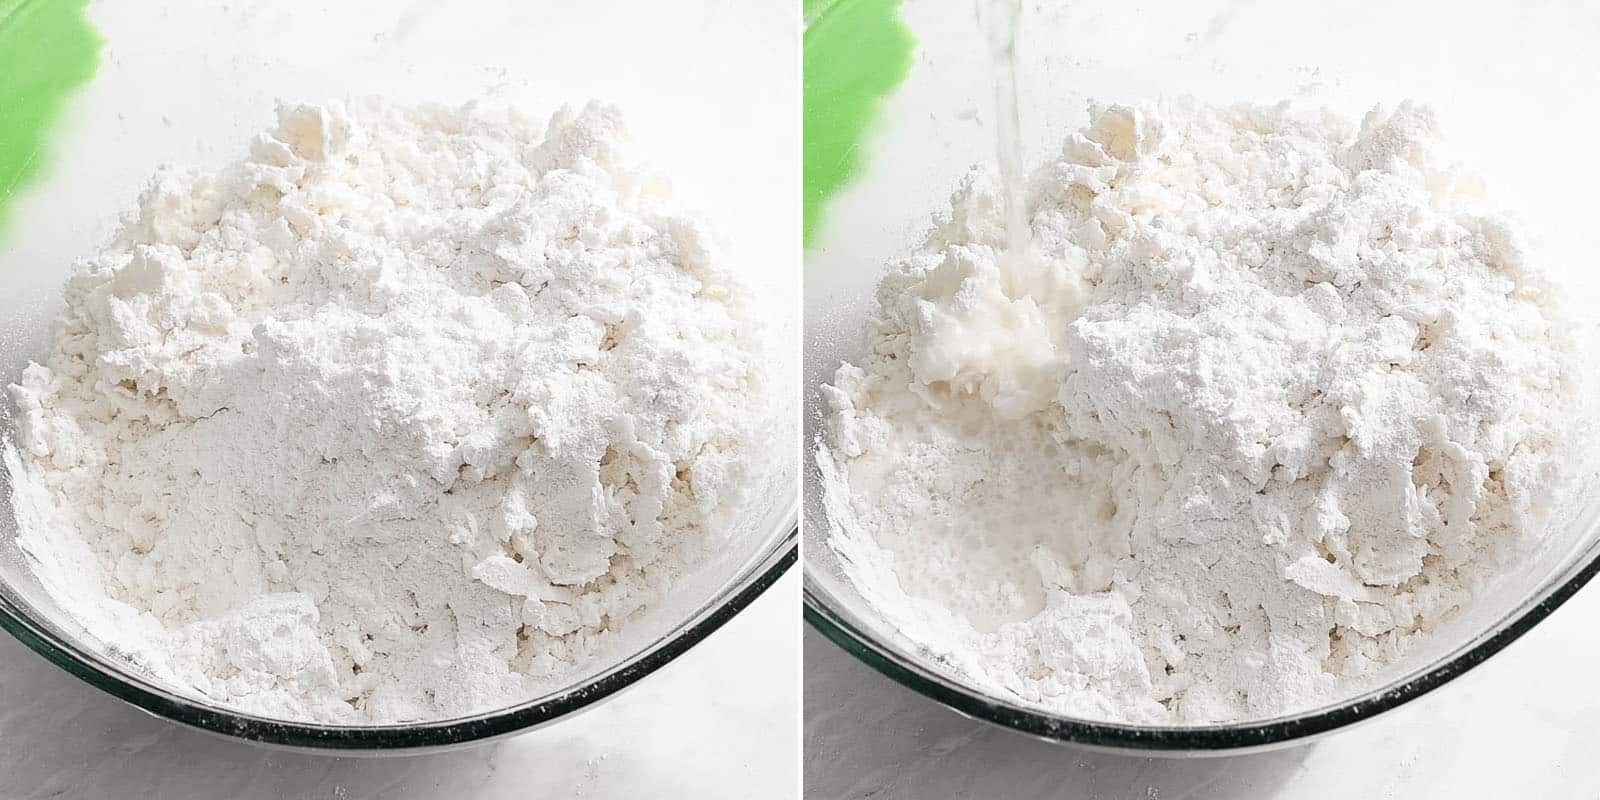
- Use a wok spatula or a wide silicone spatula to start working the dough together. The dough is still very hot at this stage, so using a spatula allows you to work the dough without touching it with your hands.
-
Continue mixing and working the dough and checking to see if there are any pockets of dry loose flour, adding more water if necessary. You can stop adding water when your dough looks like the dough in the photo below. There’s a lot of small clumps of dough and not much dry loose flour.
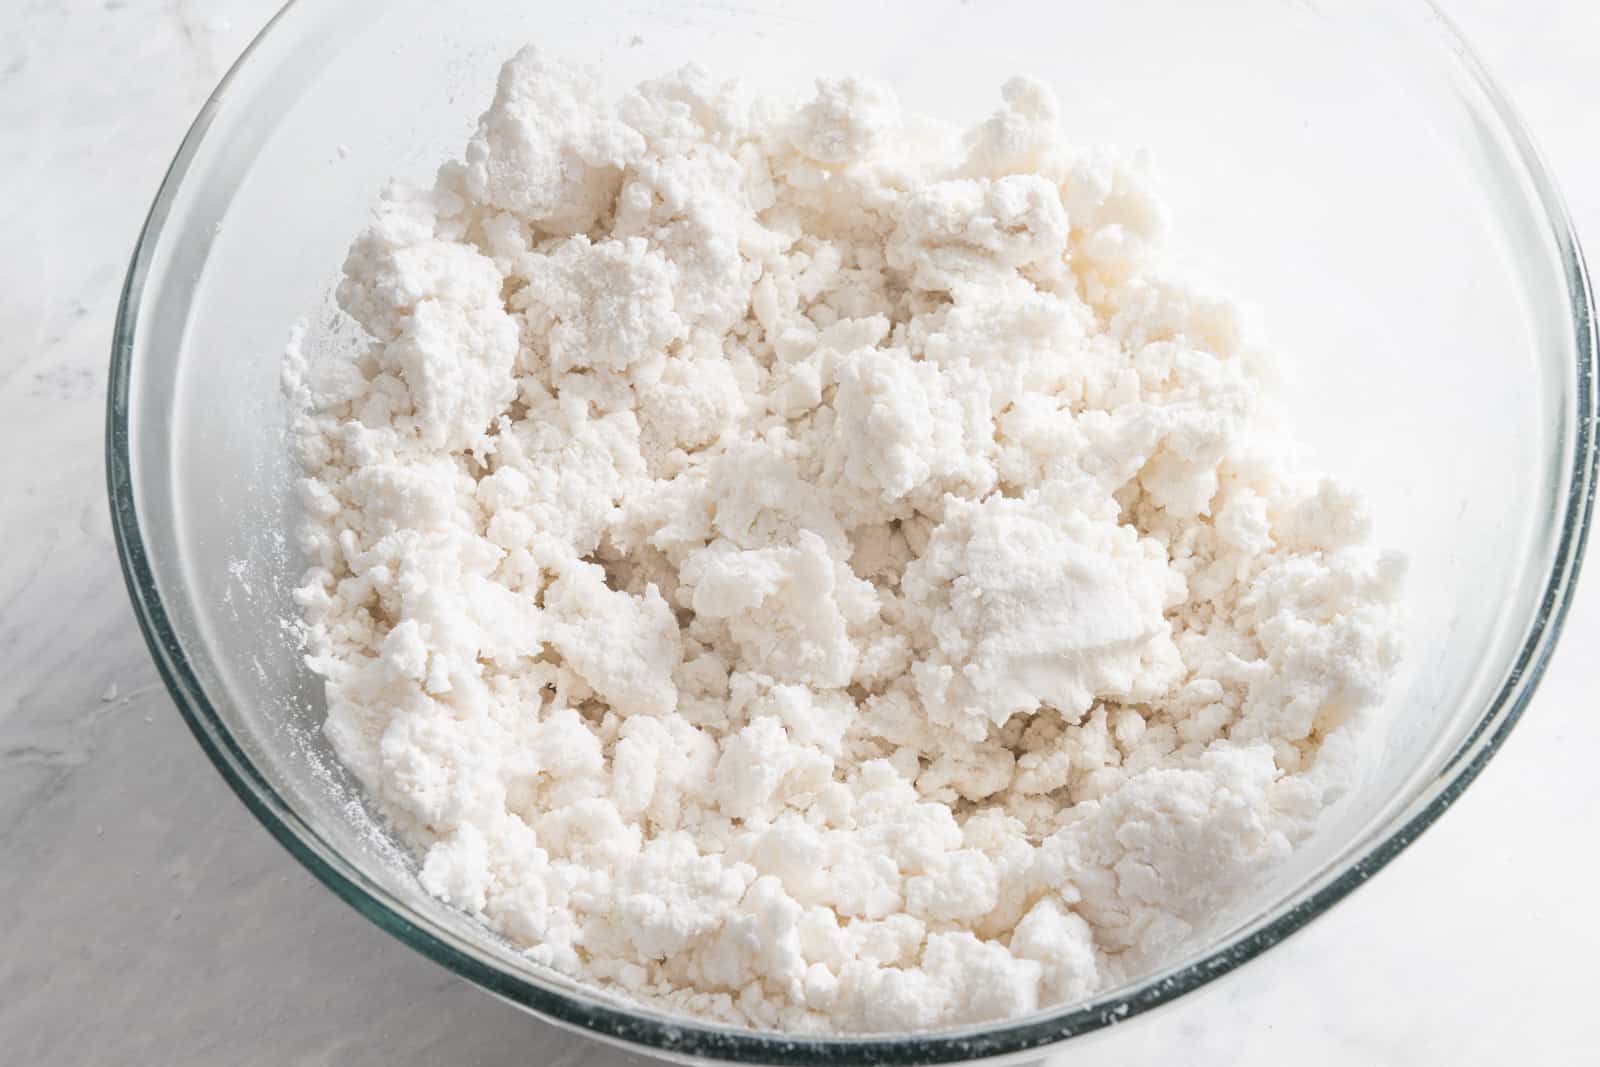
- Cover the bowl with a silicone lid or damp towel and let the dough sit for 3 to 5 minutes to cool.
- Squeeze a bit of dough to see if you can handle the warmth of the dough. If it still feels very hot, you can cover the bowl and let it rest for another 2 minutes or wear gloves to start kneading the dough.
-
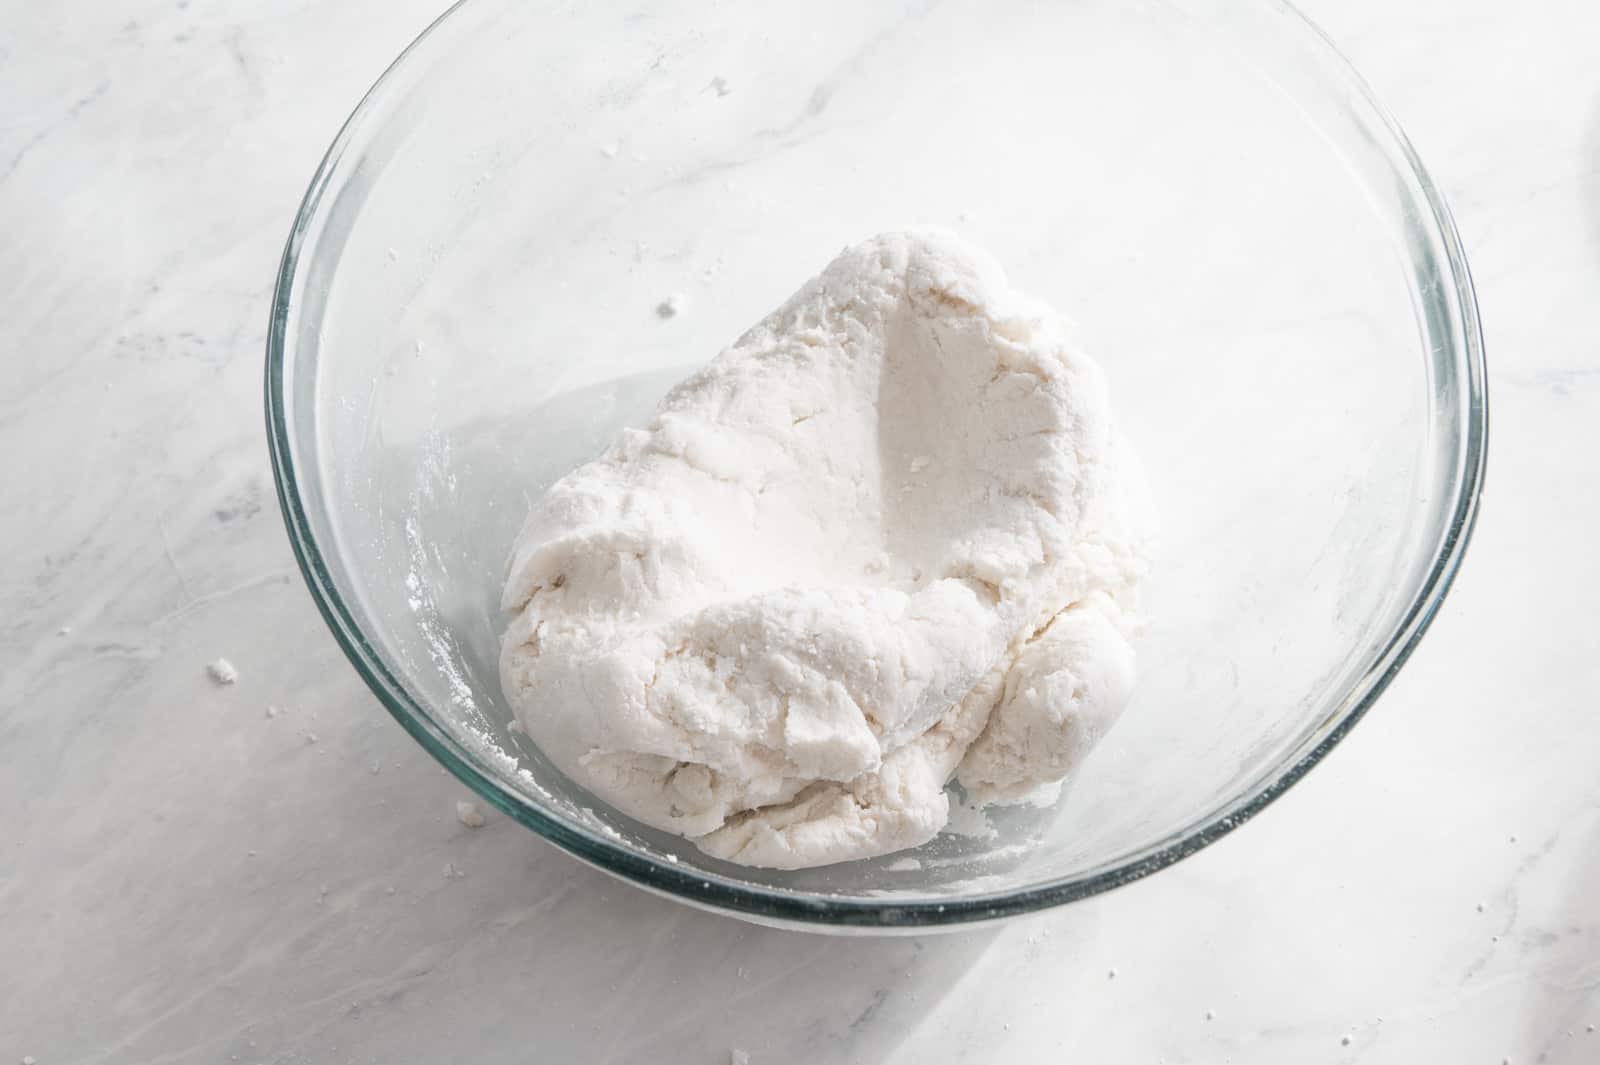
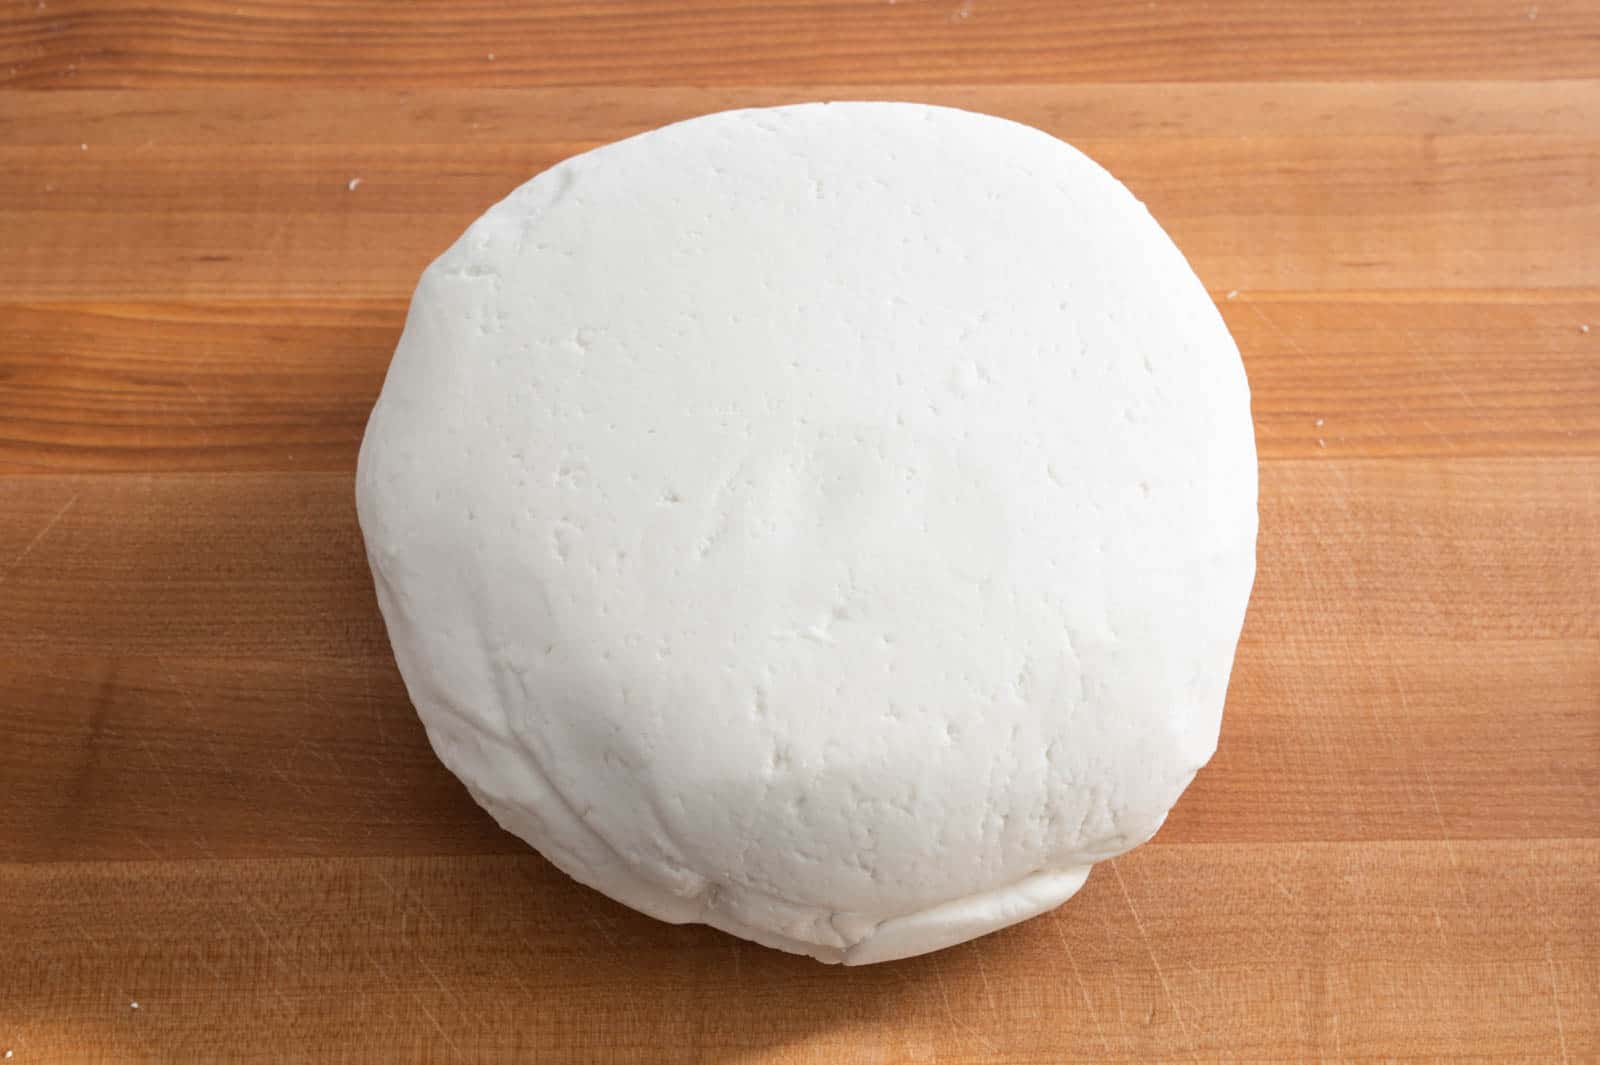
Gather and knead the dough together until you get one large mass of dough. It took me about 4 minutes to work everything together (about 2 minutes for a half batch). If after several minutes of kneading, there’s still a lot of dry crumbly dough, drizzle a bit of reserved hot water and continue kneading.
-
Wash your hands to get rid of some of the dough that’s stuck to your hands. Dust your hands with rice flour, turn the dough over a work surface, and knead until smooth. This should take another 2 minutes. The dough will be smooth and feel damp but not overly sticky. If the dough feels very sticky after all this kneading, work in some rice flour.
Prepare Steaming Basket
-
Dampen the muslin or cheesecloth with water and line the bottom of your bamboo basket with the damp cloth. If you are using a fairly large cloth, tuck in the cloth under itself so that you have no more than 1 to 2-inches of overhang. Alternatively, use parchment paper to line the bottom and sides of the basket.

Shaping the Dough
-
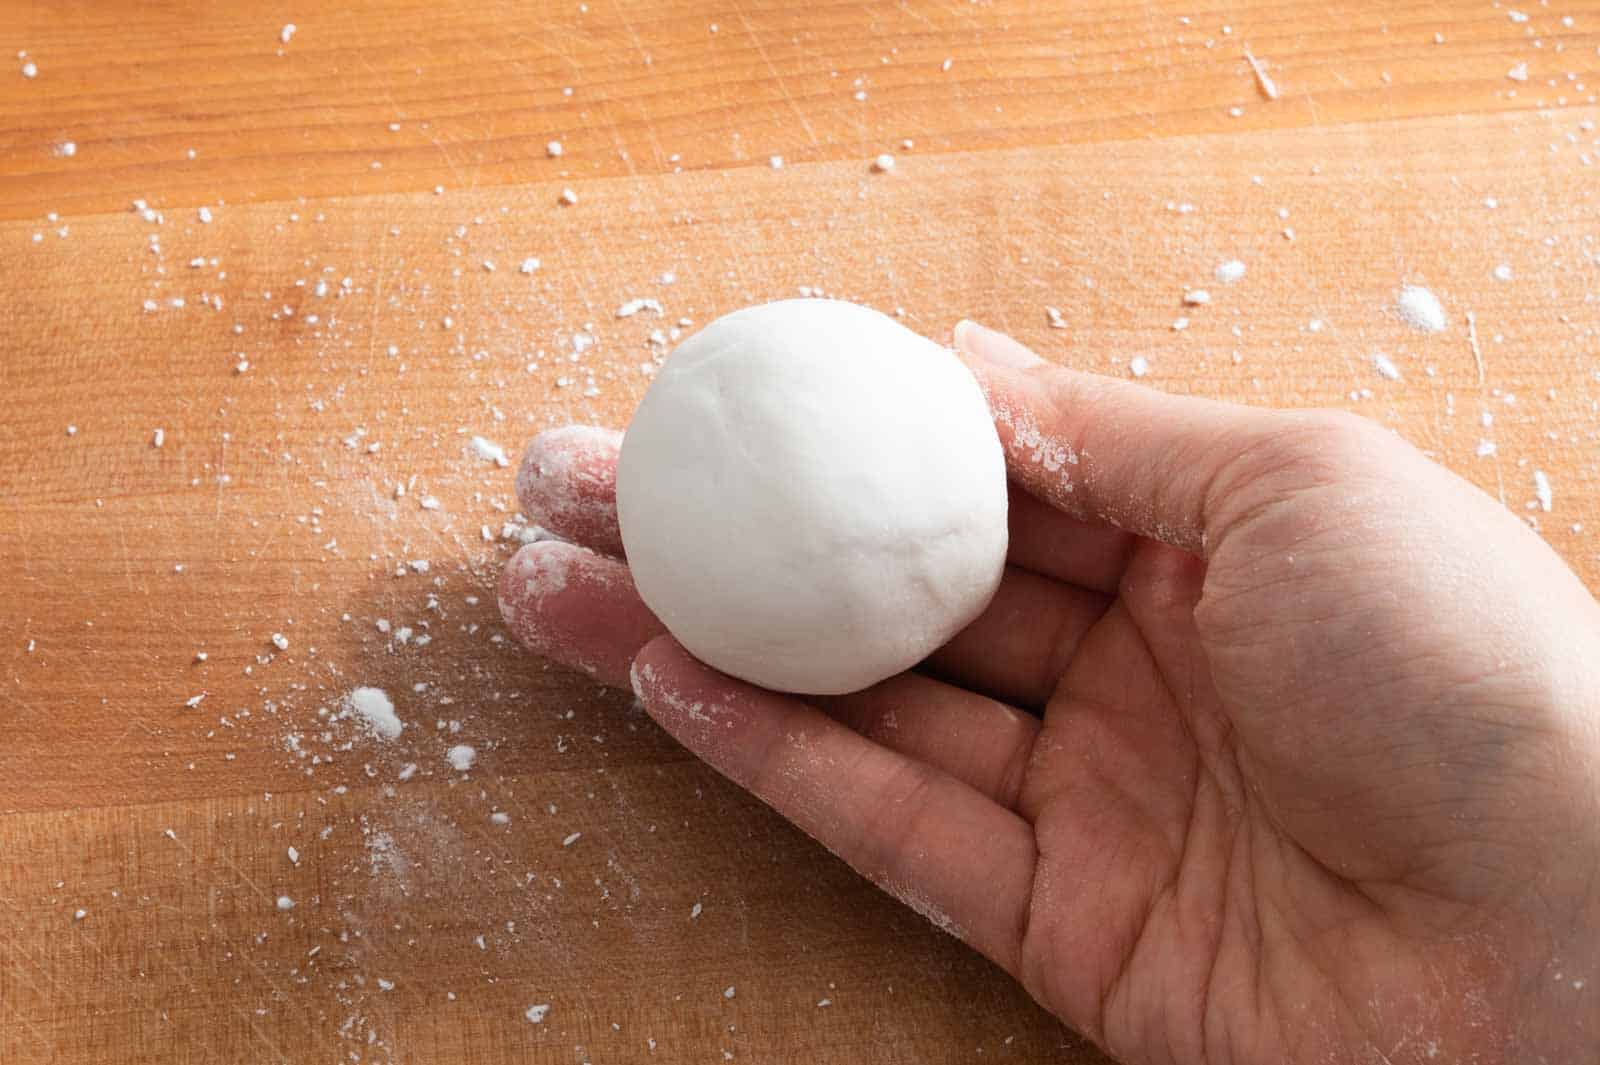
Dust your work surface and your hands with rice flour. You can shape the rice cakes a number of ways, but the most important shape is the large rice cake balls. Their circular shape symbolizes togetherness.
-
Divide the dough in half. Place one half back into the bowl and cover it with a lid or damp cloth. Take the other half and roll it out into a log about 2 inches in diameter. Divide the dough log into 2-inch wide pieces, so that each piece is about 3 to 3.5 ounces (85 to 99 grams) each. Roll each piece into round balls. Starting from the center, arrange the rice cake balls on the bamboo basket/steamer until the bottom layer is completely packed. Make sure there are no gaps between the rice cake balls. They need to touch each other to symbolize fullness and abundance.
-
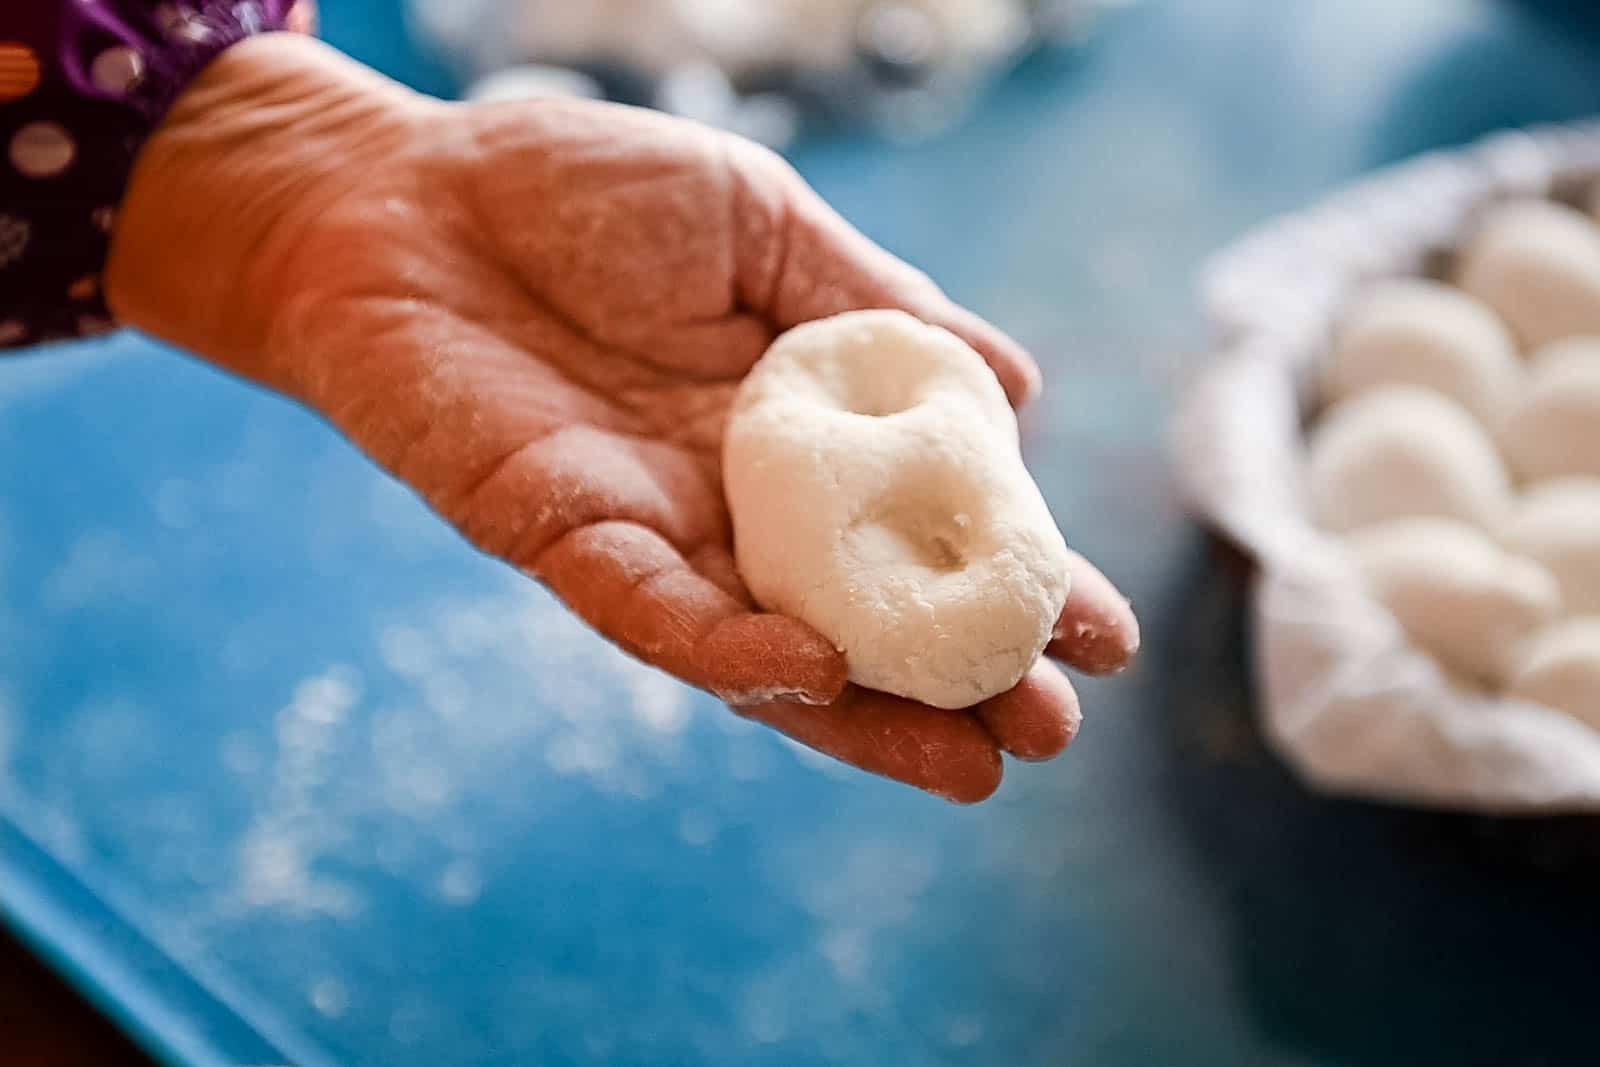
Once you reach the edge of the basket/steamer, there will be a few smaller gaps that won’t fit a large rice cake ball. You can fill those gaps with smaller balls. Alternatively, you can fill those gaps with some dough shaped as pig troughs or arrowhead root. To make a pig trough, roll out a piece of dough (about 2 ounces/56 grams) into a log shape. Then, press into the dough on both ends with your thumbs, leaving 2 imprints.
-
To make the arrowhead root, roll out a small piece of dough (about 1 to 1.5 ounces/28 to 42 grams) into a circular shape. Then, use the palms of your hands to roll out one side so that it looks like a thin shoot is growing out of the ball. Use the pig trough and/or arrowhead root to fill in the small gaps.
-
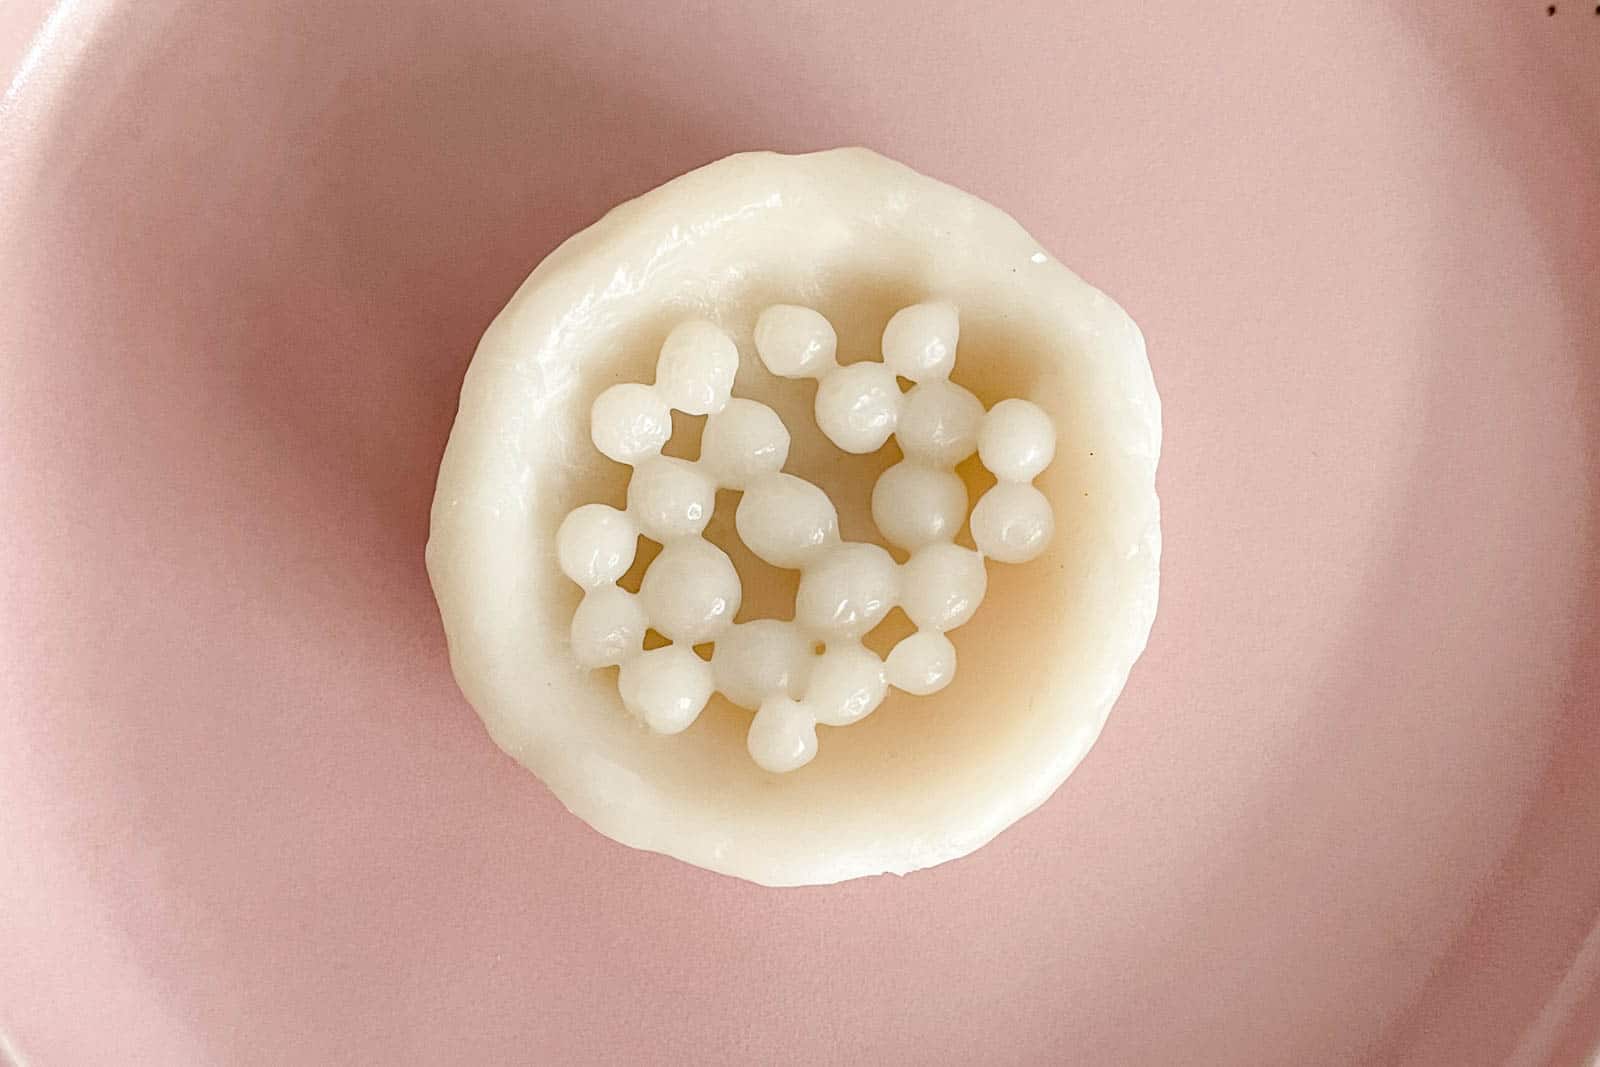
After packing the bottom layer with rice cakes, you’re ready to move on to the next layer. Bowl & bird feed: At the center of the top layer, my mom usually makes a bowl with bird feed. Rip out 1.5 to 2 ounces (43 to 56 grams) of dough and shape it into a bowl. Place it at the center. Then, roll out tiny pieces of dough into balls and place it inside the bowl. These tiny balls of dough represent the bird feed.
-
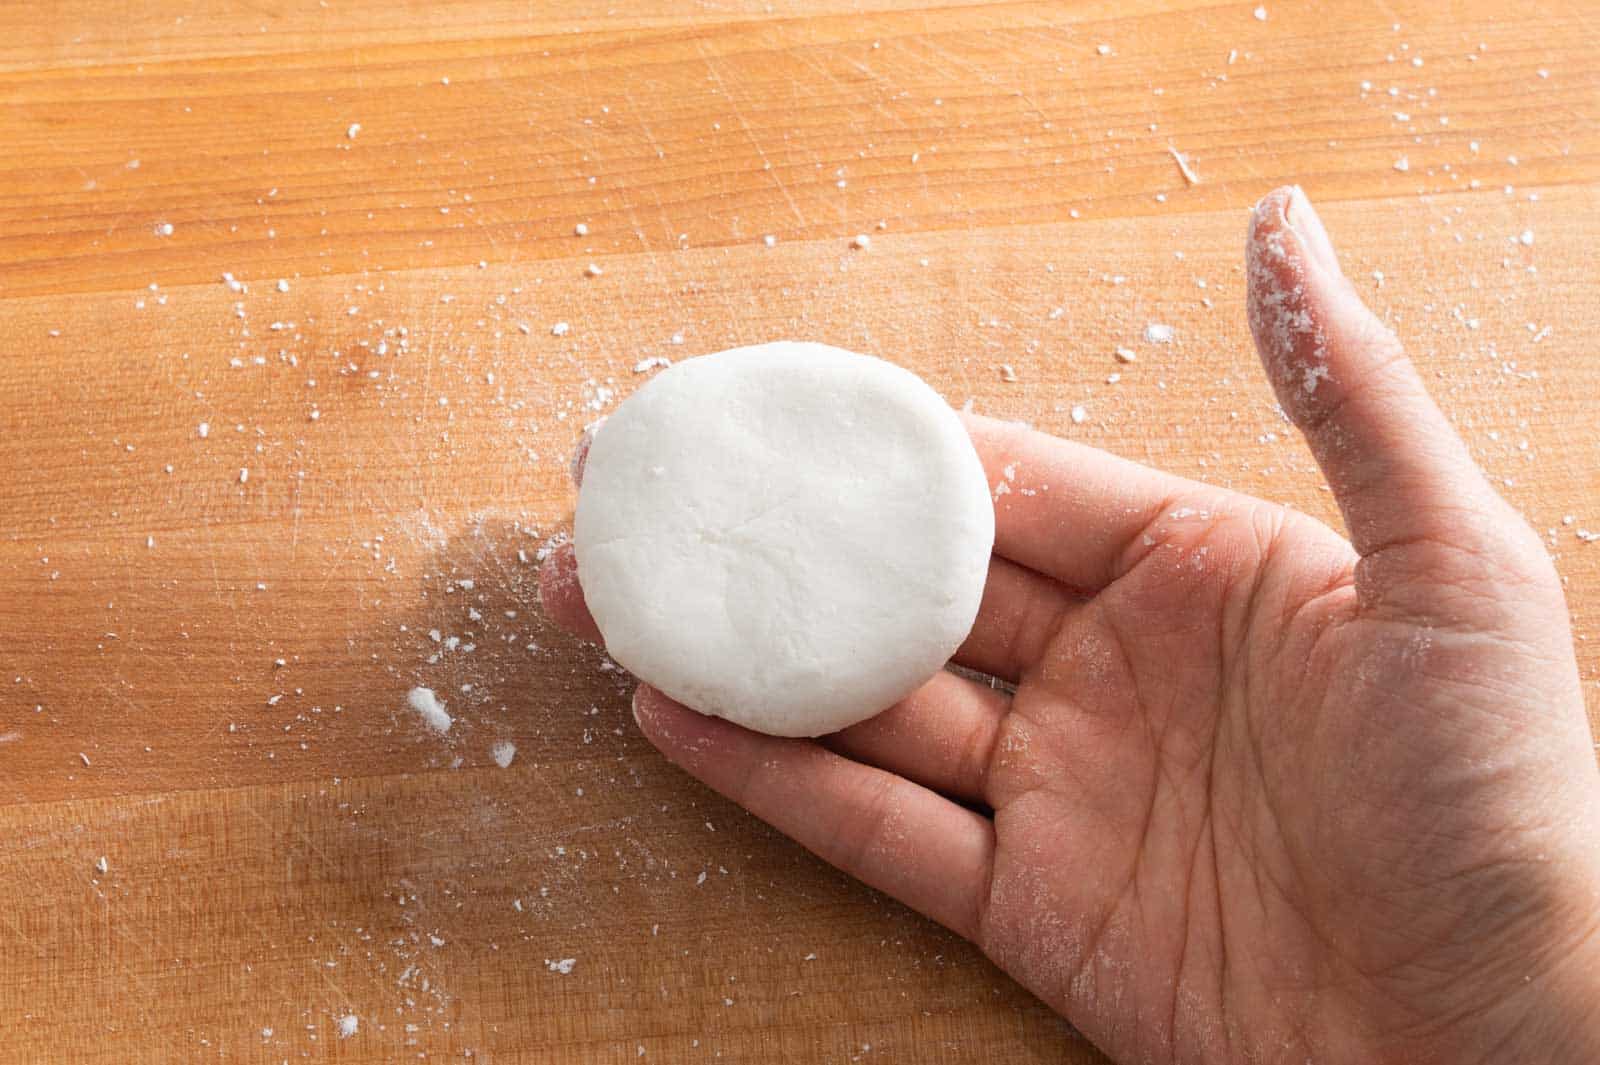
Surround the bowl of bird feed with large “coins.” Take 2 to 2.5 ounces (56 to 70 grams) of dough and roll it into a ball. Flatten the ball with the palms of your hands to make a coin about 2 inches in diameter. Arrange the coins around the bowl with bird feed.
-
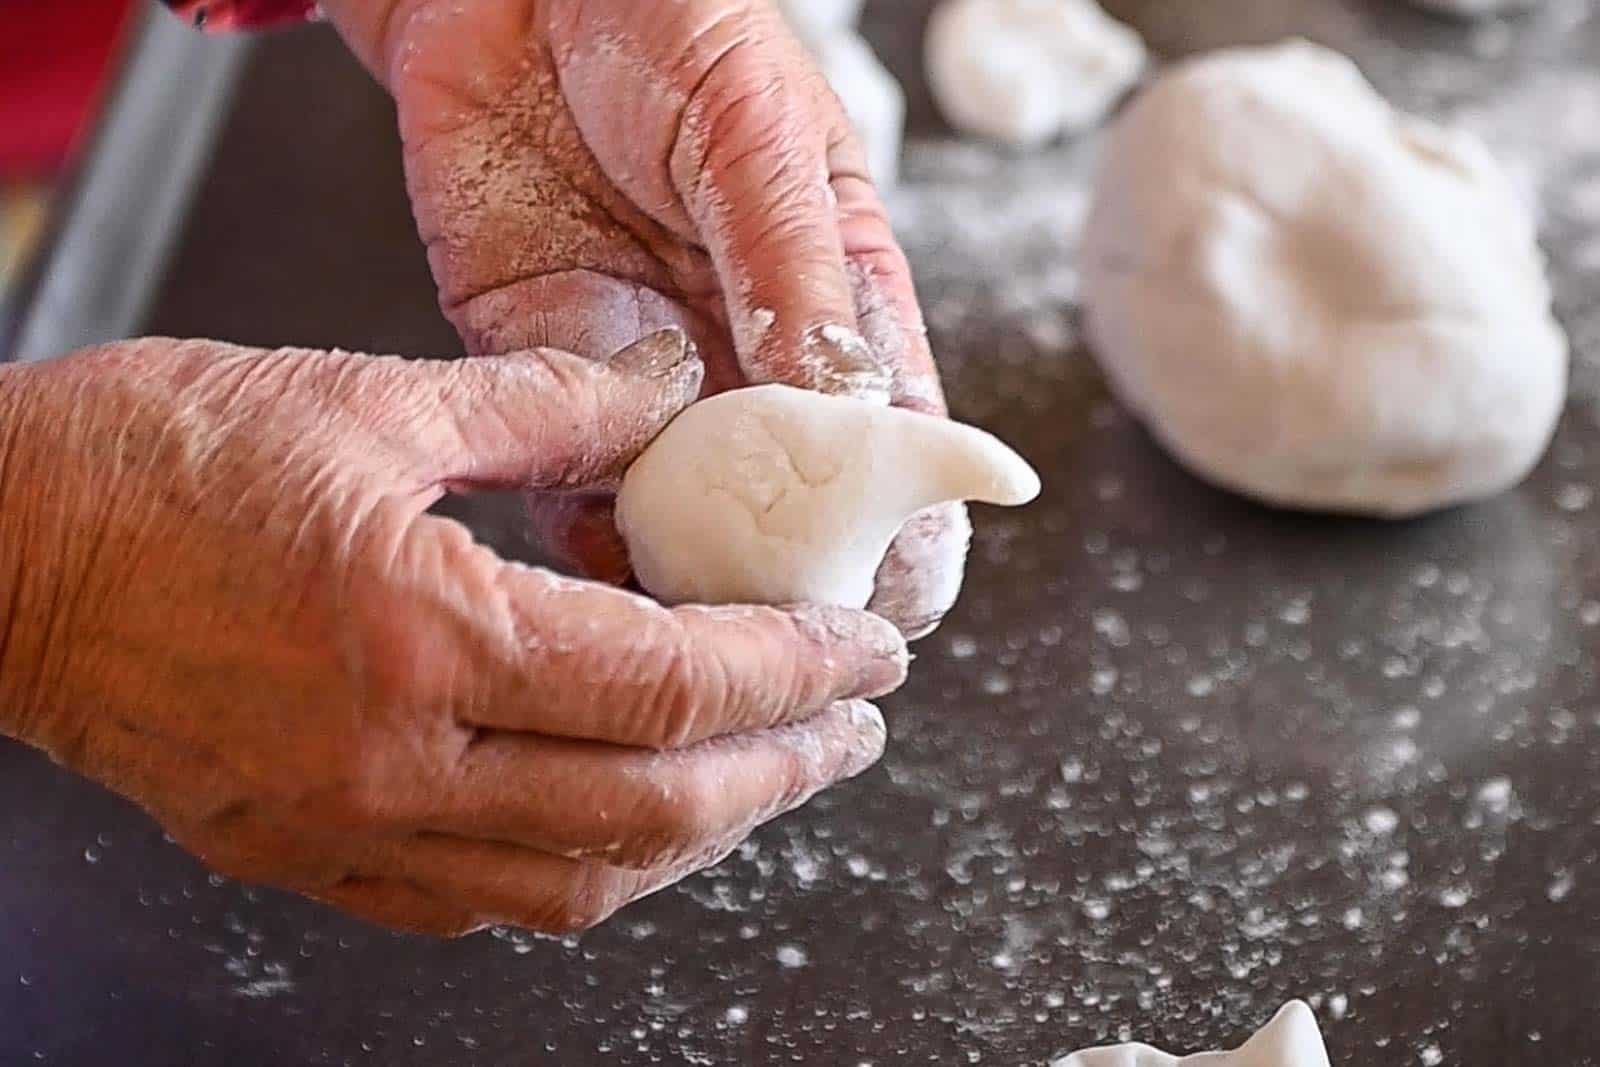
Finally, my mom usually surrounds the bird feed with geese. Take 1 to 1.5 ounces (28 to 43 grams) of dough and shape it into a log that’s about 1 inch thick. Then roll out one end so that it’s a little thinner. This thinner end will be the head.
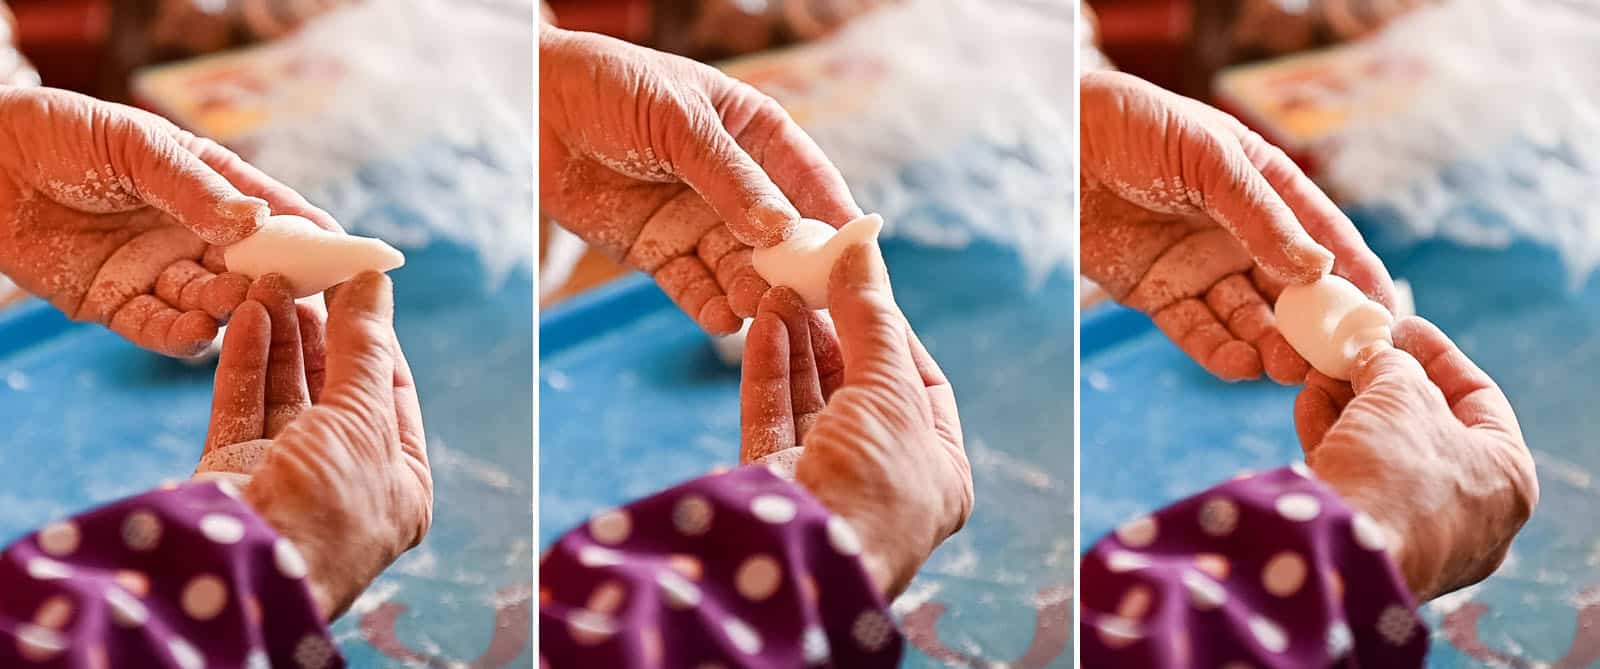
- Bend the neck up 90 degrees to shape the neck. Bend the tip of the neck down 90 degrees to create a face and beak for the geese. My mom usually makes at least 6 geese and arranges them around the bowl with bird feed, so it looks like the geese are eating from the bowl. If you have more dough, feel free to make more geese and line them around the edges.
Steam the Rice Cakes
- Place a tall steaming rack inside a large wok and fill the wok with water, until there’s about 1/2-inch gap between the water line and the top of the rack. Bring the water to boil. Carefully place the basket of rice cakes over the rack, cover the wok, and steam on medium-high for 45 to 50 minutes. Make sure to replenish the water inside the wok every 20 to 25 minutes, as the water inside the wok will evaporate.
-
If you are using a bamboo steaming basket, you can place the basket directly inside the wok, without a steaming rack. Fill the wok with water until the bottom 1/2 inch of the bamboo basket is submerged in water. With this steaming method, you must be more diligent about replenishing water during the steaming process. The bottom of the bamboo steamer can burn easily if there’s not enough water. Check the wok every 15 to 20 minutes to make sure there’s plenty of water around the bottom of the basket.
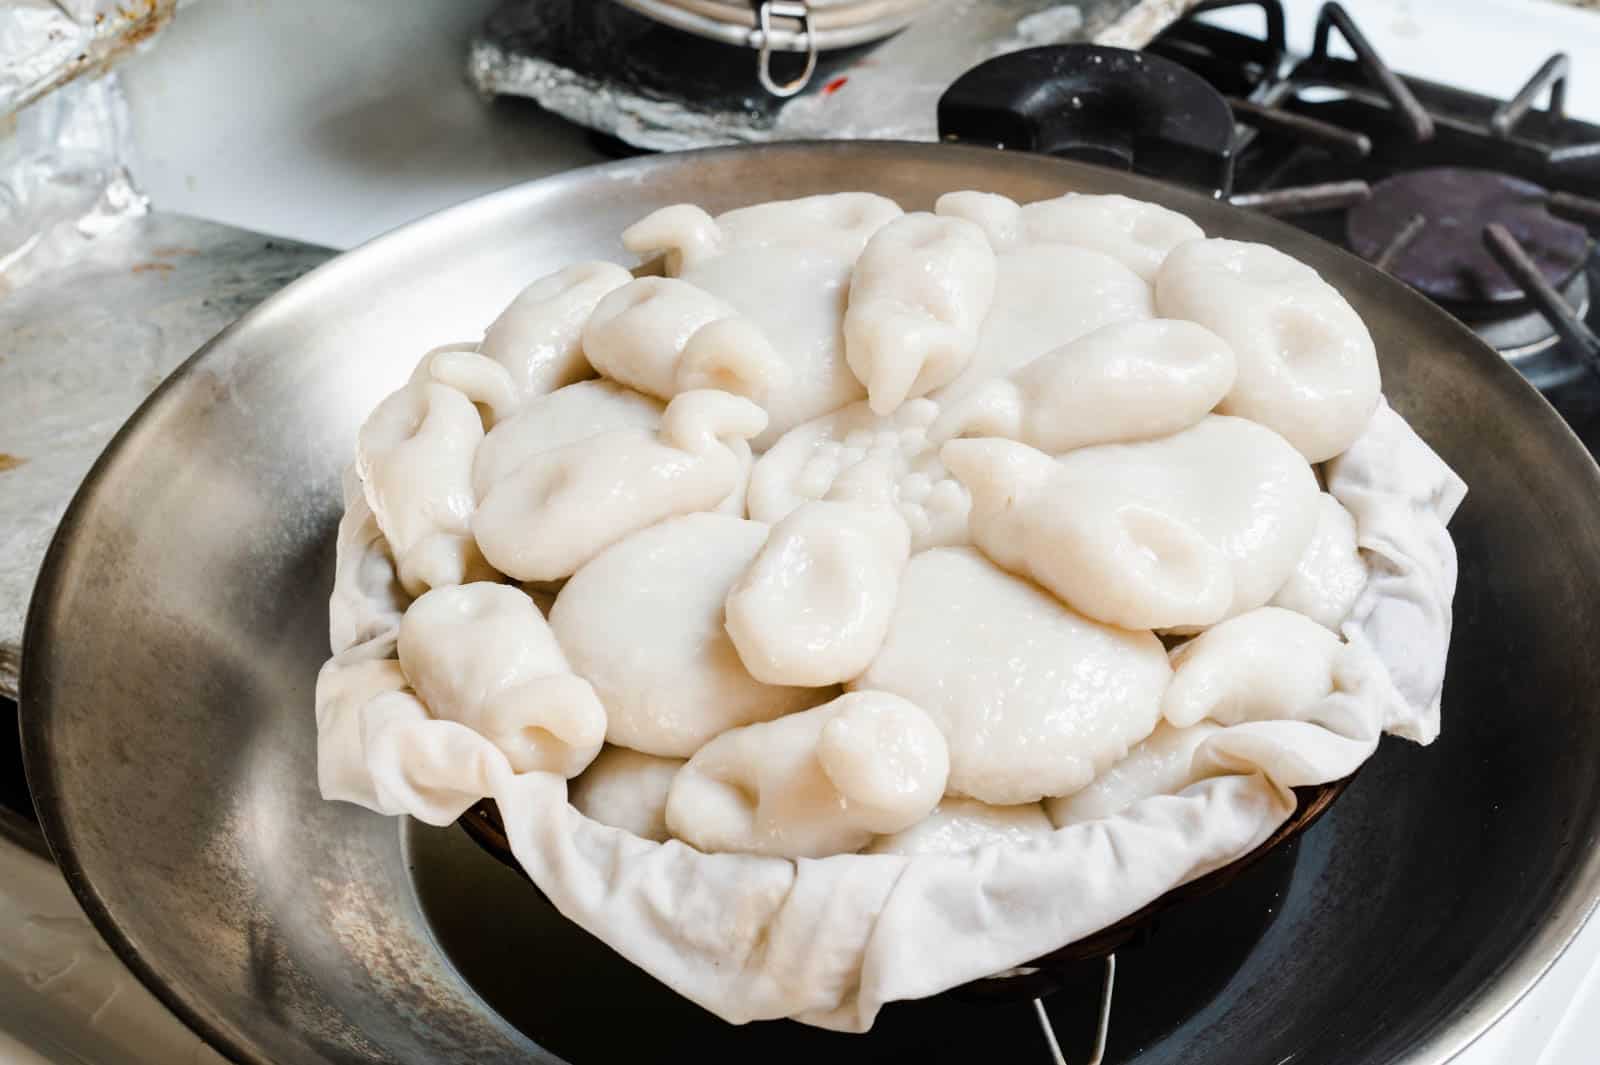
- Once the rice cakes are fully cooked, turn off the heat and let the cakes cool in the wok for 10 minutes. Then, use oven mitts or towels to carefully remove the rice cakes from the wok. Let the rice cakes cool for another 5 to 10 minutes. Place a large plate or cooling rack over the rice cakes and flip everything over. Peel off the cloth or parchment paper. Then, place another plate or cooling rack over the rice cakes again and flip everything over so the rice cakes are the right side up. If you use a cloth, make sure to remove it while the cakes are still hot so that the cloth comes off easily.
-
My mom likes to decorate her rice cakes with a bit of diluted red food coloring, but that’s optional.
Serving Rice Cakes
- You can dip warm rice cakes in soy sauce mixed with a little sugar. You can also slice the rice cakes and stir fry them with vegetables and your favorite protein. Season everything with soy sauce and oyster sauce. I usually eyeball the sauces and use enough so that the rice cakes turn brown after I toss everything together. If you plan to stir fry the rice cakes, it’s best to slice the cakes after they have chilled in the fridge overnight.
Storing Rice Cakes
-
Once the cakes have cooled completely, you can leave them out at room temperature for a day (covered with a domed lid, plastic wrap or beeswax). The next day, refrigerate them. They will keep in the fridge for 4 to 5 days. Because of its high water content, the cakes can start molding in the fridge, so freeze any that you don’t plan on eating within 5 days. When you’re ready to eat the frozen rice cakes, simply defrost and warm up the cakes or slice them up for stir fries.

Video
Notes
- Halving the Recipe: For reference, I used about 2 1/3 cups of water for a half batch, but note that you may use slightly more or less water.
- Volume Measurements for Flours (measured with spoon-and-sweep method): rice flour: 6 cups + 2 tablespoons; tapioca starch: 1 1/4 cups + 3 tablespoons.
- Mixing Bowls: I recommend using a 11 to 12-inch bowl if you are making a full batch. That way, you can easily see where there are dry pockets of flour that need hydration. You can split everything into 2 bowls if you don’t own a large bowl. If you are making a half batch, I’d still recommend using a large bowl, about 10 inches wide.
- Using Other Pans: You can also use a 9-inch springform pan. Line the bottom and sides of the pan with a damp cloth or parchment paper. Unlike bamboo baskets or steamers, springform pans are not ventilated at the bottom. As a result, a lot of water will collect at the bottom of the pan during the steaming process. Once the rice cakes are fully cooked, let the rice cakes cool for about 15 to 20 minutes. Then, carefully drain the water out of the pans. The cakes will still be very hot, so use oven mitts while doing this.
- Boiling Water on Stovetop vs Electric Kettle: In this recipe, hot water is key to forming the dough. As my mom explains it, you need boiling hot water to “cook” the flour and turn it into a solid mass. Because electric kettles turn off right when the temperature gauge detects that the water has reached boiling point, I often find that the water hasn’t been heated thoroughly enough before the kettle shuts down. However, boiling water over the stove is a more surefire way to heat the water thoroughly.
Nutrition
The post Toisan New Year Rice Cakes (迎年圓) appeared first on Healthy Nibbles by Lisa Lin.

